Table of contents:
- Author Sierra Becker becker@designhomebox.com.
- Public 2024-02-26 03:46.
- Last modified 2025-01-22 22:09.
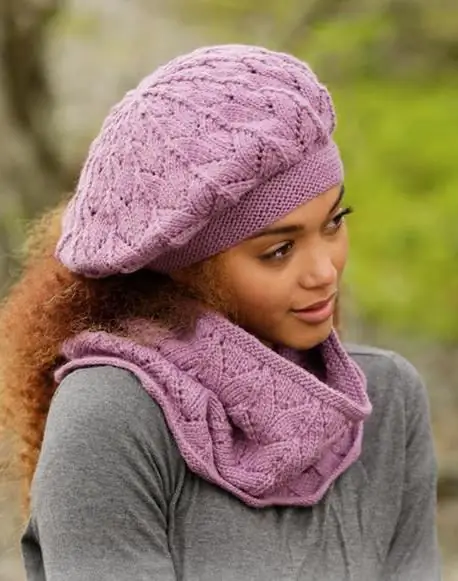
Beret is the most popular headwear. From the Middle Ages to the present, it has been part of the military uniform. In Spain, the beret is considered the national headdress of the Basques.

Today, the beret is also a favorite headwear for representatives of creative professions, as well as a fashion accessory for connoisseurs of style. The beret goes well with any outfit - with jeans and with a dress. It is universal for any season - it looks natural both in winter and in summer.
Knitting berets
This hat is easy to make with your own hands. An interesting topic is knitted berets. There are various ways of knitting. You can create separate wedges and then sew them together, you can knit on several knitting needles in a circle, you can make berets with knitting needles on a fishing line. Consider the options for knitting on two knitting needles on a fishing line.
Berets knitted top down
Cast on 5-7 sts. First row - repeat 1 yarn over, knit 1. The second row and all even ones - the loops are simply knitted according to the pattern. The third row is the same as the first. Fourth row - divide all loops into 6 wedges, separating with a red thread. We start expanding the wedges. We make a crochet on both sides of the red thread infront rows 3 times, then in every third front row 6 times. When the bottom becomes the desired diameter, we begin to reduce the loops. In the front row, we evenly reduce the loops to an amount equal to the girth of the head. Then it is knitted with an elastic band about 5 cm.

Berets knitted bottom up
This is the most convenient way to knit a hat. Usually this is how hats are knitted. It is easier to knit berets in this way, since you can try on an unfinished product and correct all the shortcomings. In order not to be mistaken in size, it is necessary to knit a pattern of knitting density, 5-7 cm in length. Calculate how many loops fit per 1 cm. Having measured the volume of the head, subtract 2 cm for stretching, multiply by the number of knitting density. We collect the resulting number of loops on the knitting needles and knit the side of the beret. The optimal pattern is a 1x1 elastic band. But other options are also possible - a wide elastic band, garter stitch. The height of the side is at least 3 cm.

Now start adding loops. Determine the desired circumference of the beret in cm, count the number of loops. From this value we subtract the number of loops already cast on the knitting needles. The result means that this is how many loops you need to evenly add when knitting. This can be done with a crochet or knit a loop a second time behind another wall without removing it from the knitting needle. If you are going to continue to knit with an English rubber band, you will not need to add loops. We knit the height of the beret with the selected pattern (10-12 cm). Then we begin the descent for the bottom of the beret. We cut the loops first through 20 loops,knitting together every 20 and 21 loops. We knit the purl row without cuts. In the next front row, the loop, obtained earlier from 2 loops, is knitted together with the next one. We knit in this way until there are so many loops left so that they can be pulled together with a thread threaded through them. Pull the thread tight and tie. We sew the product at the back. Knitted berets are traditionally decorated with a tassel or pompom on top.
Recommended:
Pullover for a boy - a few recommendations for knitting

Knitting is a rewarding activity. With the help of threads and knitting needles, as well as diligence, you can create beautiful unique things for all family members - both large and small. For example, a pullover for a boy will become a useful and elegant thing if his mother or grandmother knits it. How to knit a pullover for a boy so that it is comfortable and practical and brings joy to the child? Hints and tips to help you get started
How to make an old film effect in a few seconds?

Recently, the popularity of photo processing in the style of the 80-90s has increased. Not so long ago, in order to do this, you would need special equipment or a professional expensive editor. Many are wondering how to make the effect of an old film quickly and without additional equipment. We present the top best programs for vintage photo and video editing on different devices
Patterns for knitting berets with diagrams and descriptions. How to knit beret with knitting needles

The beret is the perfect accessory to keep your head warm during bad weather, hide your hair if it's not styled well, or just add something special to your look
Fashion berets for women: review, models, diagrams with descriptions and recommendations

Berets for women are usually knitted from soft wool, such as merino. Sheep wool mixed with acrylic, cotton or nylon is also suitable. It is important here to use a thread that does not prick. Otherwise, the beret will cause discomfort and irritation of the skin in the area of the forehead and back of the head
A few simple tips on how to properly hang a birdhouse

This article will talk about how to properly hang a birdhouse, what are the nuances of preparing a birdhouse, how to place it correctly and how to fix it on a tree
