Inhaltsverzeichnis:
- Strenge Klassik: weiche Linien mit Holzrahmen
- Eine interessante Do-it-yourself-Ergänzung. Was ist ein Passepartout?
- Im Rahmen der Ökologie. Linsen Wanddekoration
- Wunder mit deinen eigenen Händen! Eingerahmtes Stickmuster
- Japanisches Origami - Fingerfertigkeit und kein Kleber
- Einheit mit der Natur: ein Rahmen aus anmutigen Zweigen
- Stylisches Altpapier? Mit Zeitungsausschnitten dekorieren
- Quilling ist die Kunst der Dekoration. Stickerei in neumodischer Bordüre
- Billig und gut gelaunt: Plane und Wäscheklammern
- Autor Sierra Becker [email protected].
- Public 2024-02-26 04:44.
- Zuletzt bearbeitet 2025-01-22 22:11.
Du musst nicht viel Geld ausgeben, um deinem Arbeitsplatz einen gemütlichen Charme zu verleihen. Das richtige Design der Stickerei trägt dazu bei, dass sich schöne Bilder harmonisch in das gesamte Interieur einfügen und zu einem integralen Bestandteil der Raumgest altung werden.
Strenge Klassik: weiche Linien mit Holzrahmen
Elegante Einfachheit und klare Linien sind eine großartige Option für Menschen, die sich nicht mit Stickdesign beschäftigen möchten. Die Geschäfte bieten eine Vielzahl von Reihen fertiger Rahmen an, was die Arbeit für Näherinnen erheblich vereinfacht.
Bevor Sie mit der Arbeit beginnen, müssen Sie sich ein Minimum an Werkzeugen besorgen, darunter:
- Nadel, Faden;
- Nadeln, Schere;
- Sprühkleber;
- Stoff.
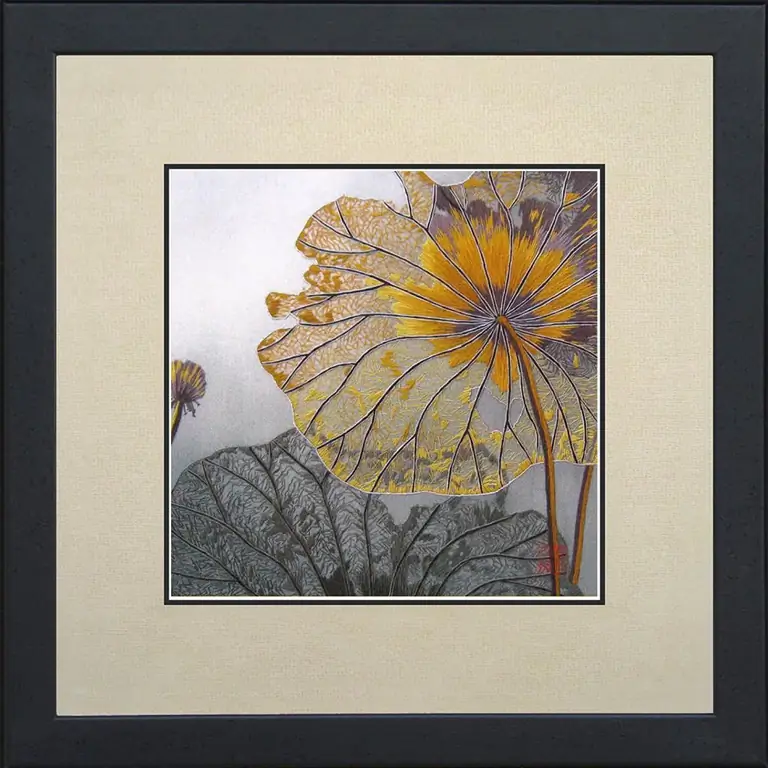
Die Größe und der Farbton des Stoffes hängen von den Parametern des ausgewählten Rahmens und den Stickfarben ab. Die Gest altung der fertigen Arbeit erfolgt in mehreren einfachen Schritten, die auch unerfahrene Meister bewältigen können:
- Bedecken Sie die linke Seite des gestickten Bildes mit einer Klebstoffschicht und drücken Sie es gegen die zuvor herausgenommene Kartonbasis des Rahmens.
- Warte 3-4 Minuten, drehe den Karton um und klebe die Ränder der Stickerei vorsichtig zusammen.
- Die Ecken sollten hochgeschlagen und mit einer Nadel gesichert werden, die Seiten der Arbeit mit Bindestichen verbinden.
- Ein Stück Stoff auf die linke Seite legen und mit einer Blindnaht an den Hauptstoff nähen.
Der letzte Punkt ist bei der Herstellung von gerahmten Stickereien nicht obligatorisch, er wird von Nadelfrauen verwendet, die es für notwendig h alten, ihre Arbeit zum Ideal zu bringen.
Eine interessante Do-it-yourself-Ergänzung. Was ist ein Passepartout?
Aus der französischen Sprache kam ein klangvolles Wort in unser Lexikon, das ein Stück Pappe mit einem Loch in der Mitte für einen Rahmen bedeutet. Passepartout verleiht der fertigen Stickerei einen stilvollen Charme, und das Design der Arbeit mit dieser Komponente hilft, den Kontrast zwischen dem Rahmen und der Komposition auf dem Stoff auszugleichen.
Benötigte Materialien:
- zwei Kartonsorten (weiß, farbig);
- Schere, Büromesser;
- Kleber, doppelseitiges Klebeband.
Arbeitsprozesse:
- Verwenden Sie weißen Karton, der der Größe der Stickerei entspricht.
- Klebe das dicke Material vorsichtig auf den Stoff.
- Beginne mit farbigem dickem Papier, messe und schneide in der Mitte ein Rechteck aus, dessen Seiten 1-2 Zentimeter kleiner sind als die Seiten deines Bildes.
- Passepartout mit doppelseitigem Klebeband auf die Stickerei kleben.
Hauptaktion abgeschlossen! Versuchen Sie für mehr Prätentiösität des Designs, ein mehrschichtiges Passepartout zu erstellen, verwenden Sie andere dekorative Elemente (Perlen,farbige Bänder, Knöpfe).
Im Rahmen der Ökologie. Linsen Wanddekoration
Kombiniere organische Elemente und selbstgemachte Stickereien, um Küchenwände appetitlich zu dekorieren. Verwenden Sie Körner in verschiedenen Farben und wählen Sie die richtige Farbpalette für den Innenraum.
Benötigte Materialien:
- Kartonrahmen;
- Linsen;
- Klebe in die Pistole.
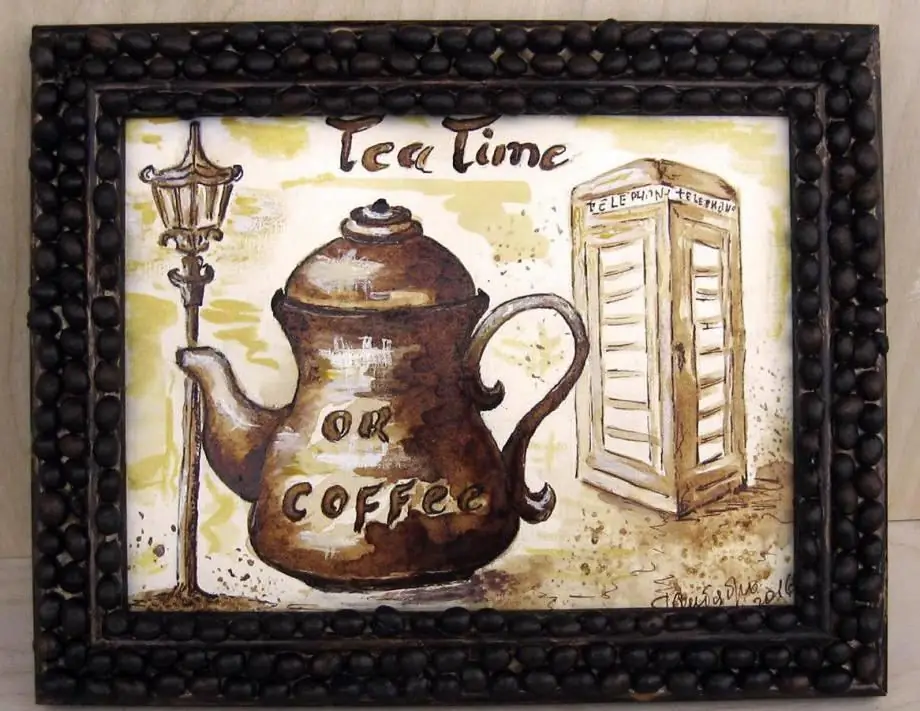
Verwende Kleber, um die Körner auf den Kartonboden des Rahmens zu kleben. Sie können die Hauptzutat durch etwas anderes ersetzen. Experimentieren Sie mit Kaffeebohnen, würzigen Gewürzen (Zimt, Nelken, Sternanis). So eine Dekoration ist nicht nur sehr schön, sondern duftet auch noch wahnsinnig lecker.
Wunder mit deinen eigenen Händen! Eingerahmtes Stickmuster
Prägnante Werke brauchen leuchtende Akzente, deren Rolle leicht von selbstgefertigten Rahmen mit Applikation übernommen werden kann. Dazu müssen Sie eine fertige Holzbasis kaufen und sich mit Inspiration eindecken. Dekorieren Sie mit der ganzen Familie und kombinieren Sie den kreativen Prozess mit einem unterh altsamen Spiel!
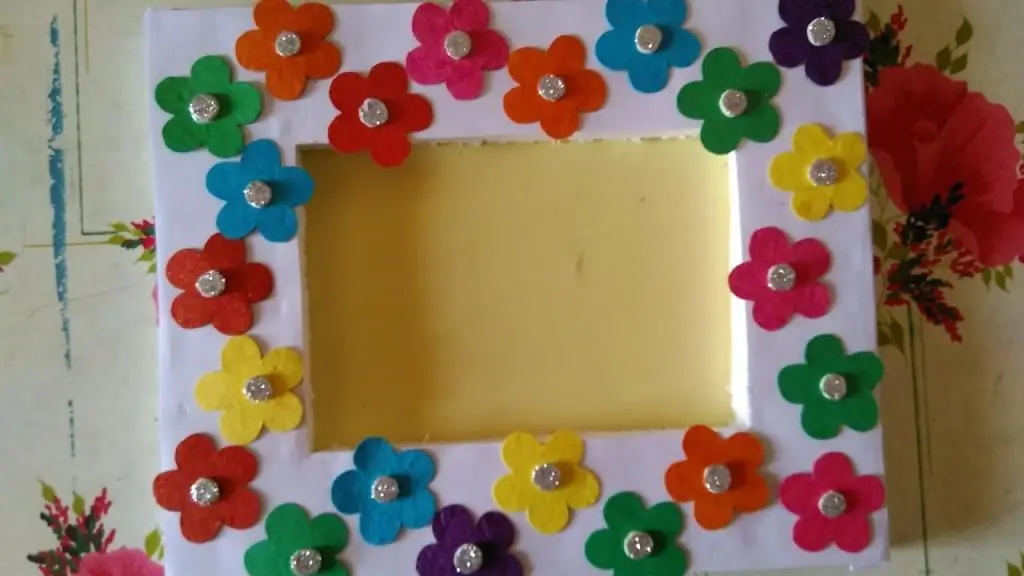
Sie können einen Standardrahmen mit verschiedenen Kleinteilen dekorieren, es ist nicht notwendig, sie im Fachhandel zu kaufen, viele Kleinigkeiten haben Sie bereits zu Hause. Zum Beispiel:
- Sch altflächen;
- Muscheln, Kieselsteine;
- Stoffstücke;
- Weinkorken;
- künstliche Blumen.
Der Rahmen kann auch mit Gouache, Wasserfarbe oder einem speziellen Spray bem alt werden. Viele Nadelfrauensie bevorzugen Acrylfarbe und verwenden als Pinsel einen feinporigen Schwamm.
Japanisches Origami - Fingerfertigkeit und kein Kleber
Handwerker aus dem Land der aufgehenden Sonne wissen viel über die Papierverwertung. Mit Hilfe mehrerer Blätter können Sie einen eleganten Rahmen schaffen, der die Schönheit der gestickten Arbeit hervorhebt und sich nahtlos in das Gesamtdesign des Raums einfügt.
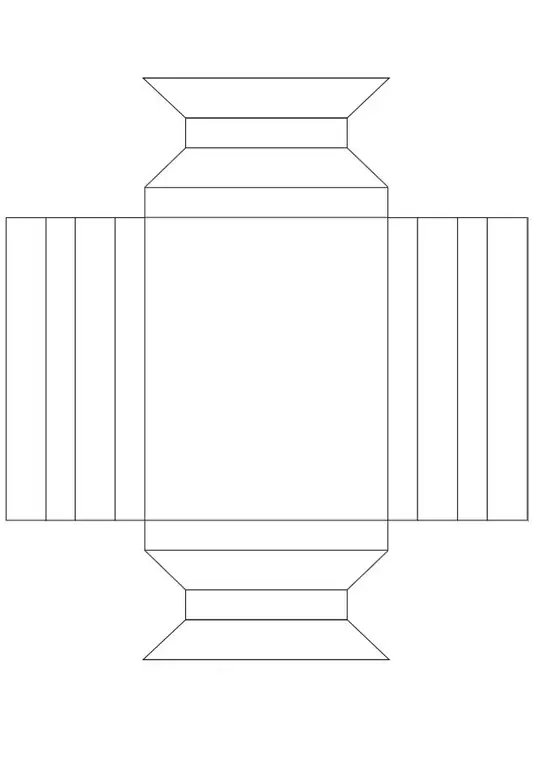
Benötigte Materialien:
- Fotorahmenvorlage;
- Karton;
- Schere;
- lineal.
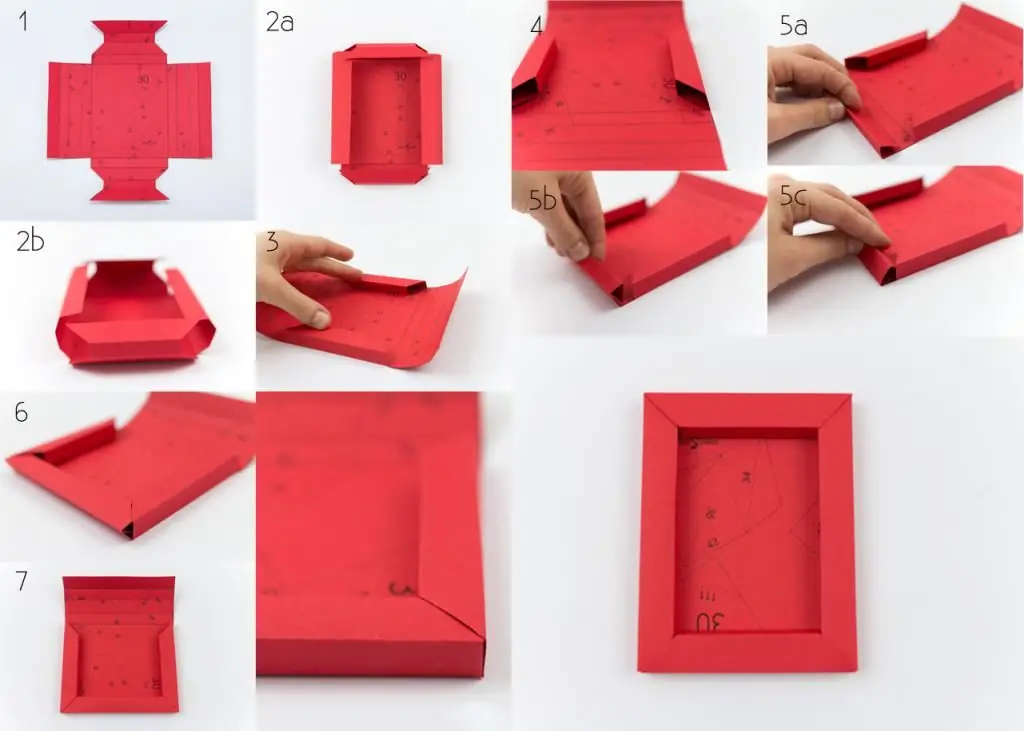
Arbeitsprozesse:
- Vorlage ausdrucken, gewünschte Form vorsichtig ausschneiden.
- Lege die DIY-Rahmenvorlage mit der bedruckten Seite nach oben vor dich.
- Benutze das Lineal, um das Origami entlang der verbleibenden Linien zu f alten.
- Beginnen Sie mit den kurzen Seiten des zukünftigen Rahmens und drehen Sie das Papier allmählich.
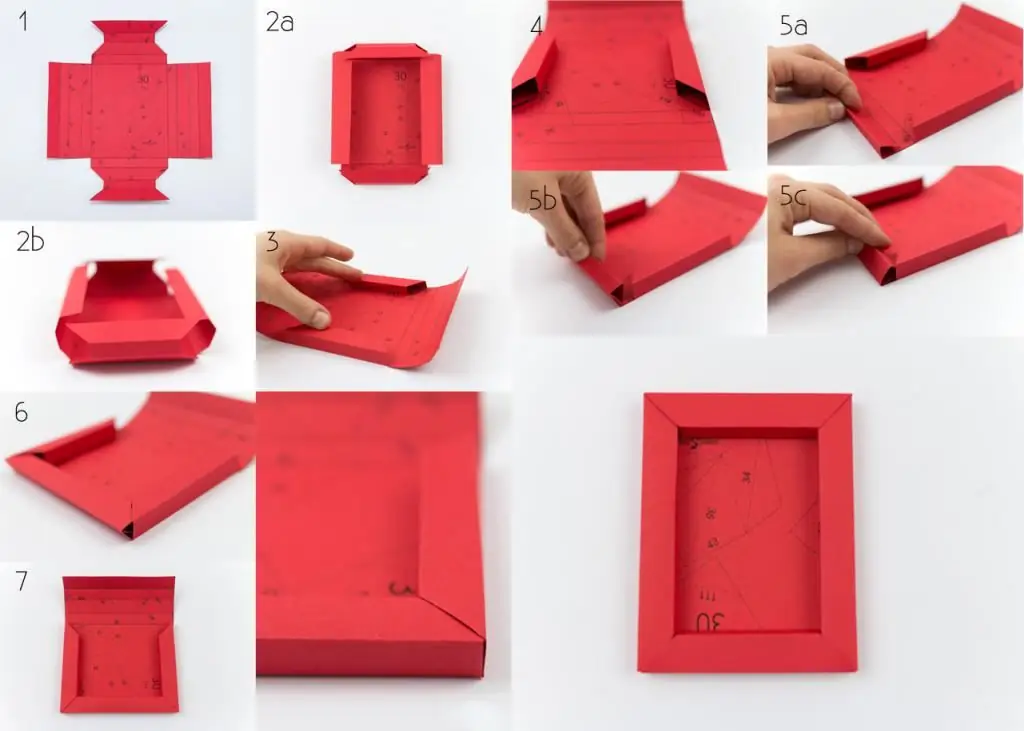
Achten Sie auf die obige Fotoanweisung, sie demonstriert genau die Prozesse der Arbeit mit Papier. Die Origami-Technik kann verwendet werden, um eine Vielzahl kleiner Details zu erstellen, die den zukünftigen Rahmen schmücken und ihm Schwung verleihen.
Einheit mit der Natur: ein Rahmen aus anmutigen Zweigen
Ein ordentlicher Astrahmen ist eine unterh altsame Möglichkeit, Ihre Kreationen der Welt zu präsentieren. Die "rustikale" Aufmachung eignet sich für die Gest altung märchenhafter Stickereien und ergänzt durch ihr Aussehen einfache Arbeiten.
Benötigte Materialien:
- Holzrahmen;
- Gartenschere;
- braunAcrylfarbe;
- Schaumpinsel;
- Heißklebepistole und Heißkleber;
- 30-50 kleine Äste;
- dekoratives künstliches Moos und Blumen.
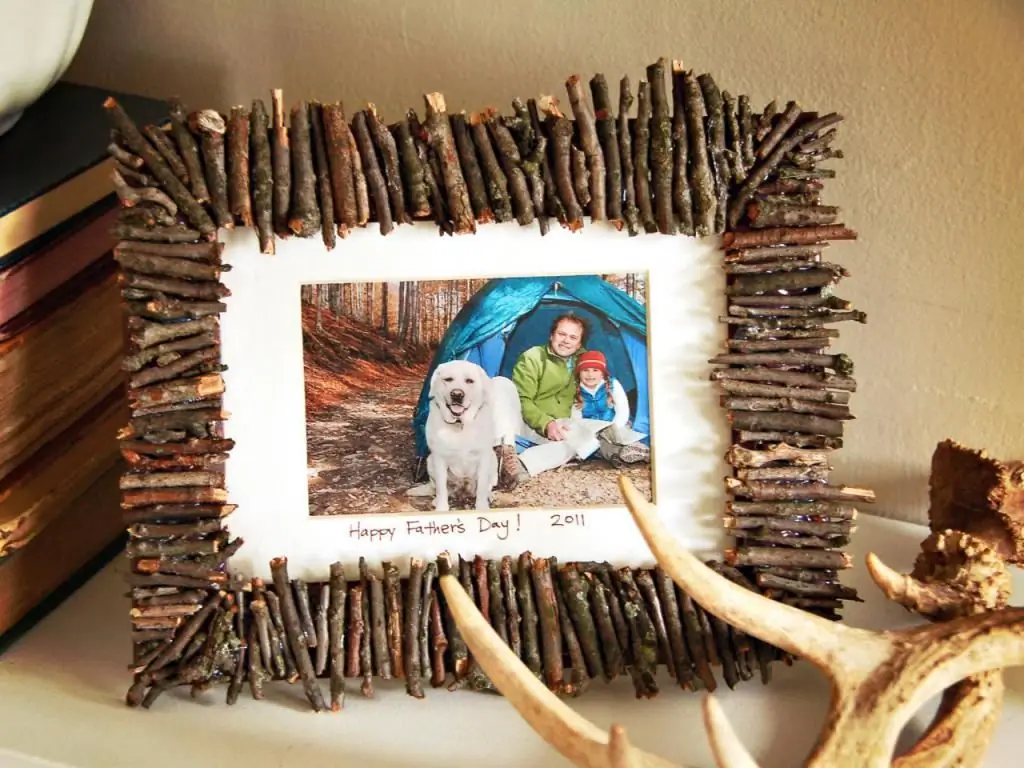
Arbeitsprozesse:
- Tragen Sie mit einem Schaumpinsel eine Schicht braune Acrylfarbe auf den Rahmen auf.
- Ein paar Stunden einwirken lassen, das Farbmaterial sollte trocknen.
- Während die Farbe trocknet, die Zweige mit der Schere 6-7 Zentimeter länger als der Rahmen abschneiden.
- Trennen Sie die geschnittenen Äste in zwei Gruppen, eine für die Breite und eine für die Länge.
- Wenn die Farbe trocken ist, nimm ein paar große Zweige und stelle sie auf die Länge und Breite des Rahmens.
- Klebe die Zweige nach und nach an die Seiten des Rahmens und trage den Heißkleber vorsichtig auf das Holz auf.
- Wenn du kein Loch für den nächsten Ast findest, ist die Arbeit erledigt.
Um die resultierende Komposition zu dekorieren, verwenden Sie dekoratives Moos und Seidenblumen. Scheuen Sie sich nicht, natürliche Zutaten zu verwenden! Echte Zweige verleihen dem Rahmen ein natürlicheres Aussehen als verarbeitete Zweige, die Sie in einem Bastelgeschäft finden können.
Stylisches Altpapier? Mit Zeitungsausschnitten dekorieren
Beeilen Sie sich nicht, die angesammelten Zeitungen und Zeitschriften wegzuwerfen! Sie dienen als zukünftige Rohstoffe für ein ungewöhnliches Stickdesign. Mit Ihren eigenen Händen können Sie jedes Bild stilvoll ergänzen, einfache Inschriften sehen besonders harmonisch aus.
Benötigte Materialien:
- Holzrahmen;
- Zeitungen, Zeitschriften;
- Schere;
- kleber.
Arbeitsprozesse:
- Versuche glänzende Seiten in symmetrische Quadrate zu schneiden.
- Rolle jede Scheibe vorsichtig zu einer festen Rolle. Wenn das nicht funktioniert, versuchen Sie, das Papier in Seifenwasser zu tauchen.
- Kleben Sie die resultierenden Magazinformen diagonal entlang der Kontur des Rahmens.
Es ist nicht notwendig, bunte Ausschnitte zu verwenden, Sie können farbiges Papier verwenden, indem Sie Schattierungen und Texturen kombinieren. Es wird auch interessant sein, einen einfarbigen Rahmen aus Papier der gleichen Farbe zu betrachten.
Quilling ist die Kunst der Dekoration. Stickerei in neumodischer Bordüre
Oft drehen wir unbewusst alle möglichen Figuren aus Streifen und geben dem geschriebenen Stummel eine bizarre Form. So taten es die Mönche im 14. Jahrhundert, indem sie Papierschnipsel um Vogelfedern wickelten. Daher der Name "Quilling". Die Essenz dieser Aktion besteht darin, aus Papierscheiben dreidimensionale und flache Figuren zu erstellen.
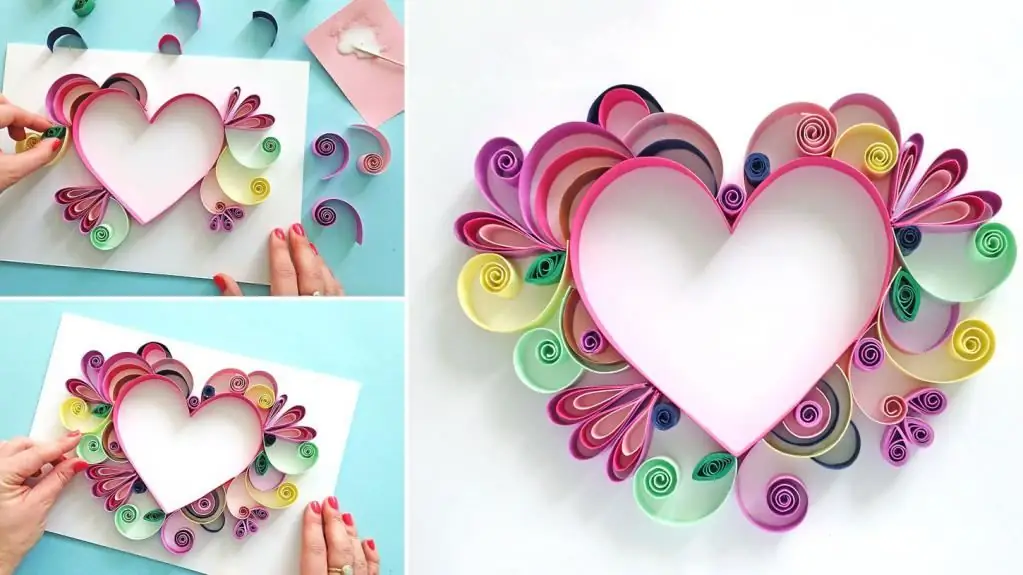
Benötigte Materialien:
- Holzrahmen;
- Papier, Papierschneider;
- Heißkleber;
- Zahnstocher.

Schneiden Sie das Papier in ordentliche Streifen unterschiedlicher Breite, formen Sie Formen aus den entstandenen "Spitzen", indem Sie sie aufrollen. Dies können einfache Spiralen oder komplexere Formen wie Dreiecke, Quadrate, Rauten sein.
Billig und gut gelaunt: Plane und Wäscheklammern
Hast du es satt, mit Rahmen herumzuspielen? Versuche FolgendesDas Design von Werken und Stickereien vor dem Hintergrund eines solchen nicht standardmäßigen Rahmens wird in neuen Farben erstrahlen. Darüber hinaus ist das Design universell, ein ordentliches Bild passt in jedes Interieur.
Benötigte Materialien:
- Mini-Leinwand;
- weiße Acrylfarbe;
- runder Schwamm zum Malen;
- zwei Mini-Wäscheklammern;
- Heißklebepistole.
Arbeitsprozesse:
- Tauche einen Schwamm in die Farbe und zeichne vorsichtig Punkte oder andere Muster auf die Leinwand.
- Wenn gewünscht, die Wäscheklammern verändern, am besten Acrylfarbe.
- Nach 8-10 Minuten kleine Wäscheklammern mit Heißkleber auf die Leinwand kleben.
Machen Sie einen zusätzlichen Kartonrahmen (Passepartout) zum Sticken, damit die Arbeit schöner aussieht. Verwenden Sie als zusätzliche dekorative Elemente Strasssteine, Knöpfe, Perlen.
Empfohlen:
Schöne Puppen zum Selbermachen: Ideen, Muster, Tipps zum Basteln
Was du brauchst, um mit deinen eigenen Händen eine schöne Puppe zu machen. Amigurumi, Dachbodenpuppe, Bigfoot, Pumpkinhead, Tilda. Innere Puppen. Nähanleitung für eine Waldorfpuppe mit Schnittmuster. Video, in dem der Autor eine Puppe in gemischten Medien herstellt. Tipps von erfahrenen Handwerkern zur Herstellung schöner handgefertigter Puppen
Geschenk zum Selbermachen für Kinder - interessante Ideen. Geschenke für Kinder zum Jahreswechsel und zum Geburtstag

Der Artikel beschreibt einige Geschenke für Kinder, die Sie mit Ihren eigenen Händen machen können. Ein originelles Geschenk für ein Kind, das mit eigenen Händen geschaffen wurde, ist wertvoller als ein gekauftes, denn bei der Herstellung legen die Eltern ihre ganze Liebe und Wärme in das Produkt
Fensterdeko zum Selbermachen zum Jahreswechsel: Ideen, Fotos. Fensterdekoration mit Schneeflocken
Fensterdeko zum Jahreswechsel bringt nicht nur gute Festtagsstimmung bei Ihnen und allen Familienmitgliedern, sondern erfreut und zaubert auch Passanten ein Lächeln ins Gesicht
Ziege zum Selbermachen. Schafe und Ziegen zum Selbermachen: Muster, Muster
Willst du ein Kuscheltier machen? Zum Beispiel werden Schafe oder Ziegen zum Selbermachen ganz einfach hergestellt. Verwenden Sie Vorlagen. Nähen Sie ein originelles Souvenir
Strickmarker zum Selbermachen: eine günstige Alternative zum Ladenkauf
Möchten Sie lernen, wie man wie ein Profi strickt, wissen aber nicht, wo Sie anfangen sollen? Wir sagen es Ihnen! Zuerst werden wir mit unseren eigenen Händen Markierungen zum Stricken herstellen und dann eine Idee für ein zukünftiges Produkt auswählen. Und was am wichtigsten ist, wir werden nur ein paar Cent dafür ausgeben
