Table of contents:
- Author Sierra Becker becker@designhomebox.com.
- Public 2024-02-26 03:47.
- Last modified 2025-01-22 22:09.
Speaking of home shoes, you already understand from the name that it should be something cozy, soft, pleasant to the feet, warm, comfortable. Purchased models do not always correspond to our ideas about comfort. Some people think that sewing home shoes with their own hands is a very difficult task, accessible only to experienced shoemakers or experienced craftsmen. There are light models made of felt, fabric that even a novice master can do.
Slippers can be created from a variety of materials, using an old sweater, sheepskin coat, felt or worn jeans, taking into account the season and the manufacturer's wishes. Home slippers knitted with knitting needles are perfectly worn. In the article, we will consider some of the simplest options for making shoes with your own hands. The presented patterns will help to master the sewing technique easier, and the photos will give an idea of how the finished products should look like in the end.
Open slippers
For cutting you will need felt, scissors and taking measurements of the feet of both legs. You can draw outlines on a sheet of cardboard with a pencil and then transfer the dimensions to felt, or you can carefully outline them directly on the material or use an insole made ofother shoes. On the upper half of the pattern, "wings" are drawn to the left and right. Their length can be measured with a flexible meter, applying it to the instep, do not forget to leave the material for an overlap, and this is at least 3 cm on each side.
After cutting the left and right slippers, you need to connect the "wings", trying on the leg, and sew in the center with stitches.

To decorate such shoes, you can use a bright large button, as in the photo above. You can sew shoes with your own hands in just a few minutes. If you want to extend the life of such a product, then you can sew a purchased leather insole to the sole of the slippers.
Closed slippers
To cut such a model of slippers, you need to make two parts. First, trace both feet on thick cardboard to create the sole of the shoe. Then go around the drawing with a pencil again along the contour, adding 1 cm of fabric to the hem. Secondly, you need to draw a pattern for the top. To do this, measure the rise of the foot at the top point from one edge to the other. Putting a sheet of cardboard to the pattern of the sole, add 2 cm on both sides and draw a straight line. Then the trajectory of the toe is circled in a semicircle and they smoothly reach the indicated marks. The top line is rounded, connecting the marked points.

Then they start assembling shoes with their own hands with threads. In order for the sole to be dense and warmer, you can cut another layer of fabric and an internal non-woven insulation by the same standards, and purchasedleather or felt insole. The sewn layer of fabric on the sole is recommended to be sheathed with a piping of a satin ribbon or a strip of dense fabric. The upper part of the slippers is sewn, starting from the center point, so that the fabric does not skew. The top of this part of the pattern is also wrapped with a piping so that the threads of the fabric do not split. For decoration, you can first sew an appliqué or lace onto the fabric, attach a bow or a pom-pom made of threads. That's it, here's your DIY slippers!
Closed Shoe Pattern
To make closed slippers at home, you need to outline the outline of the foot. The pencil should not be tilted inward, it should be held straight down. Also, be sure to step back 1 cm along the edge for the hem of the fabric and seams. The upper part of the pattern consists of two halves.

Front folds up approximately 12-13 cm for all adult shoe sizes. The back part has a heel rise of 6 or 7 cm. The length of the pattern along the outer edge should be equal to the distance from the center point of the toe to the center of the heel. Use a flexible meter to measure.
After one side pattern is made, it is turned over to the opposite side and simply outlined again. So both sides of the pattern will be the same. If the fabric from which the shoes will be sewn with one's own hands will be additionally insulated with a layer of padding polyester, then it is necessary to add 0.5 cm from all sides, since the insulation significantly increases the size. This must be taken into account in order not to sew slipperssmaller size.
After cutting, the fabric is sewn on the heel, in the center of the toe and around the entire sole. Decorative seams can be made with floss threads in a contrasting color. Such shoes can be sewn from an old sheepskin coat. Homemade fur slippers will be very warm and durable.
Children's closed slippers
According to the pattern proposed above, a child can sew comfortable soft home slippers. So that there are no seams in the middle of the sock, the side patterns are combined together, then the seam will remain only at the back. The photo below shows that the cutting is made in two layers - the upper part is made of knitwear, and the lower part is sewn from faux fine fur. To sew such shoes with your own hands at home, you must first cut and join the fur parts together, and then, adding 1 cm from all sides to the measurements, make the outer fabric part of the craft.

So that the child, moving in slippers on the floor of the room, does not slip and fall, you can additionally sew a suede insole over the fabric on the sole. You need to decorate slippers depending on the gender of the child. For a girl, you can decorate products with bows, sew on butterflies or make roses from satin ribbons. For boys, you can use ready-made applications of superheroes or cartoon cars.
Leather slippers
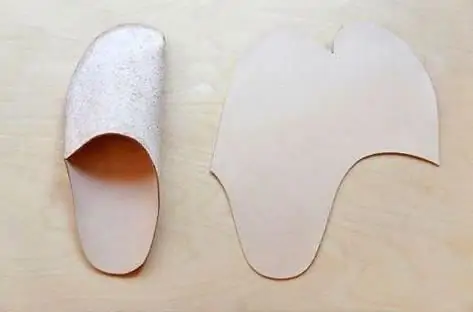
If you still don't know how to sew house shoes with your own hands, patterns of simple slippers will help solve the problem. It is advisable to use a piece of leather or suede for such slippers. Patternquite simple, the curves of the lines are best drawn using a template. As you can see in the photo below, a one-piece pattern is sewn with just one side seam. It is best to do it externally so that the seam inside does not press on the skin of the foot.

Over time, these slippers completely take the shape of the foot, like a second skin. In them, the legs do not steam, a person feels comfortable both in summer and in winter.
Felt baby booties
Felt is a very soft and pleasant material for the body, so it is quite suitable for children's shoes. On the first frame in the photo below, you can see that the pattern of each product consists of two parts. The first is the contours of the foot, for convenience, you can use any baby's shoes and simply circle around the perimeter with a pencil on cardboard. The second part of the pattern is a strip of fabric with rounded ends. Its length is equal to the size of the foot in a circle, plus a few centimeters for the smell.

Before sewing booties, determine the center points on the heel and on the strip of the second part of the pattern. They are attached together with pins, and sewing begins from the heel zone. On the left and right products, the smell is made to the inside, that is, the fold turns out to be opposite.
To work, you will need a nylon thread, a needle and scissors. It is best to use a seam over the edge. Threads of a contrasting color look beautiful. After trying on, you can make a couple of tucks at the top so that the slippers fit snugly against the leg and do not fall.
Felt shoes with side seams
From the sheetfelt according to the pattern below, you can cut comfortable soft slippers, in which the parts are connected by a wide lace of bright color. For a boy, you can sew seams in blue or black, and for a girl, in red, pink or yellow.

For the pattern of the foot, simply circle it with a pencil, you will not need to leave the fabric for the seams. The wide part of the pattern corresponds to the size of the instep, and the long part is equal to the measurements of the foot along the perimeter. The height of the slippers is optional. Any person's shoe can be measured as a sample.
For the seams, wide cuts are made with a knife. To do this, you need to substitute a wooden board under the bottom. Each slit should be evenly spaced so the shoes look neat.
Knitted indoor shoes
With your own hands you can knit slippers from yarn for both a child and an adult man. These can be short products, similar in shape to ordinary slippers, or you can add knitting up and make warmer winter slippers like socks or half boots.

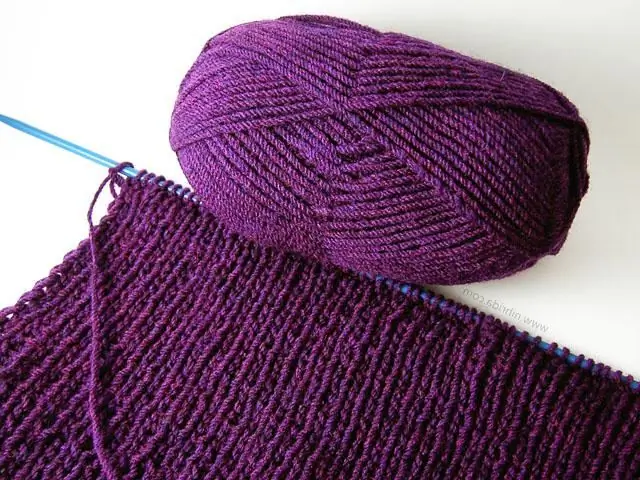
The lower part of such products is usually knitted in garter stitch. The number of loops corresponding to the perimeter of the insole is typed on the knitting needles, that is, double the size of the foot. You can start knitting from threads of dark yarn, highlighting the sole separately. In the photo of the sample, this part of the product is knitted with burgundy threads. Then the blue yarn is added, and knitting continues until the height of the slippers is reached.
More workcontinues only from the side of the toe. 10 central loops are counted, and they are knitted with the addition of an extreme loop in each row by knitting 2 edge loops together. In this way, the foot is raised to the required level. If you want to knit short slippers, then you will have to knit only 5-6 cm, then one row is knitted along the entire length, and the loops are closed. The product is sewn from the top of the heel down the sole to the toe.
If high ankle boots are knitted, then the front of the slippers is made higher, and then you can go along the entire length of the knitting to an elastic band 1x1 or 2x2 and raise the bootleg up to the desired height.
Conclusion
Now you know how to sew house shoes with your own hands. With the patterns presented in the article, it will not be difficult to do this work. Masters for manufacturing take a variety of fabrics, use old knitwear, warm woolen sweaters, jeans. You can decorate crafts with buttons, fabric appliqué, ribbon piping or lace inserts. Making your own shoes is a fun, creative process that not only brings joy to work, but also makes the products comfortable to wear.
Recommended:
How to make a chair with your own hands. How to make a rocking chair with your own hands

Furniture can be made not only from boards, but also from any available material. The only question is how strong, reliable and durable it will be. Consider how to make a chair with your own hands from plastic bottles, cardboard, wine corks, hoop and thread
How to make a Santa Claus costume with your own hands? How to sew a Snow Maiden costume with your own hands?

With the help of costumes, you can give the holiday the necessary atmosphere. For example, what images are associated with such a wonderful and beloved New Year holiday? Of course, with Santa Claus and the Snow Maiden. So why not give yourself an unforgettable holiday and sew costumes with your own hands?
Tablecloths with their own hands. How to sew a beautiful tablecloth with your own hands

In this article I want to talk about how to sew various tablecloths with your own hands. Here you can find tips on how to sew a round, oval or rectangular tablecloth, how to create a festive version of it, a dining room version and a simple rustic patchwork tablecloth
New things from old things with your own hands. Knitting from old things. Remaking old things with your own hands

Knitting is an exciting process with which you can create new and beautiful products. For knitting, you can use threads that are obtained from old unnecessary things
Pattern of slippers with your own hands. How to sew children's house slippers with your own hands?

Shoes such as slippers are relevant at any time of the year. In summer, the foot in them rests from sandals, and in winter they do not allow to freeze. We suggest you make homemade slippers with your own hands. A pattern is included with every tutorial
