Table of contents:
- Author Sierra Becker becker@designhomebox.com.
- Public 2024-02-26 03:46.
- Last modified 2025-01-22 22:09.
What do you need a paper vase for, you ask a question. The answer is quite simple - such crafts can be an excellent decoration for the interior of a home, office, or just a wonderful gift. In this article you will find information on how to make a paper vase. Today, there are a huge number of techniques for creating crafts from this material. You will get to know them by reading the article.

Master class number 1. A vase is the best gift for Valentine's Day
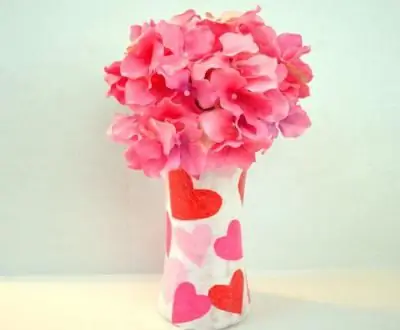
Any glass container can be turned into a beautiful and original vase that you can give to your loved one. In this master class we will use the technique - decoupage. To understand how to make a paper vase, you will need:
- glass vessel;
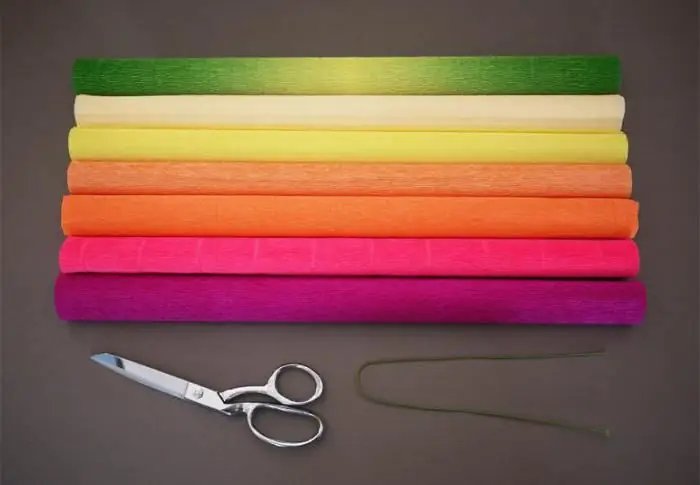
- crepe paper (red, white and pink);
- brush;
- sponge;
- scissors;
- decoupage glue.
Cut out squares from white crepe paper. Applyglue on a glass vessel. Glue the squares so that there are no gaps. Now cut out hearts from red paper. Make five pieces and glue. Arrange symmetrically on the vase. Apply another layer of glue on top. Do not be afraid - after drying, it becomes colorless. Remove excess glue with a sponge. The finished product can also be varnished. This is how the corrugated paper vase turned out.
Master class number 2. How to make a vase from paper tubes
To make such a product, you will need:
- Office or corrugated paper - you can use newspaper, magazine or notebook sheets. Most importantly - choose one thing, do not mix several types of paper.
- PVA glue.
- Spoke.
- Whatman.
- Lacquer.

Take a sheet of paper. Cut into long strips ten centimeters wide. To wind the tubes, use a knitting needle or a cocktail tube. To prevent the paper from unwinding, fix its edges with glue. Do not make too thin tubes, otherwise the product will not look good. The height of the craft depends on the length of the wound tubes. It is necessary to craft 50 pieces. When all the tubes are wound, make the base for the vase. Whatman is best. Do not choose thin paper, otherwise the vase will not last you long. Roll the paper into a cylinder of the desired diameter. Glue the tubes. Now attach two strips at the top and bottom. They are made from the same tubes, but they must be flat. Smooth with an iron, wind around your finger and stronglypress down with your thumb. Glue these strips. Next, cut the top of the vase diagonally. To do this evenly, use an elastic band and two pins. Cut along the intended path. Now paint the product. You can use stain, varnish or gouache. When the vase dries, start making the bottom. Cut out a circle from cardboard equal to the diameter of the vase. Glue it and apply varnish too. You can insert a bottle inside the cylinder. The vase is ready!

The creation of such crafts can be entrusted to a child. There is nothing complicated in the assembly.
Origami technique. Paper vases
Modular origami is the creation of crafts from identical fragments connected together. This needlework appeared in China.
We bring to your attention some original ideas - how to make a paper vase using the origami technique. It is best to start with simple products, for example, with a vase for sweets, and then move on to more voluminous compositions. Before you start the craft, you need to fold the triangular modules according to the following pattern:
- Take a sheet of A4, divide into 8 equal rectangles. Cut out the resulting shapes. Take one of the rectangular pieces and fold in half.
- Bend and straighten the workpiece vertically, outlining the middle line.
- Bend the corners to the middle.
- Turn the workpiece over and lift the edges up.
- Bend the corners of the figure by bending them through a triangular element and tuck inward.
- Bend the blank in half.
The result is a module withtwo pockets and two corners.
Now start assembling. Here are some options.

Master Class 3: Candy Bowl
The craft is assembled from triangular modules. They must all be the same size. To work, you will need the following number of modules: 80 white and 140 yellow. You will also need scissors and glue. Making this craft is easy. The main thing is to know the assembly scheme. It can be found in any specialized magazine.
So, for the first row, take twenty white modules, and for the second - twenty yellow ones. Connect a chain of parts of two rows into a ring.
In the third, connect twenty yellow modules. Turn the resulting ring inside out.
In the fourth row, insert thirty yellow pieces evenly.
In the seventh put on thirty whites.
In the eighth row, insert the same number of parts, only backwards.
Make the ninth out of forty yellow parts. Add ten modules evenly in a circle.
It will take thirty yellow fragments to make the bottom of the vase. Insert them into each other. Connect in a ring. Glue the bottom to the main workpiece. You can make more pens if you like in the same way.

Master Class 4: Flower Vase
This vase is sure to be a wonderful decoration for your home.
So, for paper crafts "Vase for flowers" you will need 308 pieces of triangular elements (144 yellow, 48 light green, 100 pink, 12 blue and4 white pieces).
Used abbreviations:
- long side (DS);
- short side (KS);
- long side out (SDS);
- short side out (OSN).
Paper vase: diagram
The assembly scheme is complicated, follow it exactly. Start collecting crafts from modules in rows:
- First: twenty yellow cards (KC).
- Second: twenty light green (KS).
- Connect a chain of modules of two rows into a ring.
- Third: one light green (KS), two blue (KS), one light green (KS), one yellow (DS). Repeat this alternation of modules four more times.
- Fourth: two yellow (DS), one light green (KS), one blue (KS), one green (KS). Repeat four times. Turn the ring inside out.
- Fifth: one yellow (SDS), two light green (SDS), one yellow (SDS). Alternate this four more times. Repeat this action on subsequent rows.
- Sixth: two pink (SDS), one yellow (SDS), one light green (SDS), one yellow (SDS).
- Seventh: one white (SDS), one pink (SDS), two yellow (SDS), one pink (SDS).
- Eighth: two pink (SDS) and three yellow (SDS).
- Ninth: one pink (SDS) and two yellow (SDS).
- Tenth: one pink (OSN) and one yellow (OSN).
- Eleventh to sixteenth: one pink (OSN), one yellow (OSN).
During assembly, bend the craft outward, thereby giving the vase a shape.

If you carefully read the article beforeend, now you know how to make a paper vase, and you can create such a miracle yourself. Get creative and enjoy your results! Good luck in your work!
Recommended:
From crepe paper flowers: step by step instructions with photos

Crepe paper flowers and bouquets have a number of practical benefits. Firstly, they are much more durable, do not fade and retain their shape and appearance for a long time. Secondly, they are not inferior in their beauty to compositions from living plants. How to make crepe paper flowers? There are currently many ways
DIY paper vase. How to make origami "paper vase"

Paper vase can be an unusual souvenir gift! It can be made from improvised materials using quilling and origami techniques
Vase of pumpkin with their own hands. Pumpkin vase: master class

The main autumn hero of our ancestors was rightfully considered a pumpkin, which is not only very tasty and he althy, but can also help create a special festive atmosphere in the house. In today's article we will look at how to make a vase from a pumpkin
DIY peony from corrugated paper. How to make crepe paper flowers step by step

The beginning of summer is the time for peonies to bloom, but they fade very quickly. And so you want to admire the delicate and refined flowers both in the dank autumn and in the icy winter! Everyone can perform a small miracle and make a realistic, delicate and beautiful crepe paper peony with their own hands. A bouquet made up of such flowers will not fade and will perfectly decorate the interior in any style
How to make DIY crepe paper pom-poms?

Pom-poms are a decoration that people are used to seeing on clothes such as children's hats, scarves, women's skirts, etc. However, this original item, it turns out, can be made not only from soft yarn
