Inhaltsverzeichnis:
- Autor Sierra Becker [email protected].
- Public 2024-02-26 04:44.
- Zuletzt bearbeitet 2025-01-22 22:11.
Vierblättriger Rock ist zeitlos. Lerne, wie man es näht.
Viele Frauen tragen im Alltag lieber Hosen und Jeans, aber wenn es Zeit für die Feiertage ist, steigen fast alle auf Kleider und Röcke um. Die Auswahl auf dem Markt ist riesig, aber leider passt entweder die Größe nicht, oder die Länge ist nicht gleich, der Stoff ist nicht angenehm, er ist in der Taille breit, an der Hüfte schmal oder läuft an der Taille nicht zusammen Gürtel. Fast jeder hat das schon mal erlebt, am Ende taucht noch eine Sache im Kleiderschrank auf, die ihm nicht wirklich gefällt. Um solche unangenehmen Momente zu vermeiden, können Sie sich einen Rock selbst nähen.

Die einfachsten Rock-Designs zum Selbermachen
Es gibt verschiedene Modelle von Röcken, einige davon sind recht einfach, andere erfordern viel Arbeit. Eine der günstigsten Optionen ist das Vierblatt. Der Rock kann natürlich komplexe Modifikationen mit einer Kombination aus Stoffen, einer Passe, einem Schlitz, Taschen und dekorativen Elementen aufweisen. Ziernähte, Gürtel, Besätze, Codpieces und Gürtelschlaufen sind häufigals Ergänzungen zum Grundmodell des Produkts verwendet werden. Aber bevor Sie zu komplexen Oberflächen übergehen, müssen Sie versuchen, etwas Einfacheres zu nähen, um Ihre Fähigkeiten zu üben. Der vierteilige Rock ist zeitlos und perfekt für Anfänger. Aufgrund der Länge des Produkts können Sie verschiedene Bilder erstellen, ein solches Modell passt gut zu fast jeder Frau. Durch die Auswahl verschiedener Schuhe können Sie den Stil ändern: Bei Mokassins ist es kostenlos, bei Pumps - Business.
Muster in 10 Minuten
Es lohnt sich gleich zu sagen, dass Muster für sechs Klingen nach dem gleichen Prinzip aufgebaut sind, die Hauptsache ist, die Grundlagen zu verstehen. Wie immer beginnt die Arbeit mit dem Bau. Pauspapier wird am häufigsten zum Zeichnen verwendet, aber dickes Whatman-Papier und Flipchart-Papier können auch funktionieren. Im Extremfall gehen auch Tapeten mit Zeitungspapier, es gibt Handwerkerinnen, die mit Klarsichtfolie arbeiten.
Zunächst musst du Maß nehmen und in ein Arbeitsheft schreiben.
Messname |
Kurzzeichen |
Messergebnis, cm |
| Taille | VON | 70 |
| Hüften | OB | 100 |
| Produktlänge | DI | 65 |
Nehmen Sie willkürliche Messungen nahe der tatsächlichen Größe vor.
Unser Ziel ist ein Vierteiler (Rock), was bedeutet, dass das Produkt aus vier Elementen (Details) genäht wird, aber für deren SchnittEs wird nur ein Muster verwendet. Das Schnittmuster wird anhand der gemessenen Maße erstellt.
Taille sollte durch 4 geteilt werden (Anzahl der Keile): 70:4=17,5 cm.
Hüftumfang sollte durch 4 geteilt werden (Anzahl Keile): 100:4=25 cm.
Diese Maße reichen aus, um das Muster zu erstellen, das wir brauchen. Auf dem Pauspapier zeichnen wir eine horizontale Linie, 17,5 cm lang (1/4 Taillenumfang). Wir teilen das Segment in zwei und setzen einen Punkt (Mitte): 17,5:2=8,75 cm.
Von diesem Punkt aus eine 65 cm lange Linie (CI) im rechten Winkel nach unten ziehen.
Der konvexste Punkt der Hüfte befindet sich ca. 19 cm unterhalb der Taille, in Ihrem speziellen Fall können Sie diese Länge separat messen. Auf der CI-Linie von oben nach unten 19 cm beiseite legen und einen Punkt setzen. Durch diesen Punkt müssen Sie eine horizontale Linie von 25 cm (OB) bzw. 25: 2=12,5 cm ziehen, d.h. in jede Richtung 12,5 cm frei lassen

Wenn die Hauptelemente auf dem Stoff markiert sind, müssen Sie die Seitenpunkte mit geraden Linien verbinden und den Boden zeichnen. Es stellt sich heraus, dass es sich um ein Trapez handelt.

Die vierblättrige Variante ist rot markiert, was nicht so üppig sein wird, dafür aber weniger Stoff braucht. Denken Sie auch daran, dass die Länge des Rocks 65 cm beträgt, also sollten die Seiten auch so lang sein. Überschüssige Zentimeter an den Ecken werden mit Kreide abgerundet und abgeschnitten.
Offene Röcke auf Stoff
Es gibt mehrere Möglichkeiten, wie der vierteilige Rock auf dem Stoff ausgelegt wird. Die Beschreibung ist ziemlich einfach. Alle Details sind gleich, also müssen Sie 4 Keile mit Zugaben für die Nähte aus dem Stoff ausschneiden. Bei diesem ModellSie müssen auf den Stoff selbst achten. Wenn es eine Zeichnung gibt, sollte sie nicht auf dem Kopf stehen, Sie müssen diesen Punkt vor dem Schneiden überprüfen.

Stapel sollte von oben nach unten gerichtet sein. Wenn der Stoff einfarbig und glatt ist, können die Keile abwechselnd auf dem Stoff ausgelegt werden: das Detail ist auf der Taille oben, das Detail ist auf der Taille unten. Dadurch wird Material gespart und sinnvoll eingesetzt. Aus dem verbleibenden Segment kann ein Gürtel oder Besatz ausgeschnitten werden.
Wenn der Hüftumfang groß genug ist, geht der gesamte Stoff auf die Keile, daher müssen Sie beim Kauf eines Schnitts zusätzliche 15-20 cm für den Gürtel berücksichtigen.
Es ist auf Pauspapier und auf dem Stoff einer Sechsklinge geschnitten, wie eine Vierklinge. Der Rock ist sehr schnell genäht. In nur einem Tag können Sie Ihre Garderobe aufrüsten.
Montage und Nähen von Fertigteilen
Die fertigen Keile ähneln einem Trapez.

Die geschnittenen Teile müssen zusammengeschnitten werden, damit der Stoff bei der Arbeit nicht unter den Fuß passt, sonst müssen Sie alles auseinanderreißen und neu nähen. Der vierteilige Rock ist in gleichmäßigen Stichen genäht. Lassen Sie bei der letzten Naht oben ca. 15 cm für den Reißverschluss frei.
Eine abschließende Anpassung ist ein Muss, um sicherzustellen, dass der Artikel der richtigen Größe entspricht. Gegebenenfalls sollte die Handwerkerin letzte Anpassungen vornehmen, zum Beispiel die Hüften leicht entfernen oder die Taille leicht verengen. Wenn das Produkt gut auf der Figur sitzt, müssen Sie die Abschnitte auf der Overlock verarbeiten, den Boden stecken und nähen.
Endstadien der Arbeiten
Produkttyp wird seindavon abhängen, wie sauber und gleichmäßig die Linien verlegt, Reißverschluss und Gürtel eingenäht sind. Sie können einen versteckten Reißverschluss oder normal verwenden. Die Oberseite des Produkts wird entweder durch Wenden oder durch ein Band der gewünschten Breite bearbeitet. Als Verschluss eignet sich ein Knopf, Knopf oder verdeckter Verschluss. Sie können sehen, wie der fertige vierteilige Rock aussieht. Das Foto zeigt das Modell, dessen Schneiderei im Artikel beschrieben ist.

Wenn Sie entlang der Hüftlinie ein paar Zentimeter hinzufügen, wird der Rock flauschiger und passt sich der Figur nicht an. Entlang der Nahtlinie kannst du vorne einen verspielten Schlitz lassen.
Empfohlen:
Kleidung für eine Puppe: Stricken, Beschreibung mit Foto, Arbeitstechnik und Tipps

Jedes Mädchen hat eine Lieblingspuppe. Es kann Baby Bon, Barbie, Baby Doll, Tilda oder irgendetwas anderes sein. Das Baby nimmt sein Haustier als Tochter wahr und möchte es mit dem Besten umgeben. Natürlich kann die Station nicht ohne Kleidung auskommen. Aber der Kauf einer Garderobe für eine Puppe ist nicht immer klug. Schließlich ist es viel interessanter, Kleidung mit eigenen Händen herzustellen. Dadurch rücken die Familienmitglieder noch enger zusammen, weil alle am kreativen Prozess teilhaben können
Schriftsteller Gorchakov Ovidy Aleksandrovich: Biografie und Foto

Ovidy Gorchakov ist einer der berühmtesten sowjetischen Spione. Außerdem erfuhr das Land von ihm, als er sich nach dem Ende seiner Karriere der Kreativität zuwandte. Der Held unseres Artikels wurde als Schriftsteller und Drehbuchautor berühmt, seine Romane fesselten Zehntausende von Lesern, Filme und Drehbücher, für die er schrieb, wurden von Millionen von Menschen angesehen. In diesem Artikel werden wir über seine Biographie sowie die bedeutendsten Werke sprechen
Nassfilzen aus Wolle. Blume: Beschreibung der Ausrüstung, notwendige Materialien, Foto

Die Arbeit mit nasser Wolle ist ein Handwerk mit langer Geschichte. Die erste Erwähnung dieser Technik zur Herstellung von Textilien findet sich in der Bibel. Die Geschichte der Arche Noah erzählt von einem gefilzten Wollteppich, der aus Platzmangel auftauchte. Laut dem Text der Heiligen Schrift fiel die Wolle der Schafe auf den Boden und wurde nass, und die Tiere zertraten sie mit ihren Hufen. So entstand das erste durch Nassfilzen hergestellte Filzstück
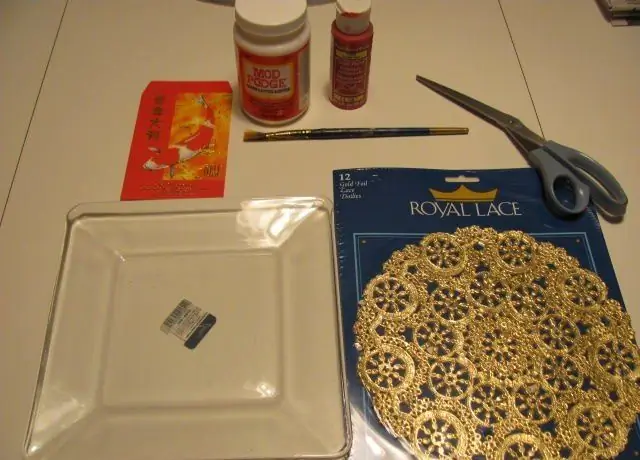
Umgekehrtes Decoupage von Platten: eine Schritt-für-Schritt-Meisterklasse mit einem Foto

Die Technik der umgekehrten Decoupage von Tellern ermöglicht es Ihnen, diese nicht nur als festliche Tischdekoration, sondern auch für Speisen zu verwenden, da der vordere Teil unberührt bleibt. Der gesamte Transformationsprozess findet auf der Rückseite statt. Wir bieten einen Meisterkurs zum Reverse Decoupage einer Platte mit und ohne Craquelé an
Pfingstrose aus Fimo: Beschreibung mit Foto, Pfingstrosenfarben, Beschreibung, Schritt-für-Schritt-Anleitung für die Ausführung der Arbeit und die Nuancen der Blumenformung

In den 30er Jahren des letzten Jahrhunderts wurde ein so wunderbares Material zum Basteln wie Fimo erfunden. Zuerst wurden Teile von Puppen daraus hergestellt, aber die Plastizität, die einfache Arbeit mit dem Material und die H altbarkeit der Produkte eroberten schnell die Herzen der Handwerker, und Ton wurde zur Herstellung von Souvenirfiguren und Schmuck verwendet. Polymer Clay ist besonders beliebt bei der Herstellung von Blumenarrangements
