Table of contents:
- Author Sierra Becker becker@designhomebox.com.
- Public 2024-02-26 03:45.
- Last modified 2025-01-22 22:09.
A handbag is needed for every outfit - that's a fact! It is clear that buying them in large quantities is unrealistic - it is quite expensive. But by sewing one clutch with your own hands, and then another and another, you will get a whole collection for every day!
Clutch is called a small handbag without handles. They are made from leather, suede, textiles, yarn, etc. The finish is also varied - based on the style, purpose and taste of the hostess.
Sewing a clutch with your own hands is very simple from any material that is available.
Tools and materials for sewing a clutch
This is practically everything in the house: old bags, jeans, pieces of leatherette, thick fabric, sealant.
Material you can buy at any shop specializing in the sale of fabric.

You will also need thread for sewing - better take strong, synthetic with reinforcement, suitable needles and sharp scissors.
A sewing machine is welcome, but not required - everything can be done by hand.
Forleather or suede clutch bags, you can use old jackets, bags, skirts, etc. In this case, you will need a special tool - a punch or a hole punch - to pierce holes in hard leather.
Fittings, clasps, carabiners - all available and sold in stores.
How to sew a clutch from fabric with your own hands
Very beautiful and simple handbag is easy to make yourself. The large bow looks very stylish and can be used as a pen.
For work, prepare a piece of dense fabric - this way you will save on sealant, lining fabric, zipper, matching threads, scissors.
So, we sew a clutch with our own hands! Patterns are best built on paper. We draw rectangles with the following sizes and in such quantities:
- Top of the bag: two with sides 16 by 23 cm.
- Bow detail: two with sides 17 by 25.5 cm.
- Liverter: one 6 x 13 cm.
- Lining: two with sides 16 by 23 cm.
First, let's form a bow - for this we fold the part of the jumper with the front side inward and stitch along the edge. Turn inside out and iron, then fold into a ring and sew along the edge.

We also lay the two parts of the bow on top of each other inside out and sew along the long sides. We twist, straighten and iron. The resulting rectangle is inserted into the ring - a jumper.
Now attach it to the main part of the top and sew the edges of the bow to the side cuts.
Take the zipper and tack it totop of both pieces. Use the zipper foot to secure it in place.
Next, sew the lining. To do this, you need to sew the two parts together, folding the front sides inward. We attach it from above, basting with hidden stitches in the area of \u200b\u200bthe "zipper", but leaving a small hole.
Now sew the remaining sides of the outer pieces and turn the piece right side out. The left hole is sewn with inconspicuous stitches.
Clutch from an old bag
Very often on the shelves of our cabinets things are gathering dust, seemingly unnecessary, but the hand does not rise to throw them away. It is these things that are easy to turn into a necessary accessory that will last a very long time. Here is a DIY clutch - photo below - you can sew from old bags.
First, unzip each seam. Lay out and sort all individual parts. It is better not to take worn and damaged parts - they will only spoil the look of the finished item.

The lining, depending on its condition, may be useful for a new bag.
Since the very first time everything seems more complicated than it really is, the pattern will be the simplest - with front, back and valve.
Take an old bag and cut out the "spare parts". Do the same with the lining.
Now all the details (top and lining) are folded inside out, and stitched at the bottom and from the sides. The lining is carefully inserted inside, a zipper is sewn on or a magnetic fastener is attached.
Turns out, tapping the seams with a hammer.
Here comes the new stylish bag!
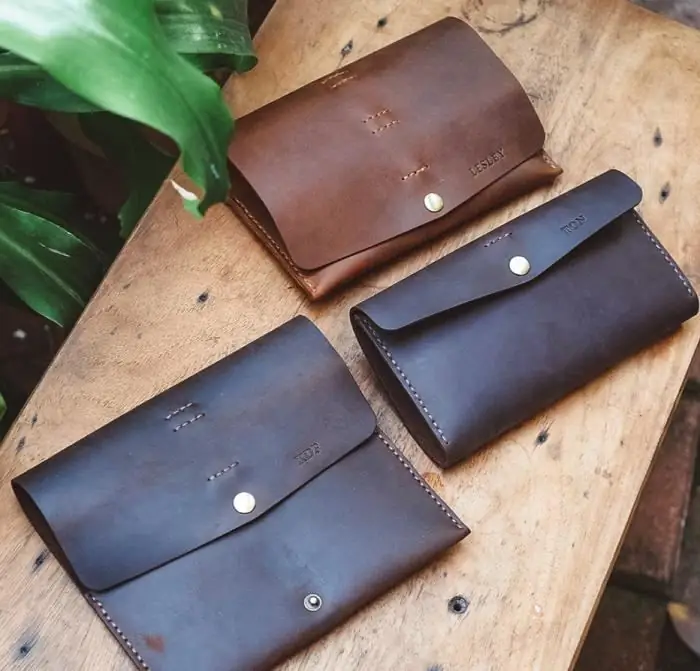
Handmade leather clutch
Sewing a leather envelope is not difficult at all. The advantage of this material is that it does not require compaction. Leather has excellent shape retention property. Also, this material does not require fastening, fasteners are not required - only the successful selection of the pattern is important.
Sewing such a clutch with your own hands is easy. The work is similar to the one described above, but there are still more advantages - no time is wasted on "dismantling", there are no defects in the material. The pattern is almost the same, only the shape of the valve has been changed.
We need the following materials for work:
- Leather, suede or leatherette.
- Sharp knife, scissors.
- Fittings (half-ring, carabiner, magnetic clasp).
- Rulers, pencils.
- Strong synthetic threads.
- Punchers, awl.
Carefully lay the piece of leather inside out. The pattern is simple, so we will build it on the spot. If you doubt your skills, then first draw it on paper, and only then transfer it to the material.
For example, the sides of the handbag should be equal to 15 cm and 25 cm. Then we draw a rectangle for the pattern with sides of 25 and 30 cm. Complete the valve right away - choose the size at your discretion.

Next, let's start sewing. Measure 15 cm and fold the part along this mark, right side inward. Using an awl or a punch, punch holes around the entire perimeter, retreating from the edge by 2-3 mm. The distance between them should be the same - we will lay a seam in them.
Now we take a needle with thread and stitches, sew the entire perimeter, reach the end and turn back. Thus, we get a double line that imitates a machine.
At the end of this process, cut out two narrow strips - a strap and a holder for a half ring. We thread a short strip into the fittings, bend it in half and fix it where it is convenient for you. We insert a long belt into the half ring and fasten its ends together - in the form of a ring.
Almost done! It remains to attach a magnet or Velcro. Although it is quite possible to do without it, since the valve is heavy and closes securely.
So, without much effort, we have created a wonderful and stylish handbag!
Plastic clutch
Sometimes a small handbag is simply necessary, but you don’t want to spend money on it at all! You can go for a little trick and do everything yourself in a very short time!
Tools and materials we will need:
- Small plastic folder - available at the office supply store.
- Material for pasting the surface - it does not matter, leather or fabric - to your taste.
- PVA glue.
- Sandpaper fine-grained skin.
- Tassel.
- Decor in the form of beads, rhinestones, sequins.
The fabric sticks very poorly to a smooth surface, so we will first sand the daddy with a sandpaper. Now take a brush and glue the folder on one side with glue. Glue the material in such a way that the edges remainseam allowance about 1 cm.

After working one side, go to the second. Glue the fabric in the same way, avoiding the formation of wrinkles, air bubbles and other defects.
Also coat the allowances with glue and wrap inside the folder.
It remains to decorate the resulting clutch and that's it - you can show it to others!
Clutch decoration
For everyday use, bright shiny things are undesirable, it's tasteless! But for an evening out, such an accessory is a must!

Any kind of decorative material is perfect for finishing a small handbag:
- Fabric embroidered with sequins.
- Beads, beads.
- Ribbons - satin, rep, organza.
- Rivets, clips, eyelets.
- Lace, sewing.
- Chains, beads.
DIY clutch is easy and simple to create! Such an activity will help to reveal all your abilities and skills, develop imagination and taste. Create and enjoy wonderful unique things!
Recommended:
How to make lipstick with your own hands? Various manufacturing options and recommendations

Some representatives of the beautiful half of humanity do not trust the manufacturers of decorative cosmetics and are increasingly thinking about how to make lipstick with their own hands. I must say that this process is not at all complicated
How to make a chair with your own hands. How to make a rocking chair with your own hands

Furniture can be made not only from boards, but also from any available material. The only question is how strong, reliable and durable it will be. Consider how to make a chair with your own hands from plastic bottles, cardboard, wine corks, hoop and thread
How to make a Santa Claus costume with your own hands? How to sew a Snow Maiden costume with your own hands?

With the help of costumes, you can give the holiday the necessary atmosphere. For example, what images are associated with such a wonderful and beloved New Year holiday? Of course, with Santa Claus and the Snow Maiden. So why not give yourself an unforgettable holiday and sew costumes with your own hands?
New things from old things with your own hands. Knitting from old things. Remaking old things with your own hands

Knitting is an exciting process with which you can create new and beautiful products. For knitting, you can use threads that are obtained from old unnecessary things
Pattern of slippers with your own hands. How to sew children's house slippers with your own hands?

Shoes such as slippers are relevant at any time of the year. In summer, the foot in them rests from sandals, and in winter they do not allow to freeze. We suggest you make homemade slippers with your own hands. A pattern is included with every tutorial
