Inhaltsverzeichnis:
- Autor Sierra Becker [email protected].
- Public 2024-02-26 04:44.
- Zuletzt bearbeitet 2025-01-22 22:11.
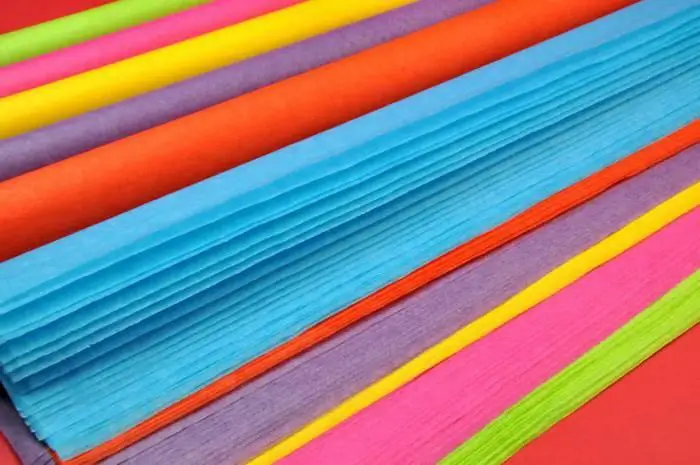
Die End-to-End-Technik ermöglicht es Ihnen, wundervolle flauschige Teppichbilder in verschiedenen Formen und Größen zu erstellen, die Interesse und Bewunderung wecken. Es scheint unwahrscheinlich, dass solche scheinbar komplexen Anwendungen von Kindern durchgeführt werden können. Alles ist möglich, wenn die Arbeit des Teams richtig organisiert ist, und selbst Erstklässler können mit der komplexesten Zeichnung fertig werden. Die Technik des Beschneidens von Wellpappe erfordert keine spezielle Ausrüstung. Zum Arbeiten benötigen Sie nur eine Zeichnung mit Konturen, eine Schere, einen Bleistift oder einen Kugelschreiber, mehrfarbiges Wellpappe oder Papierservietten und PVA-Kleber.

Schnitttechnik: Arbeitsvorbereitung
Zuerst müssen Sie Wellpappe mit einer Seitenlänge von etwa 1,5 Zentimetern zuschneiden. Ihre Anzahl und Farben hängen von der Komplexität und Größe der Arbeit ab. Schablone für ein zukünftiges MeisterwerkSie können es selbst zeichnen oder eine beliebige einfache Zeichnung ausdrucken. Es empfiehlt sich, dickes Papier oder Karton zu verwenden. Der Einfachheit halber können Sie Kleber auf einen Teller gießen oder auch einen Klebestift verwenden. Die Facing-Technik ist ein einfacher, aber gleichzeitig zeitaufwändiger Prozess, der Ausdauer und Geduld erfordert, da er viele sich wiederholende Aktionen enthält.

Schritt für Schritt Beschreibung der Technik
1) Eine dünne Klebstoffraupe wird auf einen kleinen Bereich des Musters entlang der Kontur aufgetragen.
2) Bedecken Sie das Ende der Stange oder des Bleistifts mit einem Quadrat Wellpappe und geben Sie dem Papier mit den Fingern die notwendige Form, die einem Blumenkopf ähnelt.
3) Dann muss die Unterseite der entstandenen Figur in Kleber getaucht und auf eine bestimmte Stelle des Bildes geklebt werden.
4) Nach leichtem Druck wird der Stab vorsichtig entfernt. Der wichtige Punkt ist, dass jede nächste Wellpappe neben dem vorherigen liegen sollte, also müssen sie sehr nahe beieinander platziert werden, damit es keine Lücken gibt.
Technologiefunktionen
Was kann man mit Krepppapier machen? Tatsächlich bietet dieses Material nahezu unbegrenzten Spielraum für Fantasie. Karten aus Wellpappe, verschiedene Handarbeiten, Blumen sowie voluminöse, flauschige Gemälde sehen originell und ungewöhnlich aus. Die Krepppapierschneidetechnik ist eine sehr beliebte Arbeitstechnik. Die Produkte sind sehr interessant und die Ausführung solcher Handwerke erfordert nichtbesondere Fähigkeiten. Mit dieser Methode können Sie schöne und originelle volumetrische Bilder aus Wellpappe erstellen. Und es können sowohl Miniaturkompositionen als auch große Tafeln sein. Alle Elemente sollten sehr eng aneinander liegen und den Effekt eines dicken, flauschigen Teppichs erzeugen, der aus einer großen Anzahl von Papierfetzen besteht. Die Facing-Technik ist sehr einfach zu erlernen, daher ist diese Aktivität ideal für die Erholung und Aktivitäten mit kleinen Kindern.

Wellpappen-Vorteil
Die Hauptattraktion eines Bildes, das mit der Trimmtechnik erstellt wurde, ist, dass die Bilder leicht und luftig sind, was durch die Verwendung von Wellpappe erreicht wird, einem dünnen und transparenten Material, das leicht eine bestimmte Form annimmt. Im Gegensatz zu anderen Papierbearbeitungsmethoden spielt die Maßgenauigkeit der ausgeschnittenen Teile keine Rolle, im Gegenteil, je mehr gezackte Kanten vorhanden sind, desto schöner wird das fertige Produkt aussehen. Dennoch müssen einige Regeln beachtet werden, damit die Arbeit nicht nachlässig oder bösgläubig wirkt.

Hilfreiche Tipps
Um Ihren Plan mit der Trimmtechnik zu verwirklichen, müssen Sie Wellpappe oder Servietten in verschiedenen Farben kaufen, die Sie in viele kleine Stücke mit einer Größe von etwa 1,5 bis 2 Zentimetern verwandeln müssen. Die Form der Elemente kann quadratisch, dreieckig oder rund sein. Gleichzeitig sind die Kanten optionalmüssen vollkommen eben sein, sie können zickzackförmig, wellig usw. sein. Die Hauptsache ist, die Größe der Teile nicht stark zu erhöhen. Wenn das Bild groß ist, können Sie ein Quadrat von 33 cm machen, aber nicht mehr. Je kleiner sie sind, desto klarer wird das Bild in vollständiger, vollständiger Form aussehen. Beim Anbringen von Papier an Klebstoff wird ein dünner Gegenstand verwendet: Dies kann ein Bleistift oder ein Streichholz sein. Um die Trimmtechnik zu beherrschen, empfiehlt es sich, mit einfacheren Bildern zu beginnen, wie einem Regenbogen, einer Blume, einem Schmetterling oder verschiedenen geometrischen Formen.

Richtlinien
Die Technik des Zuschneidens von Servietten oder Wellpappe impliziert nicht immer die vollständige Füllung des gewünschten Raums. Zum Beispiel gibt es nur ein Futter in Form eines flauschigen, verdrehten Rahmens um den gesamten Umfang der ausgewählten Figur, während die Bildmitte leer bleiben kann. Bei der Arbeit können mehrere Farben verwendet werden, und es kann auch einfarbig mit nur einer Farbe gebastelt werden, um beispielsweise den Hintergrund hervorzuheben. Das Hauptprinzip der Technik besteht darin, sie in den Bereichen zu verwenden, in denen Sie Volumen hinzufügen müssen, während aufgrund der geringen Größe der Papierelemente alle Umrisse und Ränder des Musters unverändert bleiben und das Bild nicht an Klarheit verliert und die Hauptidee.

3D-Trimmtechnik
Die Papierschnitttechnik kann nicht nur für flache Bilder, sondern auch für fest geklebte Papierfiguren verwendet werden. Das kann seinSchachtel, Figur, Papierbaum. Mit Pappe, Gips, Ton und anderen Materialien können Sie alten Dingen neues Leben einhauchen, die nicht mit Pinsel und Farbe, sondern mit Papierdekoration „wiederbelebt“werden können. Außerdem können die Elemente nicht immer mit Klebstoff befestigt werden, es ist durchaus möglich, eine Plastilinbasis zu verwenden, was viel Zeit spart. Das Aufkleben von Papierstücken, die sich in Größe und Dichte unterscheiden, ermöglicht sehr weiche Farbübergänge und echte Volumen auf einer ebenen Fläche. All diese Effekte wirken sich auf die Gesamtwahrnehmung des Bildes aus: Dasselbe grüne Gras wirkt heller und natürlicher, wenn es an einigen Stellen dunkelgrün ist, und hellgrün, wo die Sonnenstrahlen fallen.

Livebild
Die Technik des Zuschneidens von Servietten oder Wellpappe kann selbst die einfachste Zeichnung mit primitiven Elementen in ein interessanteres Bild verwandeln. Auch wenn es nur Sonne, Wolken, ein Haus und ein Apfelbaum neben einem Holzzaun sind, wird das Bild nach dem Füllen voluminös und lebendig. Handwerke, die mit dieser Technologie hergestellt werden, zeichnen sich durch ihre besondere haptische Weichheit und visuelle Eleganz aus.

Die Geschichte der Verblendtechnik
Was steht vor? Die Geschichte der Entstehung der Technik der angewandten Papierkunst hat mehr als ein Jahrhundert. Es gibt jedoch Bereiche, die erst vor relativ kurzer Zeit erschienen sind, darunter Applikationen, Quilling, Origami und Trimmen. Bei der SchnitttechnikEs werden volumetrische Papieranwendungen erstellt, die zur Entwicklung von Kreativität, Feinmotorik und abstraktem Denken beitragen. Darüber hinaus lehrt diese Lektion Geduld, Ausdauer und Fleiß, was modernen Kindern so oft fehlt. Diese junge Technologie erfreut sich immer größerer Beliebtheit durch ihre einfache Ausführung und den ungewöhnlichen „flauschigen Teppich“-Effekt, der sowohl haptisch als auch optisch angenehm ist. Was ist an der Facing-Technik bemerkenswert? Eine Meisterklasse zum Erstellen dreidimensionaler Gemälde kann durchgeführt werden, ohne Ihr Zuhause zu verlassen, während der Arbeit sind keine speziellen Geräte und teuren Materialien erforderlich. Sie müssen sich nur mit Servietten oder Krepppapier, Plastilin, Klebstoff, Pinsel, Pappe, bunten Markern und anderen Geräten eindecken, die bereits im Arsenal jedes Schulkindes oder Kindergartenschülers sind.
Empfohlen:
Die Geschichte des Kreuzstichs: Muster und Ornamente

Kreuzstich ist eine sehr beliebte Art der Volkskunst. Es erschien vor mehreren Jahrhunderten. Nach so viel Zeit haben sich die Materialien, aus denen die Handwerkerinnen ihre Meisterwerke schaffen, geändert, aber viele Muster und Ornamente beim Sticken mit einem Kreuz verlieren über viele Jahrhunderte hinweg nicht an Relevanz
Markierte Karten: die Geschichte des Aussehens, Methoden der Markierung, wie man sich vor einem schärferen schützt?

Der Artikel spricht über markierte Karten, Methoden von markierten Karten und gibt Tipps, wie man nicht Opfer von Kartenbetrug wird
Die Geschichte des Kreuzstichs - von der Antike bis heute

Die Geschichte des Kreuzstichs hat mehr als 2,5 Tausend Jahre. In jedem Land entwickelte sich die Geschichte der Kreuzstiche auf ihre eigene Weise. Der Stil und die Farben der Zeichnungen waren merklich anders. Die Geschichte des Kreuzstichs in Russland reicht bis ins 10. Jahrhundert zurück
Origami. Geschichte des Auftretens

Figuren aus quadratischen Papierbögen ohne Schere und Kleber f alten – die Kunst des Origami – stammt ursprünglich aus China, entwickelte sich aber in Japan und erlangte dann Weltruhm. Der Artikel enthält einige Details über die Entstehungsgeschichte des klassischen Origami sowie verschiedene Methoden dieser Kunst, die später auftauchten
Beading: die Geschichte des Auftretens

Unter den Handarbeitsarten nimmt die Perlenstickerei einen besonderen Platz ein. Die Entstehungsgeschichte reicht bis in die Antike zurück
