Table of contents:
- Author Sierra Becker becker@designhomebox.com.
- Public 2024-02-26 03:40.
- Last modified 2025-01-22 22:09.
Do-it-yourself Easter cards are made by children from the younger group of kindergarten. These can be simple drawings with gouache paints, as well as an appliqué, the elements of which are cut out by the teacher. The task of the children is to correctly place them on a sheet of paper and stick them.
As children age, do-it-yourself Easter cards become more complicated. New techniques and methods for making such crafts are being added. Additional materials, stamping methods and twisting from quilling strips are used. Postcards are voluminous and consist of many elements.
Some need special training. In the article, we will consider several options for making Easter cards with children with our own hands. The description will begin with simpler and more accessible to kids in kindergarten. Then advice will be given for older preschoolers and primary school students. After reading the step-by-step instructions, any child will cope with the task and be able to make an Easter card with their own hands for the competition at school.
Drawing for kids
This postcard combines both drawing in an unconventional way and application. You can also work on colored paper. The chicken is drawn with a fork, you can use a disposable plastic one. Half a teaspoon of thick gouache paint is applied in the center of the sheet. Then, with a fork, the child should perform strokes from the middle to the edges. After such a procedure, the chicken gets a funny disheveled look. Then you need to let the paint dry. Only after complete drying, you can continue to work on an Easter card with your own hands.

In order for the fluffy yellow "spot" to turn into a chicken, you need to stick eyes, a beak and paws on it. You can buy toy eyes at a sewing accessories store, and cut out the rest of the elements from double-sided orange colored paper.
Sponge Stamping
Children of the middle group of kindergarten can do this work on their own. It is enough for the educator and parent of a 4 or 5-year-old child to show the sample and the way the work is done and cut out several details in the shape of a chicken egg from sponges. Paints of each color are diluted with water and poured into a flat plate.

Then the baby takes the sponges by the edges and dips them into the paint bowl. Then he puts a stamp in the center of a sheet of white cardboard. So several eggs are stamped in turn. Place them close to each other. Some inattentive children may be carried to the side, so it is advisable to outline the field of activity with a simple pencil.
When the eggs are sealed, the leafset aside to dry. Only then can you start applying the basket. It is made from small brown stripes. According to the drawn contour, the contours of the basket are first glued, then the middle is filled. The rods are arranged in a chaotic manner, the main thing is to fill most of the space. You can also make a basket handle from the same stripes to hide the drawn contours under them.
Finger drawing
How to draw an Easter card with your own hands? You can use your fingers. To do this, put a small amount of paint on flat plates or in jar lids. You can use several bright and contrasting colors. White color looks good in the picture. Therefore, the background for the postcard is taken in color.

To keep the middle of the egg unpainted, a template cut out of cardboard is superimposed on top of it. Then, in turn, the child dips his finger in gouache and makes an imprint on cardboard. Prints are thick around the circumference of the template so that the shape of the egg is clearly visible.
Don't forget that you need to prepare a damp cloth or handkerchief soaked in water for your child so that after each color you can wipe off the remaining paint. Only when using clean fingers will the drawing look neat. When all the work of decorating an Easter paper card with your own hands is done, the template is taken away, only an egg-shaped void remains on the cardboard.
Easter Chicken and Bunny Eggs
Creating such a postcard requires the child to be able tohandle scissors and clearly place and glue parts. First, a chicken and a rabbit are made separately. Their contours are outlined with a simple pencil according to the template and cut out from colored double-sided paper. Then, using the application method, small details are made, ears, nose, beak and teeth are attached. The remaining elements can simply be drawn with felt-tip pens.

Next, you need to make a bow. Its production consists of several stages. First, the lower part with sharp edges is cut out, then the bow itself, which is glued by the edges into the middle of the first part. At the end, you need to attach a thin and small strip - a bow knot.
For the egg itself, two parts are cut out. 2 whole eggs are cut out of colored paper according to the pattern. One is pasted on background paper. Then the rabbit and chicken are attached. A half of an egg is glued on top of the craft, only its central cut must first be cut into corners. A bow is attached on top.
Next, you need to decorate the top half of the egg with flowers. They can be pre-cut with scissors using outline drawing templates. Then the elements will work out the same way. The edges of the flowers are not smeared with glue to make them look voluminous.
According to this master class, it is not difficult to make Easter cards with your own hands. If a child is not good with scissors, details, especially small ones, can be prepared by an adult.
Striped postcard
For children, do-it-yourself Easter cards are made in a variety of styles. Looks interestingopening card, in which the inner layer of the title page consists of multi-colored strips glued side by side. You can use not only colored paper, but also with printed prints. It can be dots, stars, hearts or flowers. Any small pattern will do.

After the entire sheet is glued with horizontal stripes, work begins on the top of the title page of the postcard. A double-sided sheet of colored paper is taken of the same size and the shape of an egg is outlined with a simple pencil according to the template. Then with scissors you need to cut out the inside of it. To do this, first, in the middle of the applied contours, you need to punch a hole with scissors, then carefully cut to the pencil line and go further with scissors only along it. When the top sheet is ready, it is pasted onto the title page.
Potato Stamping
Do-it-yourself Easter card in grades 1-4 can be made in such an unconventional way. A potato is taken and cut into two equal halves. Next, the stripes are drawn with a marker. They may consist of wavy or broken lines, be truncated. Here, the student must show imagination. You also need to be able to carefully use a knife. It is better to take a small cutting tool, it will be more convenient for them to cut out the drawn stripes.

The contours of the seals should stand out by 0.5 cm, then the prints will be clear. When the stamps are made, gouache paints are applied to the strips. The multi-colored elements look beautiful. Apply paintbrush. After each color, the brush must be thoroughly rinsed with water in a cup so that the next color is not dirty. Then they apply a stamp to a sheet of cardboard and leave beautiful multi-colored marks.
Original moving postcard
Such a postcard, as in the photo below, is distinguished from a simple application by one detail. The egg is cut into two parts by the corners. The lower part is glued to the paper, and a grommet is attached to the upper one, thanks to which this part of the egg can be moved by hand to the side, showing who is in the middle.

We will not describe how to make an application, since everything is clear if you look closely at the photo. Small decorative elements can be made by drawing with a brush or sticking with your fingers. The grass is not completely smeared, the sharp edges remain free of glue and add a little volume to the postcard.
3D Corrugated Paper Card
The title part of this postcard is designed using different techniques. The main central part is an egg cut out of corrugated paper. This craft looks structural, which adds originality to the postcard. Before gluing the cut out element, you need to stick a bow of paper strips on it. To make it even, use a strip of quilling.

Flowers cut from several layers of paper are attached on top of the egg. Their edges are cut either with "noodles" or with rounded petals. The rest of the elements are made fromstrips of quilling by twisting paper.
Quilling
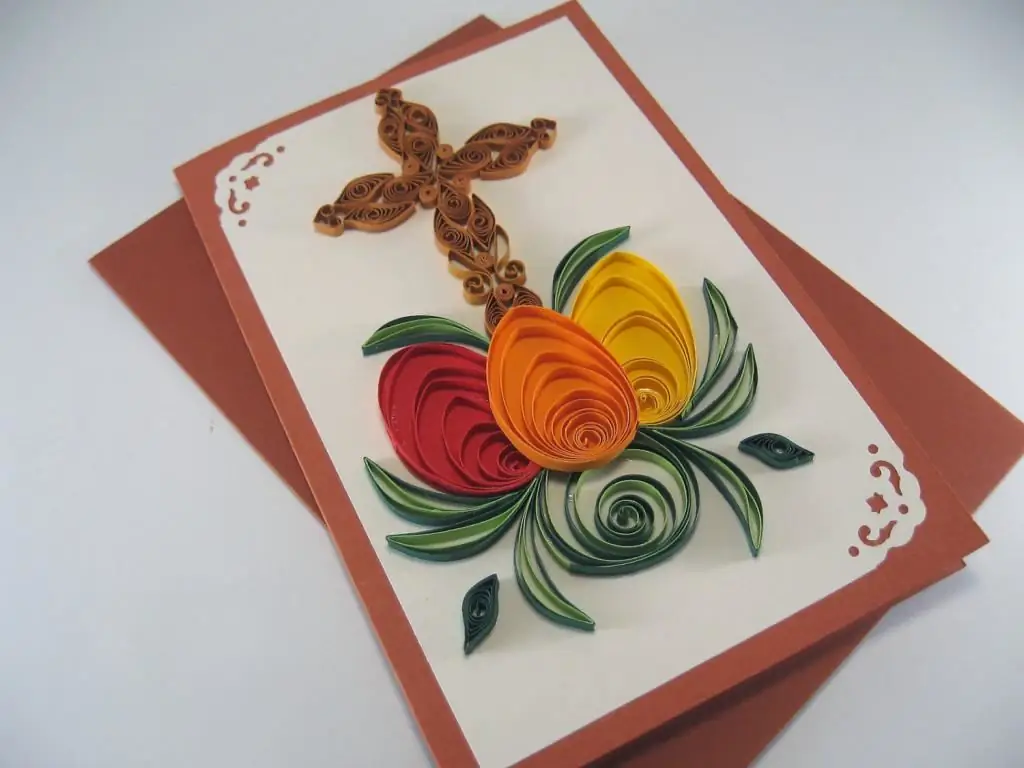
DIY Easter cards can be made from quilling strips. The background of the postcard is better to take a color one, the printed paper will look beautiful. An egg cut out of white cardboard is attached to the center of the card. They make it large to fit all the quilling details.
A willow twig is made from corrugated paper. A brown strip is smeared with PVA glue on the end part and applied to the intended places. Willow "seals" simply wind paper on a quilling hook or thin knitting needle.

Flowers are made from stripes of different colors. If, when winding the strip on the knitting needle, the petal turns out to be small, then you need to glue another one to the edge and continue winding. To twist the leaves, you need to take a felt-tip pen and wind the strip freely. Then pull it off the mold and glue the edge to the last turn. Then, with two fingers, the edges are pressed down from opposite sides. It turns out the shape of a leaf.
The egg is filled with loosely twisted elements. Its shape can, in principle, be filled with any quilling twists, even small leaves. This is already as your fantasy tells you.
Conclusion
While the child is small, he needs to prepare both a sample postcard and cut out the details. With age, children acquire some skills in working with paper, so the adult is already removed from the help and entrusts the task to the child on his own.
In elementary school, children already have to fantasize andcome up with stories for postcards. The teacher only gives a topic for the assignment and can give some oral advice. Most of the work is done by the students themselves. Our article will help the children complete their homework on the theme of Easter or for a children's work competition.
Recommended:
Easter bunny with your own hands. Easter Bunny: pattern

Want to make a beautiful Easter souvenir? Read tips, follow instructions. And you will get a cute Easter Bunny
Easter decor. How to decorate your house for Easter

Easter home decorating is a common tradition. There are different ways and the opportunity to give a unique look to your interior on Easter Eve
Easter composition. Beautiful Easter compositions for home decoration

Among all Christian holidays, Easter is the most important. Like other celebrations, there are many customs and traditional attributes of this bright day. So, on this great religious holiday, it is customary to color and paint eggs, cook rich cakes, and also collect compositions for Easter, which can be made from flowers or sweets
Easter egg in quilling technique. DIY Easter egg

The "quilling" technique allows you to make amazingly beautiful eggs for Easter. In addition to them, you will need colored paper, glue and a wooden toothpick. These are all the items that are needed to implement interesting ideas using quilling. Easter egg will turn into a real work of art and will be the subject of your pride
DIY Easter decoration (photo). Dough decorations for Easter

Easter is a beautiful holiday that we all love to celebrate. How to make the decor of your home unique, so that your guests enjoy spending time here with you?
