Table of contents:
- Author Sierra Becker becker@designhomebox.com.
- Public 2024-02-26 03:46.
- Last modified 2025-01-22 22:09.
Recently, dry felting from wool has been very popular. Toys made in this technique are particularly realistic. In particular, furry animals are surprisingly cute and believable.

Wool felting technique. Required material for work
For crafts you will need:
- combed ribbon (combed sheep wool, the fibers of which are stretched in one direction and laid in a ribbon);
- slicker;
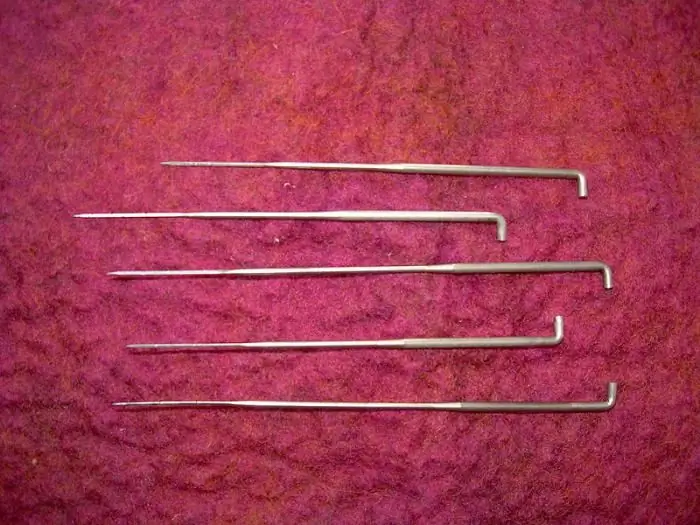
- felting needles (special needles for felting with notches on one side, which, when stuck into wool, catch the upper fibers and confuse them with the lower ones);
- filler (fibrous material - synthetic winterizer, knitwear, pieces of yarn for knitting);- lining for felting (foam sponge or foam plastic);
- sewing needle;
- scissors;
- cotton thread;
- fishing line.

Making toys. Stage one
We present to your attention a unique technique - felting from wool. Master classes of this kind now often attract the attention of craftswomen. Getting Startedmaking a kitten. First you need to make blanks from the filler. It must be tightly twisted into balls and tied with threads. The blanks should be similar to the body parts of your future kitten. Now we need to go through three simple steps in making a toy: knit individual parts, assemble them and decorate.
Stage Two
Next, with the help of a slicker, you need to pull a little wool from the tape, put it on the lining (foam rubber sponge, foam plastic) and start felting. Since the blanks are already made, you just need to roll them on top. We will need thin needles (they do not leave marks, and the surface is compacted faster). Use three needles at the same time, fixing them with your index and thumb. The ring and middle fingers lie on the body of the needles. Remember, the needle should exit the product at the same angle as it entered! Otherwise, it will break quickly.
Stage three
Remove a semi-felted piece of wool from the lining, tightly wrap the necessary part with it and nail it with needles. If the details show through, attach another piece of the prepared felted wool blank. So that there are no borders at the joints, fluffy edges must be left on semi-boneless pieces of wool.
Stage Four
We remind you: we make a kitten using the "wool felting" technique, master classes in which are interesting and relevant today for many. To make the details of the kitten's head, you need three small, but rather tightly knitted balls of wool. These are the future cheeks and the basis for the mouth. Roll the ballsfirst over the entire circumference, and then over the entire surface. After that, attach a small piece of prepared felted wool to the bridge of your nose. The nose and mouth of a kitten, of course, can be sewn on top, but for credibility, it is better to knit them from wool of the desired color.

Stage Five
Sew the kitten's head to the body and mask the seams with wool with non-welded edges. Next, sew on the paws and tail of the kitten and also hide the seams under the half-welded pieces of wool.
Stage six
Next, form the ears and roll them where they should be. From fishing line you can make a mustache for a kitten. And from wool of a suitable color - soft pads on the paws.
Conclusion
So our kitten is ready, made in the "wool felting" technique. Master classes, as you can see, help to fully understand the methods of making toys, if you follow the instructions clearly.
With this technique, you can make many original crafts and decorations that will delight you and your loved ones.
It should be noted that felting from wool (it is not difficult to find master classes by professional needlewomen) is a rather laborious occupation, but nevertheless very exciting. It will be interesting for both children and adults.
Recommended:
How to choose needles for felting wool. Felting technique

The Slavic lands are considered the birthplace of the ancient craft of wool felting, which means that the passion for this technique is in our blood. Therefore, the products are of the highest quality and most beautiful precisely from the representatives of the Slavic peoples. If you try to dump something once, you will definitely get carried away with it for a long time
Wool pattern. Pictures from wool - animals. DIY wool paintings

Wool picture is a work of art that can decorate any interior and an original gift
How to make beads with your own hands? A master class will help you master the simple technique of needlework

The article provides a description with step-by-step instructions on how you can easily and simply make beads with your own hands, as well as a master class of the manufacturing process in photographs. The process of making beads will not take much time and effort, so you can safely start creating
Felting for beginners: a description of the technique with a detailed master class. DIY felting

Felting is a kind of handicraft known since ancient times, felting from wool. Wet technique is available to those who already have certain skills, and dry felting is possible for a beginner. Felting allows you to diversify your usual pastime, calm your nerves and create unusual accessories and souvenirs
Felting: wool lamb. Dry felting sheep: master class

Felting has been known for a long time. This version of creativity is used by many craftswomen. Professional needlewomen are ready to sit for hours creating another masterpiece. Someone recently mastered felting. A sheep using this technique can turn out wonderful. Moreover, this year (2015) is dedicated to her, so beautiful and fluffy
