Inhaltsverzeichnis:
- Autor Sierra Becker [email protected].
- Public 2024-02-26 04:44.
- Zuletzt bearbeitet 2025-01-22 22:11.
Beading ist ein faszinierender, aber mühsamer Prozess, der viel Ausdauer erfordert. Aber das Ergebnis ist es wert. Schimmernde Figuren, Blumen, Bäume und verschiedene Dekorationen lassen niemanden gleichgültig. Außerdem ist es ein tolles Hobby. Und Sie können Ihren Lieben eine Freude machen, indem Sie ihnen eine Ihrer Kreationen schenken. Im heutigen Artikel erklären wir Ihnen, wie man Ahorn aus Perlen herstellt. Fangen wir also an.
Für Perlenahorn brauchen wir:
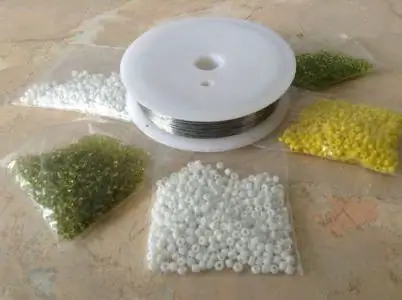
- Perlen sind rot, gelb, grün, orange, da in unserem Fall der Perlenahorn Herbst ist;
- Draht 0,3-0,4 cm dick;
- ein Knäuel aus dicken braunen Fäden;
- Schere;
- dicker Draht für Stamm und Äste;
- Gipsmischung;
- Blumentopf;
- schwarzer Tee.

Stufe eins
- Fangen wir an, einen Herbstahorn aus Perlen mit einem Orangenblatt zu kreieren. Wir nehmen einen 30 Zentimeter langen Draht und orangefarbene Perlen. Wir sammeln 3 Perlen auf dem Draht. Durch die letzten 2 fädeln wir den Draht zurück und ziehen ihn fest.
- Als nächstes sammeln wir 3 weitere Perlen und machen dasselbe. Dann 4 Perlen, dann 5 und 6. Wir machen alles gleichSequenzen.
- Jetzt beginnen wir, die Anzahl der Perlen in jeder Reihe zu verringern. Das heißt, wir sammeln 5 Perlen, ziehen fest, 4, 3, 2 und 1.
- Drehen Sie den Draht in ein paar Umdrehungen. Es stellte sich heraus, wie eine Raute. Dies wird der mittlere Teil sein.

Stufe Zwei
Gehe zu den Seitenteilen des Baumes. Ahorn aus Perlen mit einem Schritt-für-Schritt-Foto herzustellen ist überhaupt nicht schwierig. Nehmen Sie dazu zwei 25 Zentimeter lange Drahtstücke.
- Beginne wieder mit einer Perle. Dann 2, 3, 4, 5.
- Der nächste Schritt ist, dass wir 4 Perlen an einem Ende des Drahtes sammeln und das andere freie Ende in unsere erste Raute zwischen 5 und 4 Perlenreihen von unten einfädeln.
- Und jetzt fädeln wir dieses Ende in aufgereihte Perlen und ziehen es fest. Und wir ziehen den Draht in die nächste Reihe zwischen 4 und 3.
- 3 Perlen auf den Draht stecken und mit dem anderen Ende festziehen.
- Wir gehen eine weitere Reihe nach unten und fädeln den Draht zwischen 3 und 2 als nächstes ein.
- Wir sammeln 2 Perlen. Wir führen den Draht zwischen 2 und 1 nebeneinander durch.
- Wir fädeln die letzte Perle auf und ziehen sie fest. Drehe ein paar Umdrehungen.
- Durch Analogie machen wir auf der anderen Seite genau den gleichen Teil des Blattes.
- Kommen wir zum kleinsten Teil unserer Broschüre. Sie hat die maximale Anzahl von Perlen - 4. Das heißt, wir machen alles genauso wie zuvor, aber nach einer Reihe von 4 Perlen beginnen wir, ihre Anzahl zu reduzieren.
- Nachdem wir zur Abnahme gegangen sind und 3 Perlen erzielt haben, fädeln wir die freie Kante des Drahtes in den äußersten Teil unserer einBlatt zwischen 4 und 3 nebeneinander. Wir ziehen fest, indem wir den Draht durch unsere 3 Perlen führen.
- Führen Sie den Draht zwischen 3 und 2 nebeneinander. Und so weiter bis zur letzten Perle.
- Vom anderen Blattrand aus machen wir alles gleich.
- Wir haben ein Blatt, das aus 5 Teilen besteht.
- Die Enden der Drähte werden in zwei Teile geteilt und miteinander verdrillt.
Mit derselben Technologie stellen wir Blätter aus andersfarbigen Perlen her.
Stufe drei
Farben können kombiniert werden, um Blätter gelb-orange oder gelb-grün zu machen. Im Grunde nach Lust und Laune. Nachdem wir die erforderliche Anzahl von Blättern hergestellt haben, nehmen wir den Faden in die Hand und fangen an, die Enden des Drahtes damit zu umwickeln. Kurz bevor wir die Drahtkante erreichen, binden wir den Faden zu einem Knoten und schneiden den Überschuss ab.
Sammle den Baum.
- Um "nackte" Zweige herzustellen, von denen die Blätter bereits abgefallen sind, nehmen wir Drahtstücke (vorzugsweise dicht, wie Aluminium oder Stahl), umwickeln sie mit einem Faden um etwa ein Drittel. Mit Hilfe dieser Äste sammeln wir Blätter und befestigen sie am Stamm.
- Nun binden wir die Blätter 2-3 Stück mit ihren "Beine" zusammen und wickeln sie mit einem Faden um. Wir wickeln auch kahle Zweige ein.
- Dann verbinden wir sie alle nach und nach mit Draht und Faden zu großen Ästen, von denen jeder 10-15 kleine Äste mit und ohne Blätter hat.
- Wir formen einen Stamm aus zwei dicken Drahtstücken und befestigen sie mit einem Seil.
- Befestige einen Ast mit einem Faden am Stamm.

Stufe Vier
Der Baum wurde eingesammelt. Es bleibt, ihn zu "pflanzen".
- Die Gipsmischung kneten und mit einem kleinen Topf für Blumen füllen, dabei Platz für die "Erde" lassen.
- Dort pflanzen wir unseren Perlenahorn. Lassen, bis der Gips vollständig ausgehärtet ist.
- Überprüfen, ob der Gips trocken ist. Wenn ja, dann können Sie anfangen, "Erde" in den Topf zu legen. Dazu nehmen wir gewöhnlichen Tee, vorzugsweise granuliert, und gießen ihn in eine Kanne auf Gips. Damit unsere Teeblätter nicht verstreuen, müssen wir sie mit einem transparenten Lack fixieren.

Das ist es! Unser wunderbarer Perlenahorn, dessen Foto oben zu sehen ist, mit Sorgf alt und Liebe hergestellt, ist fertig!
Empfohlen:
Wie man Slingo-Perlen mit eigenen Händen bindet. Wie man Slingo-Perlen häkelt

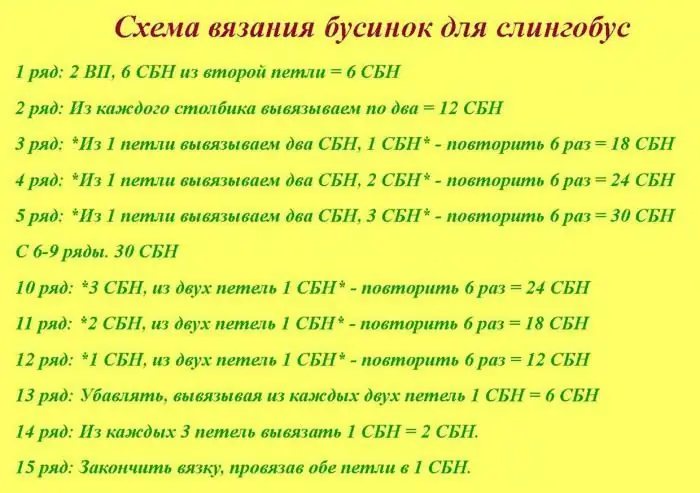
Heute ist es sehr in Mode gekommen, Schleuderbusse mit eigenen Händen herzustellen. Diesen süßen Mumienschmuck, den sie gerne wie gewöhnliche Perlen um den Hals trägt, können Babys zum Spielen oder sogar zum Kratzen des Zahnfleisches beim Zahnen verwenden
Wie man mit eigenen Händen einen Baumstamm aus Perlen macht

Perlen ist eine Art Handarbeit. Perlen machen wunderbare Accessoires, Schmuck und Kunsthandwerk. Ein wenig Erfahrung und Lust helfen dabei, umfangreiche und komplexe Werke zu schaffen - Bäume aus Perlen. In diesem Artikel erfahren Sie, wie Sie verschiedene Perlenstiele für handgefertigte Bäume herstellen
Wie macht man ein Krokodil aus Perlen? Volumensicken. Schema eines Krokodils aus Perlen

In diesem Artikel werden wir uns überlegen, wie man aus Perlen ein Krokodil macht - ein originelles Souvenir. Es gibt viele Möglichkeiten für seine Herstellung. Der Artikel wird volumetrische Perlenarbeiten beschreiben, da jeder weiß, dass solche Figuren interessanter sind
Wie erstelle ich eine Tulpe mit Perlen? Tulpen aus Perlen weben für Anfänger

Tulpen sind wunderschöne Frühlingsblumen, die zartesten und weiblichsten. Mit ihnen ist für die Mehrheit der schönen Hälfte der Menschheit der wunderbare Feiertag des 8. März verbunden. Tulpen blühen im frühen Frühling, um alle Mädchen zu erfreuen. Heute verraten wir Ihnen, wie Sie das ganze Jahr über schöne Pflanzen in Ihrer Wohnung zum Blühen bringen. Dazu müssen Sie nur lernen, wie man eine Tulpe aus Perlen webt. Ein Strauß dieser Frühlingsblumen wird eine großartige Dekoration für Ihre Küche oder Ihr Badezimmer sein
Wie man Blumen aus Perlen webt: Diagramme, Fotos für Anfänger. Wie man Bäume und Blumen aus Perlen webt?

Perlenarbeiten, die von akribischen Nadelfrauen geschaffen wurden, haben noch niemanden gleichgültig gelassen. Es braucht viel Zeit, um Innendekorationen zu machen. Wenn Sie sich also für eine davon entscheiden, lernen Sie von einfachen, um die Grundprinzipien des Webens von Blumen aus Perlen zu beherrschen
