Table of contents:
- Author Sierra Becker becker@designhomebox.com.
- Public 2024-02-26 03:46.
- Last modified 2025-01-22 22:09.
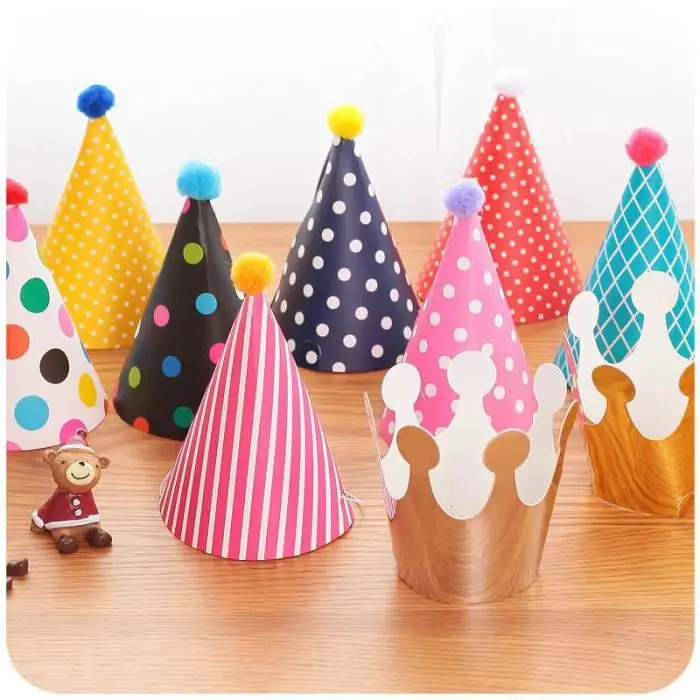
The tradition of putting on a festive cap came to us from America. It was there that it was originally customary to "fool" children and adults who came to a children's birthday. Over time, the fashion for caps of various types was adopted by the countries of Europe and Russia. Bright and cheerful hats, of course, are liked not only by children, but also by adults.
Buy or make?
Of course, a huge variety of caps are sold in stores, but it is quite possible to make them yourself. You can make this festive headdress in just a few minutes, saving you time and money. This does not require the use of expensive materials or special skills.
If we are talking about a children's holiday, then you can involve your child in creating a festive cap.

Don't forget that it should be bright and bring a positive mood to everyone around.
DIY
In order to make a festive cap with your own hands, you will need cardboard or thickdecorative paper. As well as handy materials such as scissors, pencil, glue, double-sided tape, glue gun or stapler.
You will also need any beautiful fabric, satin ribbons of any width, self-adhesive film, corrugated and colored paper, paints, pencils. In addition, take into service all kinds of buttons, rhinestones, shiny sequins, jewelry.

In order to keep your cap well on your head, you will need elastic bands or ribbons. For complete convenience, it is better to attach the elastic band from the inside with tape, glue or a stapler. The rubber bands themselves can be purchased at any embroidery and sewing store or stationery store.
It will take patience and a little imagination
Naturally, you will have a question about how to make a festive cap quickly and beautifully. Making this holiday decoration is not at all difficult. The cap itself will turn out no worse than the purchased one, and perhaps even better. After all, you yourself can make exactly the option that you want to see, based on your taste and creative idea.
So, let's start making a cap for the holiday. There is a fairly simple and quick option for creating such a headdress according to a template. The finished template with a picture can be printed on a color printer.

Then you need to attach the template to the cardboard, circle it with a pencil and cut it out. After that, you should roll up and connect the two edges of the workpiece with each other with any means at hand convenient for you. Making holeson the sides of the cap and retract the rubber band. Now it remains only to decorate the festive cap according to your taste and desire.
Let's consider another option for creating a beautiful cap. To begin with, we take as a basis cardboard or thick paper measuring 30 by 45 centimeters and fold it into a cone shape. Then you need to fasten the edges with glue or a stapler, fixing them together. Now you just have to cut off the protruding paper. And on this your holiday cap is almost ready. It remains only to decorate the accessory for the celebration. This can be done in absolutely different ways, depending on the theme of the holiday, the age of the audience, imagination and the materials at hand.
Ways to decorate elegant hats
Interestingly, for the New Year holidays, you can use a variety of Christmas tree decorations, such as tinsel and foil. You can also make a pompom and rain cap base.
To make a personalized cap for yourself or guests will be obtained from a photograph previously printed on a printer and pasted onto the cap. Or, use your imagination and fantasy by decorating the headdress with colored paper appliqué, or just paint it with bright colors.
Making a collage from clippings of glossy magazines or, for example, the remnants of wallpaper will be an entertaining job for you. You can also decorate a festive cap (photo provided below) by gluing it with fabric or ribbons.

The last thing to do is decorate it with sparkles and rhinestones.
Handmadeelegant and colorful caps will be a good decoration for any holiday and will certainly give everyone a joyful mood, regardless of age and preferences.
Recommended:
How to wipe a camera lens: tools, effective methods, tips and tricks

Dust everywhere. It is inevitable, and you just have to come to terms with the fact that it gets on the lenses. Of course, many other substances such as sweat fingerprints, leftover food or something else can end up on all equipment. Here are some important tips that will tell you how to clean the camera and how to wipe the camera lens
Interior photography: how to shoot interiors, tips and tricks

Interior photography is a separate area of photographic art, the primary task of which is to depict the interior space of premises from the most favorable angle. Often the photographer needs not only to show the room in terms of composition and perspective, but also to pay attention to details: focus on the texture of the walls and furniture, emphasize the lines. How to start photographing interiors?
How to take pictures with your phone: setup, lighting, tips and tricks

Many people want to try themselves as a skilled photographer, but not everyone has the skills, abilities, and indeed the necessary equipment in the form of a professional camera. At the same time, most people have smartphones - some have expensive ones, others have budget models. So why not read how to take pictures with your phone the right way?
How to make a panorama in Photoshop: a step-by-step tutorial, gluing, tips and tricks from experts

The panoramic image is very different from ordinary photography due to the wide view of the landscape. Looking at such a picture, you get pleasure. How are panoramic shots taken? We use Adobe Photoshop
Let's join the secret forces of Shambhala. DIY bracelets - tips and tricks

Those who are interested in Eastern spiritual practices will certainly want to have the famous Shambhala decoration. Do-it-yourself bracelets - isn't it a wonderful hobby, useful and interesting? And, most importantly, to learn this is not so difficult. Just remember a few rules
