Table of contents:
- Decoupage. What can be done?
- Glue
- Paper
- Napkins
- Other materials and tools
- Required elements for work
- Tips for Beginners
- Top cutting and gluing tips
- Top Finishing Tips
- Troubleshooting Tips
- Step 1. Choosing what awaits decoupage
- Step 2. Preparation
- Step 3. Prepare finishing materials
- Step 4 Organize Materials
- Decoupage bottles
- Step-by-step instructions for transforming a bottle
- Tips
- Conclusion
- Author Sierra Becker becker@designhomebox.com.
- Public 2024-02-26 03:46.
- Last modified 2025-01-22 22:09.
Decoupage is the art of gluing paper or fabric onto objects such as furniture, jewelry boxes and even kitchen cabinets. This hobby can grow into a life's work of making things to sell. You can also make furniture to order for money.
Decoupage. What can be done?
Thanks to extensive research, almost everything can be decoupage. Apart from the food, of course. What do you need for decoupage? More on this later. But first, let's say that there are a huge number of types of materials that can be used for crafts. This is wood, and plastic, metal (yes, metal!), And ceramics, and paper. The materials used can be purchased from specialized stores. And if you have a tiny budget, almost everything can be found in your apartment.

Glue
What materials are needed for decoupage? Glue. To decoupage an item, whether it's furniture, home decor, or clothing, you'll need glue. There are many options. And each has advantages and disadvantages. Do I need to use a certain type of decoupage glue? No, here the choice will dependon the type of work you are doing. Good old PVA glue is best. It has been used since high school. Or you can use diluted glue - either clerical or "dry".
Paper
Need to use special decoupage paper? No. You can use just about anything - newspaper clippings, wrapping paper, and even some types of fabric. Photos can be used. But it's best to make high-quality photocopies that are easier to work with. The golden rule is the thinner the better. You can also use:
- candy wrappers;
- foil;
- cards;
- cards;
- newspaper;
- old magazines;
- brochures.
Napkins
What napkins are needed for decoupage? Externally, napkins are the same as ordinary ones that are used in everyday life. The only difference is the ornament. It must be bright and original. Napkins come in one, two or three layers. The most important thing is thin paper. The thinner, the better the image will look. When decorating, only the top layer of napkins is used, which is varnished. When buying napkins, it is best to purchase several identical copies. So it will be possible to create many original kits. When purchasing three-layer napkins, only the top bright layer is used, having previously varnished it. It turns out an original idea for decorating a vase, flowerpot or dish. It is advisable to choose napkins with large patterns that do not get your hands dirty.
Napkins may be too delicate for the job, you can also use a cloth. It's fantasticAn alternative and excellent material to use on furniture drawings and craft projects. When working on a large object, using decoupage fabric can create stunning results.

Other materials and tools
What other materials and tools are used?
- Textured wallpapers. Using decoupage wallpaper can add a unique touch to a piece.
- Quality scissors. The main thing is that they are sharp. Get different sizes, from smallest to largest.
- Brushes. It is best to use small brushes, a couple of centimeters wide.
- Lacquer. What varnish is needed for decoupage? Such products are matte and glossy. The main difference is that a matte lacquer will give a matte look, the products will resemble those of the old days, while a glossy lacquer will make the appearance shiny.
Required elements for work
What do you need for decoupage for beginners? List of materials that will be useful:
- Several types of varnish. For example, it can be matte, glossy, glittery and others.
- Primer. Helps to level the surface before starting work.
- Skin. Helps even out rough surfaces.
- Rhinestones. Give originality to the work.
- Acrylic paints. Will help complete the composition.
- A set of brushes of different sizes (for ease of use, depending on the size of the object).
Tips for Beginners

What do you need for decoupage (the list is presented above)? We have already figured it out. What materials can be used in this technique and how to do it? Now we'll tell you. Depending on the surface, there are some features of the coating:
- Wood - needs to be sanded and needs to be wiped down before you can apply a primer or base coat.
- Metal - Wash with soap and water, then wipe with a damp cloth dipped in white vinegar. After that, you can apply a base coat.
- Canvas - Wipe off then primer.
- Glass/Ceramic - Wash with soap and water. Wipe with a damp cloth dampened with alcohol.
Top cutting and gluing tips
Where possible, cut with a sharp blade and at a slight angle to get a beveled edge. This will give a smoother edge after gluing.
Curling the paper before applying the adhesive will create cracks for the adhesive to penetrate. This avoids air bubbles. Apply the glue with a wet brush - this will allow it to dry without any brush strokes. Use your fingers to flatten the paper. Apply glue in a thin layer and very little when working on glass. If the layer is too thick, it will become a piece. Because glass is not a porous material.
Top Finishing Tips
After the product is completely dry, you can apply varnish - a couple of layers will help protect the paper. With more layers, there will be more sheen and the paper will start to look like it has been painted on. You can use gluePVA or special varnish. Varnish is good for objects like furniture that can get a little scratched. In the process of work, do not allow dust to get on the object, otherwise it will remain there forever!
Troubleshooting Tips
Are there any bubbles? Use a damp cloth to smooth them out while the glue is still wet.
Do the edges rise? Take a toothpick, lift the edge and apply another layer of glue. Smooth out as usual.

Step 1. Choosing what awaits decoupage
So, the materials are prepared, what do you need for decoupage? First, decide which element you want to transform. You can create art on a blank canvas made of wood, plastic, metal, ceramic or paper. You can also transform old pieces of furniture. And what else is possible? These can be picture frames, buckets, photo albums, shelves, vases, boxes, candles and even sneakers.
Step 2. Preparation
Whatever item you choose, it must be clean, free of dust and dirt. If you want to draw some kind of drawing on an object, then do it at least twenty-four hours before you start decoupage.
Step 3. Prepare finishing materials
Once you have chosen an element, you need to decide what you will use to cover it. Despite the literal meaning of the name, decoupage should not be limited to cutting. You can use images from magazines or books, wrapping paper, wallpaper, tissue paper, or even fabrics. Craft shops even sell specially made paper.for decoupage. If you have a good printer, print pictures or personal photos on it. Note that when cutting out the designs, make sure to use sharp scissors or a blade. Tilt the cutting edge slightly towards the outside. This will create a beveled edge on the paper and avoid harsh, raw edges.

Step 4 Organize Materials
After you cut out all the photos, decide how you will arrange them. Pictures can be laid out in any order and even overlap. Be creative in this matter. Keep in mind that nothing is sticking together at this stage. Therefore, if you do not like the location of the cutouts, just change them. If you want to change something after you've already done some gluing, most materials will come off with water if you do it before the item is varnished.
Decoupage bottles
What do you need to decoupage a bottle?
- Scraps of colorful design paper.
- Cleaned glass bottles or jars.
- Glue.
- Soft brush.
- Scissors (optional).

Step-by-step instructions for transforming a bottle
- Wash a glass bottle or jug by placing it in hot water and removing all labels. Then wipe dry.
- Collect the scraps of design paper. It can be different paper - wrapping paper, napkins, greeting cards, magazine clippings, a beautiful notebook orpages from books.
- Work quickly, apply a thin layer of adhesive to the area of the glass surface using a soft brush.
- Use the same brush to pick up a piece of paper - to avoid getting glue on your hands. You can tear all the paper beforehand or use scissors if necessary.
- Place the paper on the glass and smooth out the creases by applying another layer of glue on top.
- Keep adding paper until the bottle is completely covered. Then leave for 1-2 hours.

Tips
If wrinkle problems or bubbles appear, do not paint the paper until the glue is dry. This will minimize the ingress of air under the material. Feel free to experiment with a small cut-out floral print, painting over pasted paper, or even adding embellishments such as lace, flowers, or ribbon.
Conclusion
Remember that decoupage gives you endless possibilities for imagination. With little expense and little effort, a simple thing can become an exclusive masterpiece.
Recommended:
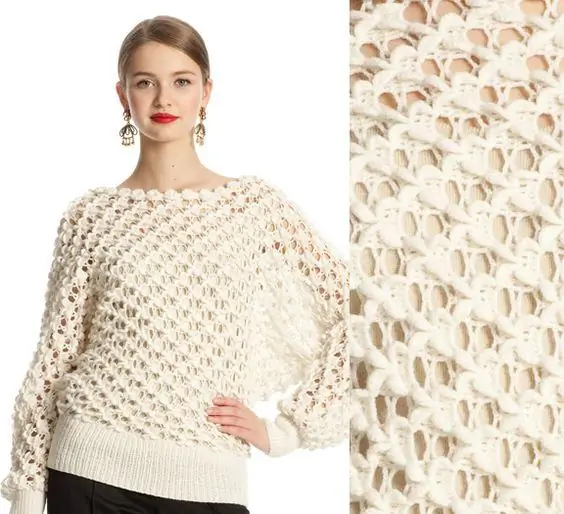
What do you need to know to crochet a bat sweater?

In today's world, everyone wants to stand out. Therefore, when choosing clothes, preference is given to original and unusual models. One of these is an interesting jacket "bat". Bringing an idea to life is easy. Craftswomen note that the ability to knit simple columns is enough
Seam allowances: all you need for the job

What are the seam allowances and what determines their size. Methods for applying them to fabric. Tables of allowances for different types of fabric and cut. The article reveals all the questions that may arise when performing and calculating allowances
Why do you need a camera aperture

Looking at professional photos, it seems to a beginner that he will not be able to achieve a similar result. But after all, world photographers also started from the basics, gradually mastering each function. We invite you to find out what the camera aperture is and what amazing effects it helps to achieve
How to shorten your trousers? What do you need to know for this?

Every woman at least once in her life had to deal with the problem of long trousers. And each of them was looking for an affordable solution that would be fast and high quality. We will consider some of them in our article
What you need to know about 20 kopecks in 1961

In the 18th century, the issue of minting a new coin with a face value of 20 kopecks was first raised. The reason for this was the "large distance" between the already existing coins of 50 kopecks and 10 kopecks. 20 kopecks 1961 is made of copper-nickel alloy and weighs 3.4 grams
