- Author Sierra Becker becker@designhomebox.com.
- Public 2024-02-26 03:47.
- Last modified 2025-01-22 22:09.
The world of embroidery is rich in its stitches and techniques. Thanks to them, you can create all kinds of masterpieces that become an adornment of clothes, room design items and other accessories. One has only to correctly select the embroidery technique that will be combined with the main product. In this article, we will analyze in detail the back-to-the-needle seam. It is also often called backstitch.

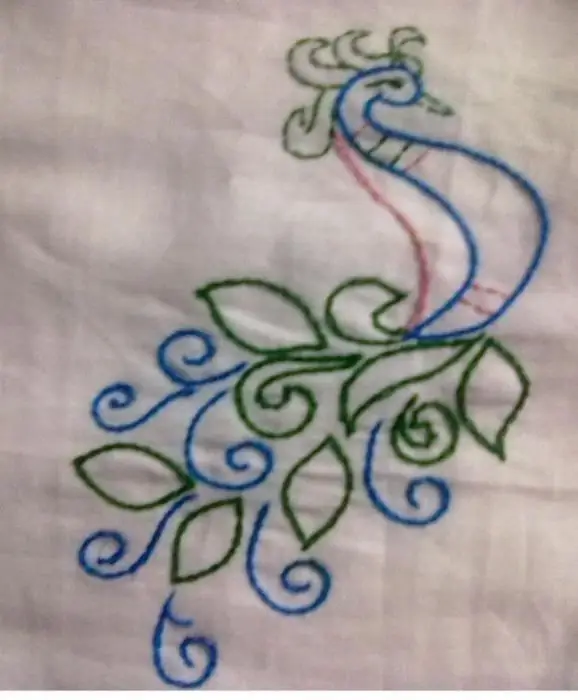
This stitch is an outline stitch and is used in embroidery to highlight elements and give clarity to the picture. They are also sometimes replaced with a sewing machine, connecting two parts together, but now we will talk about embroidery. In the works it is often used to depict the eyes, nose, mouth of animals, in general, all the details that require clarity.
On embroidery patterns, it is usually indicated by a solid line. In such sources, there are always explanations about which embroidery threads should be used and how many layers they should be folded. The main point here is the start of work only when the thing (or other accessory)fully prepared. And in the best case - after the product has been washed.
Secure the “back of the needle” seam at the very beginning, using a regular eyelet. It is better to take a needle not thick, with which you embroidered with a cross, but thin and sharp so as not to spoil the finished crosses. Such a technique is considered delicate and openwork, which is why it is necessary to use the same tools to implement it.

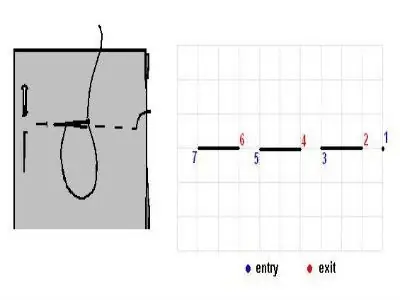
How to properly sew a back stitch? To begin with, carefully look at the diagram where this element is present. After we bring the thread to the front part, but not at the starting point, but stepping back a little in the direction of the drawing (usually this is one cell of the canvas horizontally, vertically or diagonally). As a rule, the tissue is pierced at point 1. After that, we insert the needle at the zero point. And we output at point 2, which is at the same distance from 1 as 0. It turns out that you are embroidering, returning back each time. When you complete the last stitch, on the front of the embroidery, fasten the thread on the wrong side in any way you know.
Another important point is what stitch size to choose. If the direction of the line does not change for you, that is, for example, it goes strictly horizontally, then you can choose not 1 cell, but more. It is believed that the stitch size should not exceed 4 cells, often on the needlewomen's forums they share their opinion that a length of 3 cells is optimal, otherwise the threads begin to sag. But if you have a curved line, then it is better to use only 1 cell.
Bebe careful and try to get into the previous stitch so that the seam is even and without gaps. And also try to evenly tighten the threads. If you notice that it doesn’t work out as planned, then it’s better to dissolve everything and try again. You may not be perfect at first, so practice small jobs first, and when you get your hands on it, it will be easy and fast.

As a result, a more accurate and attractive picture is obtained, and another important plus of this seam is that the wrong side also turns out to be quite neat. Experienced needlewomen sometimes replace the “back needle” seam with another or alternate it, as there is not always a desire to cut and re-stretch the thread or pull it on the wrong side.
Often there are disagreements between needlewomen about whether it is worth adding such strokes to the picture or not. Some people think that the color palette of a cross-stitched painting is enough. Others are sure that it is simply necessary to revive the composition.
Recommended:
Paper airplane - back to school years

We all come from childhood - this statement is true. One has only to start making some crafts with your child, as soon as you want to make an airplane out of paper and launch it into flight
Stitch "needle forward" in embroidery. Embroidery "forward with a needle" with diagrams and photos

Simple and versatile are the seams, during which the movement of the needle is directed forward. They can be used for manual work when sewing clothes or soft toys, decorating finished products, or as auxiliary techniques
Crochet crochet step in finishing finished products. Examples and Tips

And even if you prefer to knit, you still have to deal with a crochet sooner or later. For example, for finishing the edges of the finished product. It is for this case that such a knitting technique as a crochet step was invented
How to crochet an elastic band? Finishing clothes, hair decoration

Ribbon knitting accompanies almost every process of creating clothes using a hook or knitting needles. It is simply necessary in sweaters, hats, and socks. Therefore, it is worth learning the basics of its implementation. Our article and a detailed description of how to crochet an elastic band will help you with this
Embroidery with a back stitch: tips for beginners

Recently, many designers who make patterns for cross-stitch, began to supplement it with a back-needle stitch. It allows you to give the finished product a finished look, emphasize small details, or simply create the desired image
