- Autor Sierra Becker [email protected].
- Public 2024-02-26 04:44.
- Zuletzt bearbeitet 2025-01-22 22:11.
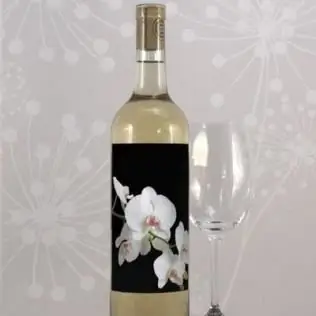
Wie macht man einem geliebten Menschen ein originelles Geschenk? Schenken Sie zum Geburtstag zum Beispiel einen ungewöhnlichen Champagner, dessen Etikett auf der Flasche Sie selbst mit einer herzlichen Gratulation oder einem Scherz angefertigt haben. Diese Idee gilt auch für andere Feiern. Wie es zu implementieren ist, werden wir weiter prüfen.
Zunächst müssen Sie sich ein Layout für die zukünftige Vorlage ausdenken: Bilder aus dem Internet nehmen, schöne Worte finden. Die Arbeit kann in Photoshop durchgeführt werden. Dieses Verfahren erfordert keine besonderen Fähigkeiten, es liegt in der Macht jeder Person.
Wie Flaschenetiketten für Geburtstage gemacht werden

Betrachten wir die Vorgehensweise am Beispiel von Adobe PhotoshopCS3. Wenn alle Bilder für die Arbeit bereit sind: Blumen, Hintergrund und andere Elemente, gehen Sie wie folgt vor.
1. Öffnen Sie Photoshop.
2. Bilder hochladen. Klicken Sie dazu in der oberen Symbolleiste auf den Reiter "Datei", dann auf "Öffnen" und wählen Sie die gewünschten Bilder (Hintergrund, Foto, Szenerie) aus.
3. Erstellen Sie ein neues Dokument (futureEtikette). Klicken Sie auf dieselbe Registerkarte "Datei", aber wählen Sie diesmal "Neu". Stellen Sie im angezeigten Fenster die Größe auf 12 x 8,2 cm ein, Name: „Ivans Geburtstagsflaschenetikett.“
4. Wir gehen zu der Datei über, auf der sich der Hintergrund befindet (wenn wir ihn nicht monoton machen wollen). Wählen Sie mit dem Werkzeug im linken vertikalen Bereich "Rechteckiges Auswahlrechteck" (gepunktetes Rechteck) den gewünschten Bereich aus und drücken Sie in der oberen Symbolleiste auf die Registerkarte "Bearbeiten" und dann auf "Kopieren".
5. Wir kehren zum leeren erstellten Blatt zurück und klicken auf "Bearbeiten" - "Einfügen". Der Hintergrund ist fertig.
Wenn Sie eine Volltonfarbe erstellen möchten, können Sie diese mit dem Füllwerkzeug aufnehmen und auf einen freien Bereich der neuen Datei klicken.

6. Jetzt müssen Sie das Foto des Geburtstagskindes bearbeiten. Kommen wir zur entsprechenden Datei. Der einfachste Weg, dies zu tun, besteht darin, mit der rechten Maustaste auf das Zauberstab-Werkzeug zu klicken, das sich in der linken vertikalen Symbolleiste befindet, und Schnellauswahl auszuwählen. Es erscheint ein gepunkteter Kreis mit einem Pluszeichen in der Mitte. Drücken Sie die linke Maustaste und wählen Sie den Teil des Fotos aus, den Sie entfernen möchten. Durch Loslassen der Taste können Sie den Vorgang wiederholen und den zu löschenden Bereich weiterhin markieren. Wenn Sie versehentlich ein Foto berühren, wird der umgekehrte Vorgang durch Drücken der "Strg"-Taste (in der unteren linken oder rechten Ecke der Tastatur) aktiviert. Im gepunkteten Kreis erscheint ein Minuszeichen. H alten Sie die Taste gedrückt, um herauszuzoomen. Drücken Sie nun einfach die „Löschen“-Taste aufTastatur (oder "Bearbeiten" - "Löschen"). Sie können das Ergebnis mit dem Radiergummi-Werkzeug bearbeiten.
Nach diesem Prinzip entsteht auf einer Flasche ein Etikett mit einem Foto des Geburtstagskindes. Wenn Sie möchten, können Sie jedoch stattdessen alles einfügen: einen Blumenstrauß, Kätzchen, ein lustiges Bild und mehr.
7. Kopieren Sie nun das ausgeschnittene Bild, wie in Schritt 4 beschrieben, und gehen Sie zu der Datei mit dem erstellten Hintergrund. Klicken Sie auf "Bearbeiten" - "Einfügen". Die Größe kann geändert werden, indem Sie auf Bearbeiten - Transformieren klicken und Frei transformieren auswählen. H alten Sie den Mauszeiger über das leere Quadrat um das Foto und ändern Sie die Größe, indem Sie es in die gewünschte Richtung ziehen.

8. Um eine Inschrift hinzuzufügen, verwenden wir das Werkzeug „Text“(Buchstabe T), mit dem wir schreiben, was wir wollen. Durch Auswahl der Buchstaben können Sie eine beliebige Farbe aus der Palette auswählen. Flaschenetikett zum Geburtstag fertig!
9. Wenn Sie zusätzliche Dekoration wünschen (Luftballons, Torte, Blumenstrauß), dann wiederholen Sie die Schritte 1 und 6.
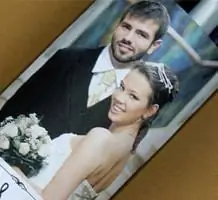
Anhand obiger Anleitung können auch andere Flaschenetiketten gest altet werden. Hochzeitsfotografie hilft zum Beispiel dabei, festlichen Champagner für das Brautpaar zu kreieren.
