- Author Sierra Becker becker@designhomebox.com.
- Public 2024-02-26 03:46.
- Last modified 2025-01-22 22:09.
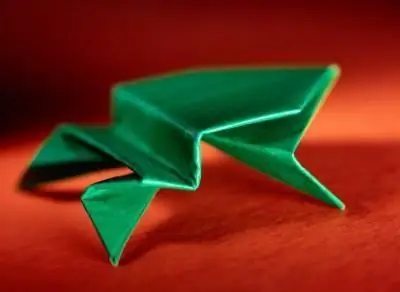
Today we will tell you how to make a paper frog. There are several ways to make this animal using the origami technique. Different options for how to make a paper frog differ in results (appearance and craft properties). For example, in origami, static and moving models are distinguished. In today's lesson, we will look at the second option on how to make a frog out of paper. Our design will have an interesting property - the ability to jump. And at a very significant distance.

For those who do not know or do not remember what origami is, we hasten to inform you that this term refers to Japanese art that describes how to make paper crafts. "Ori" means "folding" and "kami" means "paper". In general, origami is the art of creating models from the material mentioned above, without the use of glue and scissors (they may only be needed at the initial stage, since standard sheets are rectangular, and most crafts are made on the basis of a square).
So we only need paper, hands and patience to work. Let's take an A4 sheet of the color that our future jumper should have. We chose green, the most common among these amphibians, but that doesn't mean you have to do the same. We will leave the issue of color to your discretion. So, let's describe the process of how to make a paper frog.
Take a standard A4 sheet.

And make a square out of it. Fold the paper as shown in the picture.

And cut off the part that remains superfluous. Here's what it should look like.

Now fold the square along the second diagonal.

And unfold again.

Next, fold the sheet in half twice. First, press the top edge to the bottom, iron the fold. We wrap and do the same with the two remaining sides. You should end up with a shape with folds like this.

Now we begin to fold the square again along the diagonal line, but not to the end, but only to the midpoint of the line.


And now do the same on the other side. Fold up to half of the second diagonal.

Now press on the formed valve.

This is what we should end up with.

Now take one of the corners of the resulting double triangle.

And press it to the top of the figure.

We do the same work on the other side.

Now we press the working angle to the bottom as shown in the photo.

Same on the other side.

Now flip the work.

And bend the corner as shown in the photo.

Now on the other side.

There is very little left. Making paws.


Repeat the action on the other side.

Now bend the structure forward.

Retreat a little and return the paws to their original position.

Work done.

When you click on the "butt" our frog will jump.

If desired, you can add eyes, paint the back or do other decorative work. In general, the modelcan be considered complete. We hope that all the steps were easy for you and did not cause difficulties. Now you know one of the ways how to make a paper frog.
Recommended:
Application "Frog" from paper: how to make with a child

In kindergarten, children often make applications, origami and other paper crafts. This creative process develops perseverance and independence, accuracy and patience, fine motor skills of hands. The child learns to create something with his own hands, find different and identical details, decompose the general image into elements, develops imagination
How to make a paper vase. How to make a crepe paper vase

What do you need a paper vase for, you ask a question. The answer is quite simple - such crafts can be an excellent decoration for the interior of a home, office, or just a wonderful gift. In this article you will find information on how to make a paper vase. Today, there are a huge number of techniques for creating crafts from this material. You will get to know them by reading the article
How to make origami? Origami lessons for beginners

Origami lessons with a child can be started as early as 3-4 years old. It is most interesting for children to make toys, so we will devote our article to studying the simplest schemes that children can make. Parents can also try their hand at folding paper figures, so that later they can show a pattern to their children. How to make origami is shown in detail in the diagrams, and step-by-step instructions will help you complete the task correctly
DIY paper vase. How to make origami "paper vase"

Paper vase can be an unusual souvenir gift! It can be made from improvised materials using quilling and origami techniques
How to make DIY frog costumes

Holidays are coming soon and you don't know how to dress up your child to make him look the most original? This article will help you make the right choice
