Table of contents:
- Author Sierra Becker becker@designhomebox.com.
- Public 2024-02-26 03:46.
- Last modified 2025-01-22 22:09.
If you decide to make a Christmas tree for the New Year with your own hands, you will have to learn how to make a Christmas tree paper cone. All products are usually made on such a frame. Of course, you can buy a ready-made foam cone, but, firstly, this is not a very cheap option, and, secondly, you will be limited by the size of the product that you have found. The best idea is to make the base yourself. Explore your options. Use the method that suits you.

Production Methods
If you are thinking about how to make a paper cone for a Christmas tree with your own hands, you can rejoice, as there are several possibilities for making a base for decorating:
- Collapse from the sheet like a bag.
- Glue according to the pattern drawn on the basis of the circle.
- Make with the papier-mâché method using a bulk blank.
In the following sections, you will learn more about how to make a Christmas tree paper cone. Photos will clearly illustrate the process of work and the result. Each of the methods is quite simple to use, and which is more convenient is up to you.

Tools and materials
Whichever method you choose to make a Christmas tree paper cone, you will need the following:
- A sheet of drawing paper, cardboard or colored paper.
- Pencil.
- Compass or stencil (plate, dish, basin).
- Scissors.
- Glue or thermal gun (you can take double-sided tape or a stapler).
That's all you need. In some cases, you will also need to use a knife.
How to roll a cone out of a sheet
This method is simple and easy. A child can also complete the preparation. To understand how to make a Christmas tree paper cone in this way, it is enough to take a rectangular or square (which is available) sheet of thick paper and roll it into a bag. The more you wrap the workpiece, the narrower (slenderer) the cone will be.

To fix the product, you can glue the seam with PVA, with a thermal gun, fasten it with a stapler, use double-sided tape.
The next important step will be cutting the bottom, since when twisting a rectangular sheet at the bottom, you will get not a smooth edge, but with a corner on one side. Trim the part as carefully as possible, because this will determine how parallel the base of your Christmas tree will be in relation to the horizontal plane.
How to do a flat bottom
In the previous section, you learned how to make a Christmas tree paper cone using the twisting method from a rectangularblanks. If you can’t make a neat bottom by simply cutting it with scissors, and you need to make a lot of Christmas trees, you can make an auxiliary device for leveling. It is a template made of cardboard with a round hole corresponding to the diameter of the base of the cone.

You can make such a tool like this:
- Take a thick cardboard, for example, corrugated or glue the blank from several layers.
- Draw a circle with a compass or circle a suitable template (plate) along the contour.
- Cut a hole.
Use this tool as follows:
- Insert the cone folded from the sheet into the hole so that the contour of the circle of the tool matches the bottom of the cone.
- Take a sharp knife and cut off the excess paper.
Here is a finished cone with a neat bottom.
How to make a paper cone for a Christmas tree: step by step instructions
You can make the base in another way according to a pre-prepared template. In this case, you do not have to align the bottom part, as it will turn out neat. To work with this method, you need to do the following:
- Draw a circle on the sheet for making a cone, the radius of which corresponds to the height of the Christmas tree.
- Through the center draw the diameter guides perpendicular to one another.
- Cut the circle along the outline.
- Determine and cut out the part of the circle that you willuse for cone. You can take a quarter (for a cone of small diameter, that is, slender), half for a medium and three quarters for a wide one).
- Connect the blank by gluing the seam.

The first two options are more suitable for the Christmas tree, since the third one looks more like a hat or the roof of a house.
A neat cone is ready.
How to glue the base
In any of the presented methods of making a cone, the result is a hollow blank, with a thickness equal to the selected sheet of paper or cardboard. If you are satisfied with this version of the Christmas tree, you can start decorating. However, most often Christmas trees-cones are not hollow, but have a solid base. It not only gives the blank a finished look, but also gives additional strength to the base, which is important, since a decor that has a certain weight will be glued on it, and the structure should not fall apart under it.
Work options are as follows:
- If you rolled the cone from a rectangle, circle the circumference of the base on the prepared cardboard.
- If you used a tool to align the bottom, use the hole in it as a stencil for the base.
- Working with the template, you can also circle the base of the made cone or calculate the diameter of the circle using the formula by measuring the length of the circle (bottom of the cone).
As for gluing parts, this can be done with a thermal gun without additional gluing allowances, but simply end-to-end (wall thicknessconnect the cone to the circle of the base). If you use ordinary PVA, it is worth considering allowances for gluing, since the strength and setting speed of this composition is less than that of hot melt adhesive. Allowances can be made both on the base part and on the lower part of the cone. It is better to hide the allowances inside the bulk workpiece.
How to make a large Christmas tree paper cone with photo
If you decide to make an interior Christmas tree that you plan to put on the floor to decorate the room, then you will have to work a little more with the creation of the frame than for the desktop version. The most important thing for such a cone is strength, therefore, in addition to the cardboard wall, it is worth considering frame elements. It can be a wire or a rod made of another material (a wooden stick, for example). It will go through the center of the cone, acting as an axis. It's good if you fix it firmly in the base.

It is also easy to make additional stiffening ribs in the form of cardboard circles of the appropriate diameter, which will be glued along the entire height of the cone at an equal distance.
If you are going to make a cone for a large Christmas tree, it may be difficult to draw a circle of the appropriate diameter, which cannot be done with an ordinary stationery tool. In this case, you can choose one of the following methods:
- Take a basin or other blank of a suitable diameter (bucket, mirror, stool, countertop - whatever is on the farm).
- Find the compass you use to draw on the blackboard with chalk and use the marker.
- Make a drawing instrument yourself from a rod that can be fixed in the center of the circle (a stick with a needle or a carnation), and a writing instrument attached to a thread or rope to the top of the axis.

Papier-mache technique
This section will also teach you how to make a Christmas tree paper cone. Large or small you need the size, in this case it does not matter. The workpiece is strong and solid even without an additional frame. This option is suitable for those who do not have a single dense sheet to make a cone of the appropriate size.

Any paper, even newsprint or old magazines, will work with this method, however, you will need a blank base. You can use a plastic cone from a children's designer (the original part will not deteriorate and will return to its place), plasticine, plaster, polystyrene. Using one template, you can make many papier-mâché blanks. Proceed like this:
- Cut or tear newspapers into small pieces.
- Wrap the prepared template with plastic wrap and coat with PVA.
- Apply a layer of paper pieces to wet glue.
- Dry the first layer and then apply the second one using the same technology.
- Work in this way until the desired thickness of the workpiece.
- Cut the resulting shell and remove the original part.
- Install the frame rod if needed.
- Apply a few more coats to hold the halves together.
Everything is ready.
You learned how to make a Christmas tree paper cone. Start by making the base and then start decorating it.
Recommended:
How to make a chair with your own hands. How to make a rocking chair with your own hands

Furniture can be made not only from boards, but also from any available material. The only question is how strong, reliable and durable it will be. Consider how to make a chair with your own hands from plastic bottles, cardboard, wine corks, hoop and thread
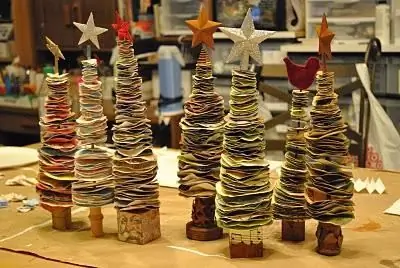
Christmas tree made of paper. We make a decorative tree with our own hands

A Christmas tree made of paper is the most beautiful present for the New Year. Such a product will surely serve as a beautiful decoration of the interior of the house. How to make a handmade Christmas tree? You will find the answer to this question in the materials of this article. We have selected the most interesting ideas for you. Learn them and put them into practice
Feather tree. Learning to make a beautiful decorative tree with your own hands

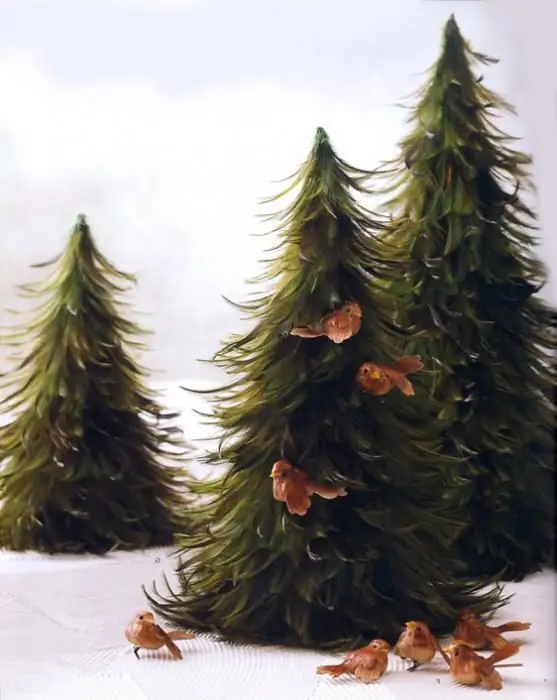
This article provides readers with information on how a Christmas tree is made from feathers. If you have all the necessary materials for work, each of you will be able to make this souvenir yourself at home
Christmas tree from napkins: you can make a real Christmas tree with your own hands

Crafts from waste material is a separate direction of needlework. What is especially pleasant, this type of creativity is available to everyone and is not limited by anything other than the imagination of the master. We bring to your attention an interesting idea. A Christmas tree made of napkins (it’s not difficult to make it with your own hands) can be made even by a child in a minimum amount of time and from materials that can be found in any home
Christmas tree made of cones. We make a decorative tree with our own hands

In this article we will talk about how a Christmas tree is made from cones. Such a product can be a good alternative to a living coniferous tree on the eve of the New Year holidays. Master classes are presented to your attention, which tell about the technology of making Christmas trees from pine fruits
