Inhaltsverzeichnis:
- Autor Sierra Becker [email protected].
- Public 2024-02-26 04:44.
- Zuletzt bearbeitet 2025-01-22 22:11.
Die Popularität des Lätzchens hat schon lange nicht nachgelassen. Viele Menschen erinnern sich daran, als Kind einen Schal getragen zu haben, der in seiner Form dem Oberteil eines Pullovers ähnelt. Ein solches Kleidungsstück ist äußerst angenehm zu tragen - es besteht keine Notwendigkeit, unbequeme traditionelle Schals zu binden. Sogar ein kleines Kind zieht die Shirt-Front mit Leichtigkeit an.

Mit der richtigen Garn- und Musterwahl schützt so ein Schal nicht nur vor Kälte und schützt vor Erkältungen. Nicht nur für Kinder, sondern auch für die Damen- und sogar Herrengarderobe kann ein Hemdvorderteil zum Unikat und Lieblingsstück werden.
Stricktipps
Einer der wichtigsten Schritte bei der Herstellung von Strickwaren ist die Wahl des Materials. Diese Regel gilt auch, wenn die Hemdvorderseite mit Stricknadeln gestrickt wird. Das zum Stricken gewählte Muster hat einen entscheidenden Einfluss auf die Wahl des Garns. Aber es gibt auch allgemeine Regeln:
- natürliche Fäden mit minimalem synthetischen Anteil werden bevorzugt;
- vor dem Stricken sollten Sie sich vergewissern, dass die Person, für die das Hemd bestimmt ist, nicht allergisch auf die Garnbestandteile reagiert;
- Material sollte weich sein, nicht kratzen und sich angenehm anfühlen.

Damit das Produkt lange seine Form behält und sich nicht verformt, sollten Sie es möglichst eng stricken. Dazu sollten Sie die kleinste Größe der Stricknadeln bevorzugen, mit denen solche Fäden gestrickt werden. Diejenigen, die eine ziemlich lockere Strickdichte haben, sollten Stricknadeln bevorzugen, die 0,5-1 Nummer dünner sind als empfohlen.
Strickmethoden
Es gibt mehrere Möglichkeiten, ein Hemdvorderteil mit Stricknadeln zu stricken. Die Wahl hängt zunächst vom Modell und der Person ab, für die das Produkt bestimmt ist.
Am beliebtesten ist das Stricken einer Hemdvorderseite in einem Kreis, beginnend am oberen Rand. In diesem Fall benötigen Sie die Fähigkeit, einen Raglan zu stricken oder einen Kreis zu machen, beginnend in der Mitte. Sie können auch eine Hemdfront nach dem Prinzip des Rundstrickens einer Passe herstellen. Diese Art von Produkt ist perfekt für Kinder im Vorschul alter, da es beim Anziehen nicht befestigt werden muss.
Allerdings sind solche Modelle aufgrund der Notwendigkeit, sie über dem Kopf zu tragen, nicht für Frauen (die ihre Haare verderben) und Kinder geeignet, die solche Verfahren nicht mögen. In diesem Fall ist eine gestrickte Hemdvorderseite mit Stricknadeln besser geeignet, deren Schema darauf hindeutet, dass sie mit Standard-Stricknadeln mit einer Naht ausgeführt wird. Sie können später einen Reißverschluss einführen oder einen Knopfverschluss machen.

Es gibt auch Möglichkeiten, eine Hemdfront nach Sweep-Mustern zu stricken. Beispielsweise wie in der obigen Zeichnung. In diesem Fall beginnt das Stricken nach dem Schema mit 8 Maschen, daher müssen Sie eine Nummer auf den Nadeln wählen, die ein Vielfaches dieser Nummer ist. NachdemDer Kragen der gewünschten Länge wird mit einem Gummiband 1 x 1 gestrickt, Sie sollten mit dem Stricken gemäß dem Muster fortfahren. Gleichzeitig ist es bequem, Rapports zu markieren, indem spezielle Markierungen an der Stricknadel zwischen ihnen aufgehängt werden. Nach dem vorgeschlagenen Schema können Sie eine Hemdfront sowohl im Kreis als auch mit zwei Stricknadeln stricken. Im letzteren Fall wird das Produkt am Ende des Strickens mit einer Naht oder einem Verschluss zu einem Ring verbunden.
Muster wählen
Bei der Auswahl eines Musters zum Stricken einer Hemdfront gibt es keine Probleme mit einer Beschreibung, wenn Sie sich an die entsprechenden Quellen wenden. Gleichzeitig ist es wichtig zu überlegen, für wen dieses Kleidungsstück bestimmt ist.
Beim Stricken eines Babyshirts ist es wichtig, das Geschlecht des Kindes zu berücksichtigen. Mädchen lieben verschiedene Rüschen, Rüschen und Schleifen. Für Jungen funktionieren solche dekorativen Elemente nicht.
Wenn die Hemdfront eines Mannes mit Stricknadeln gestrickt wird, sollte sich das Schema des ausgewählten Musters durch Strenge und Brutalität auszeichnen. Es kann glatt rechts und elastisch gestrickt werden. Bei mäßigem Gebrauch sehen Zöpfe und Aranas schick aus. Sie können auch ein "männliches" Reliefmuster aufnehmen.

In Fällen, in denen ein gestricktes Hemdvorderteil für ein Mädchen oder eine Frau bestimmt ist, ist der Spielraum für die Auswahl der Modelle unbegrenzt. Sie können durchbrochen, Spitze, mit verschiedenen Bindungen sein. Als dekorative Elemente können Perlen, Stickereien, verschiedene Broschen verwendet werden.
Erfahrene Strickerinnen, die sich nicht entscheiden können, wie sie ein Hemdvorderteil mit Stricknadeln stricken sollen, können zu einer Win-Win-Option raten. Modische, stilvolle und sehr schön aussehende Produkte aus Jacquards undSkandinavische Muster.
Musterherstellung
Der Tragekomfort eines Lätzchens ist ohne die richtige Berechnung der Schlaufen nicht möglich. Es ist wichtig, dass ihr Halsband eng um ihren Hals sitzt, aber nicht einschnürt. Wenn also eine Hemdfront mit Stricknadeln gestrickt wird, ist das Schema zur Berechnung der Maschenzahl recht einfach.
Der erste Schritt besteht, wie bei jedem anderen Stricken, darin, ein Muster zu erstellen. Es ist wünschenswert, dass seine Größe nicht zu klein ist. Das Muster wird in dem Muster gestrickt, mit dem der Kragen hergestellt wird. Nach dem Binden wird die Leinwand notwendigerweise gedämpft. Dadurch wird auf Fadenschrumpfung geprüft.

Schleifenberechnung
Die Berechnung der benötigten Schleifenzahl erfolgt in mehreren Stufen:
- Berechnung der Maschendichte (d. h. die Anzahl der Maschen und Reihen in einem Zentimeter Stoff).
- Es stellt sich der Grad der Dehnbarkeit der Probe heraus. Dazu wird die Breite der Probe im ruhigen Zustand und nach ihrer maximalen Spannung gemessen. Danach wird das Ergebnis der Division des ersten Indikators durch den zweiten ermittelt.
- Kopf- und Halsumfang wird gemessen.
- Das Ergebnis der Kopfumfangsmessung wird mit dem im zweiten Schritt ermittelten Dehnungsfaktor multipliziert. Danach wird der resultierende Wert mit dem Halsumfang verglichen, eine größere Zahl gewählt und 4 Zentimeter für eine lockere Passform hinzugefügt.
- Durch Multiplizieren der Strickdichte mit dem im vorherigen Schritt erh altenen Umfang erh alten Sie die Anzahl der Maschen, die zum Stricken gewählt werden müssen.
Standard-Strickmuster
Was auch immerVon demjenigen, für den die Hemdvorderseite bestimmt ist, kann Strickanfängern ein ziemlich einfaches Strickmuster empfohlen werden. Gleichzeitig werden Produkte für Erwachsene und eine Hemdfront für Kinder auf genau die gleiche Weise mit Stricknadeln gestrickt, der Unterschied liegt nur in der Anzahl der Arbeitsschlaufen.

- Die errechnete Maschenzahl wird nach der gewählten Methode auf die Nadeln geschlagen. Im beschriebenen Fall sollte es ein Vielfaches von 6 sein. Dies liegt daran, dass in diesem Fall vorgeschlagen wird, den Kragen mit einem Gummiband 3 mal 3 zu binden.
- Maschen werden auf 4 Nadeln verteilt und in Runden gestrickt, bis die gewünschte Halslänge erreicht ist. Danach beginnt die Erhöhung.
- Das Hinzufügen von Maschen erfolgt abwechselnd links und rechts von der Gruppe der Gesichtsmaschen in jeder dritten Reihe, zwei werden aus einer linken Masche gestrickt.
- Wenn während der Zunahme deutlich wird, dass die Größe der Hemdvorderseite die gewünschte Größe erreicht hat, werden die Strickschlaufen geschlossen.
Es empfiehlt sich, das fertige Vorderteil des Hemdes in Halbsäulen oder festen Maschen zu häkeln. Wenn ein gestricktes Vorderteil für ein Mädchen gedacht ist, können Sie sich etwas mehr Mühe geben und den Rand mit einer schönen Spitze binden oder Fransen und Quasten machen.
Jeder Stricker, auch ohne viel Erfahrung, kann eine schöne Hemdvorderseite machen. Finden Sie dazu einfach ein geeignetes Schema, haben Sie Geduld und geben Sie sich alle Mühe.
Empfohlen:
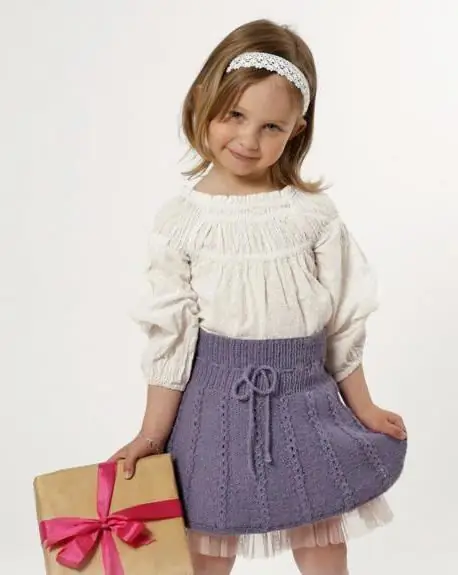
Schöne und originelle Röcke für Mädchen mit Stricknadeln (mit Beschreibungen und Diagrammen). Wie man einen Rock für ein Mädchen mit Stricknadeln strickt (mit einer Beschreibung)

Für eine Handwerkerin, die mit Garn umgehen kann, ist es kein Problem, einen Rock für ein Mädchen mit Stricknadeln (mit oder ohne Beschreibung) zu stricken. Wenn das Modell relativ einfach ist, kann es in nur wenigen Tagen fertiggestellt werden
Mütze mit Stricknadeln: Schema, Beschreibung. Strickmützen mit Stricknadeln

Wenn du nicht die Geduld hast, große und voluminöse Arbeiten zu stricken, dann wähle eine kleine und einfache Sache, um anzufangen. Eine der beliebtesten Tätigkeiten für Näherinnen ist das Stricken von Mützen mit Stricknadeln. Schemata, Beschreibung und Endergebnis hängen davon ab, für wen das Modell erstellt wurde
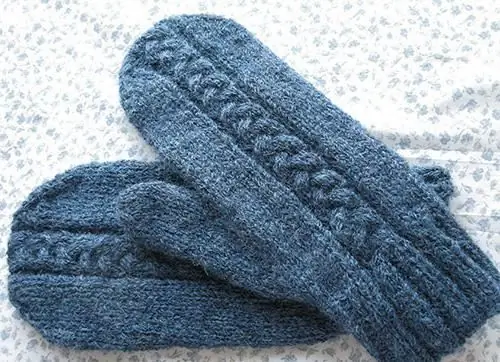
Wir stricken Fäustlinge mit Stricknadeln - wir schaffen Schönheit mit Mustern oder mit einem Muster

Fäustlinge sind im Gegensatz zu so großen Dingen wie Pullovern, Kleidern, Pullovern viel schneller gestrickt und es wird weniger Wolle benötigt. Diese kleinen Produkte können jedoch sehr schön gemacht werden, wenn man in sie Fantasie und ein wenig Ausdauer investiert. Wir stricken Fäustlinge mit Stricknadeln und tragen sie dann gerne
Wie fertigt man eine Mütze mit Stricknadeln? Wie man eine Mütze mit Stricknadeln strickt: Diagramme, Beschreibung, Muster

Stricken ist ein interessanter und aufregender Prozess, der lange Abende in Anspruch nehmen kann. Mit Hilfe des Strickens schaffen Handwerker wirklich einzigartige Werke. Aber wenn Sie sich unkonventionell kleiden möchten, müssen Sie lernen, wie man selbst strickt. Schauen wir uns zuerst an, wie man eine einfache Mütze strickt
Sehr schöne gehäkelte Servietten mit Muster. Stricktipps

Häkeldeckchen schmücken seit Jahrhunderten Häuser. Es gibt sie in verschiedenen Formen und in allen möglichen Größen. Sie sind sowohl in elegantem Weiß als auch in anderen Farben des Regenbogens gestrickt. Für einen Urlaub mit festlichen Motiven und als Alltagsdekoration. Warum also nicht selbst binden?
