Table of contents:
- Author Sierra Becker becker@designhomebox.com.
- Public 2024-02-26 03:46.
- Last modified 2025-01-22 22:09.
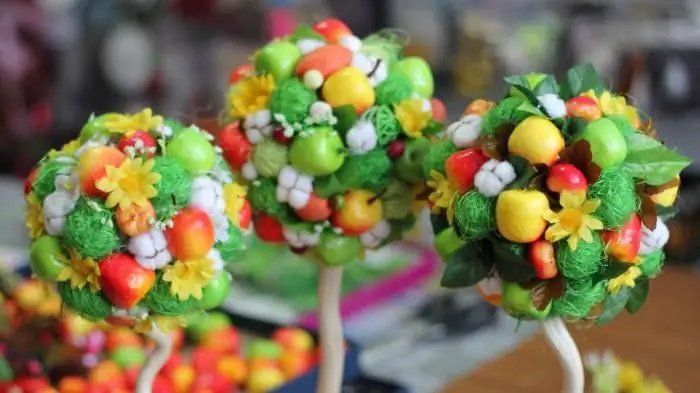
Today it has become fashionable to decorate a room with small unusual trees, which are called topiaries. The masterpieces created are similar to real trees only in appearance: they also have a crown and a trunk. As for the topiary crown, it can consist of anything.
It can be coffee beans, nuts, pebbles, flowers made of fabric or polymer clay, ribbons, beads and many other attributes of floristry. Everything will depend on the imagination of the creator of this wonderful piece of furniture. The creation of topiary from all kinds of fruits has also become widespread.

Making fruit topiary with your own hands is quite simple. To do this, it is enough to collect a set of simple household tools that are available in every home. Fruit topiary will look good both in the kitchen and on a large table in the hall. This beautiful and simple product can serve as a decoration for a long time, delighting not only the owners, but also guests with its own appearance.
Fruit topiary is considered a symbol of we alth and prosperity. To make a fruit topiary, you can use fresh fruits or models of variousfruits. It is not difficult to make such an unusual tree with your own hands. The master class described in the article will help you comprehend the whole process.
Using recommendations, you can complete the task. You will certainly succeed in making a wonderful accessory for the home or a great gift item. For example, you can make a topiary on March 8 and pleasantly surprise your loved one or friends.

Such a gift will certainly be appreciated.
Fruit Topiary
You can make a lot of useful and beautiful things with your own hands. Let's try and make a bright and memorable topiary. For manufacturing, you should prepare the following accessories, materials and tools:
- premade plastic or foam ball;
- decorative fruits;
- glue and glue gun;
- smooth branches for the trunk;
- flowers, greenery and sisal;
- foam;
- skewer;
- gypsum;
- twine;
- plastic cup or planter.
So let's get started:
- Use a Styrofoam ball as a base. Glue it with decorative fruit using a glue gun.
- For a tree of "happiness" you will need two curved trunks. Weave them together and fix them in the crown.
- Then you can add flowers and greenery to your composition.
- Be sure to fill in the gaps between fruits.
- For better attachment of branches, first make a hole in the foam with a skewer. Next, apply Moment glue to the artificial greenery and fix it well.
- In a plastic container, dilute the gypsum with water. Then fix the tree and let the mortar harden.
- The height of the plastic planter can be reduced to the size you need if necessary.
- Then wrap the pot with twine and fix with glue. If desired, decorate your pot with sisal and cover the inside with a green cover.
- For decoration, you can use decorative figurines, rattan balls and blades of grass.
As you can see, the work turned out to be simple and interesting. The topiary you created (for March 8 or any other holiday) is amazing and beautiful.
Preliminary stage
Topiary is a small part of the interior at home. Also, such a tree of happiness can be presented to someone as a gift. A variety of materials are used to form such crafts. The master class offered below will tell you how to make a tree from artificial fruits with your own hands.
Required tools and materials
Before you start the creation process and learn how to make a topiary, you will need to prepare the following:
- newspapers;
- pot;
- threads;
- foil;
- floral sponge;
- artificial vegetables, fruits;
- wooden skewers;
- wood stick;
- scotch.
Alternatively, you can use a ready-made ball - for the base of the topiary, made of plastic or foam. Having prepared all the necessary materials, you can startto production.
Create fruit topiary together: master class
Cooking the base:
- To create the base of fruit topiary, crumple up some newspapers and wrap them in foil.
- Wrap the resulting newspaper ball tightly with masking tape. It is best to make two more layers so that the base does not lose its shape.
- The wooden stick will later become a tree trunk, which will attach to the resulting ball.
- Then wrap twine or thread around the ball, evenly changing direction - for the correct imposition of turns. After winding the ball, you can start wrapping the tree trunk, moving from top to bottom.
- Poke a small hole in the ball with an awl.
- Similarly place the rest of the fruit over the entire surface of the ball.

Then pierce the fruit with a pointed stick and fix it on the ball.

Your fruit topiary is almost ready, it remains only to decorate it.
Decoration
To decorate the topiary, you need to prepare the right amount of fruits, vegetables and flowers. To make the creative process more fun and let your imagination run wild a little, you can cut them in half. You can also decorate the tree with rhinestones, birds, butterflies, leaves and ribbons.

For a good brightness of the masterpiece, add some flowers and berries.
Some recommendations
- For a good fit of the twine to the trunk, apply glue and wait until it dries completely.
- Topiary can be used with both artificial and real fruits.
- You can combine any details and fruits, making them a bright highlight of the tree.
- Try to make the topiary in bright colors, using various accessories and details in colorful shades.
- The beauty of the topiary lies in the combination of bright fruits and delicate flowers.
- You may need weights to keep the fruit topiary stable.
Make models of fruits
To create dummies of fruits, you will need:
- newspaper;
- foil;
- color paper;
- glue;
- scotch.
To give the desired shape to the dummy fruit, you should gently crumple the newspaper. Then you need to fix the newspaper form with foil and secure with tape. Next, apply layers of newspaper and glue. Then leave to dry. For ease of use, in the process of applying layers of newspaper and glue, you can pierce the model with a wooden skewer.
Paste the finished shape with colored paper: covering in layers until the desired color is obtained.
The dummy variation provided may include drying natural fruits.

To do this, wash the fruit well and dry in the sun. Turn fruit once a day. This natural fake will be ready in two weeks.
Preparing and decorating the pot
Do you want, but don't know how to decorate a pot? If you do not have a pot, then you can make it yourself from thick cardboard, gluing the shape well. Then the pot should be wrapped with twine or thread and cover the entire surface with transparent glue.
Then you can put a floral sponge on the bottom of the pot and stick a tree trunk into it. It remains to fill the pot with plaster or mounting foam.

If you prefer to use polyurethane foam, then after complete drying, you need to cut off excess fragments.
Conclusion
The master class presented in the article will provide indispensable assistance in creating a magnificent fruit tree. A handmade fruit topiary will harmoniously fit into the interior of your room. And on winter evenings it will remind you of a warm summer.
Among other things, this is an excellent opportunity to engage not only yourself, but also the children in making this skillful craft. Fruit Topiary is durable and can please for a long time, reminding of moments of creativity and warm memories.
Recommended:
Topiary from beads: ideas and master classes. New Year's topiary

Do-it-yourself beaded topiary for the New Year is a beautiful and unique gift for relatives and friends. It is practical, as it will not fade or crumble, remaining a bright and elegant decoration of the interior. Unlike a live Christmas tree, a beaded tree will last for many years and take up little space, creating a sense of celebration. Such a gift will keep warm memories and will be associated with the person who gave it
How to photograph fruit in water

Clear transparent water, bright fruits, a whirlwind of air bubbles - all this together looks very impressive. If you are learning to shoot, be sure to try this technique as well
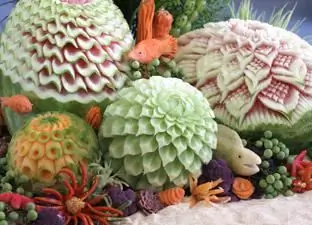
Delicious masterpieces: fruit and vegetable carving

Everyone can master the carving of fruits and vegetables. Having learned the simplest techniques, you can gradually polish your skills, impressing households and guests with your creations
Creative gift for March 8 with your own hands. Gift for mom on March 8

Do you think that all women still like only surprises that cost a lot of money? In fact, expensive underwear, diamonds, fur coats and cars are far from always able to deliver the same pleasure as a creative gift for March 8, made by oneself. After all, creating it, you invested in this gift not only your time and imagination, but also all your soul and love
DIY gifts for March 8: ideas, tips, master class

You will find ideas for creating gifts for March 8 with your own hands in our article. Step-by-step manufacturing instructions and corresponding photographs of each sample will be presented, we will also advise which craft is better to entrust to a child of preschool or school age
