Table of contents:
- Author Sierra Becker becker@designhomebox.com.
- Public 2024-02-26 03:47.
- Last modified 2025-01-22 22:09.
Making three-dimensional paper flowers is an art. From them you can create picturesque still lifes, beautiful bouquets, postcards for the holiday, even wedding bouquets for the bride. Now on sale for creativity produced a huge amount of interesting materials. This is a double-sided colored paper of various qualities, multi-colored corrugated, quilling strips of various widths, there are even stencils and patterns.
This article gives several options for making paper flower crafts with detailed descriptions and diagrams. After looking at the photos, you can try to do such interesting work at home on your own, delighting loved ones with beautiful pictures.
The simplest flower
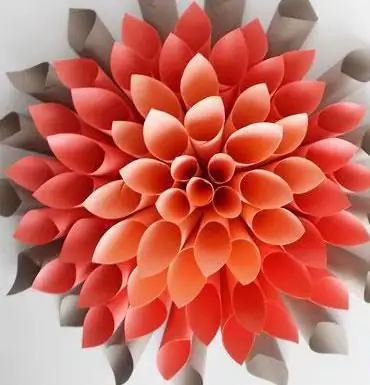
This is an easy paper craft for kids. Flowers are lush and voluminous. You can add carved leaves and stems to them, making a bouquet. Let's start in order. How to make such paper flower crafts? First you need to cut strips of paper of the same length and width. If the petals are multi-colored, then cut out the details of various colors.

It is desirable that the combinations are harmonious. Next, the preparations are made. You need to take and glue the very edge of each strip. It turns out the form of a drop. When a lot of these “drops” have already been made, you can start assembling the flower itself. To do this, you need to glue the “drop” with another of the same part. The work is painstaking, but the more petals are glued together, the more magnificent and beautiful the finished work is. If the flower consists of different petals, you need to carefully look so that the colors alternate alternately, then the composition will be perfect.
Bright aster
This is a very voluminous and beautiful paper flower craft. For such work, it is most convenient to use commercially available notebooks with an adhesive strip. Such square leaves usually have bright colors, from which it is convenient to create a lush bud. For such a paper flower craft, you must also first make blanks. What are they? Let's consider in more detail. It is necessary for each petal to twist the cones and seal the edges with the existing sticky edge.

The main thing is that all the cones are the same. You can first practice by making a few test copies. If it starts to turn out, then you can already choose the color scheme suitable for this wonderful lush flower. Usually asters have several shades, smoothly moving from dark to lighter. Before starting work, it is necessary to cut out a circle from cardboard, the diameter of which is equal to the size of the flower. It is desirable that the color matches the bottomlayer of cones. Next, assembly begins. The first layer, the darkest, is glued along the edge of the circle with a cone bell from the center, like the sun. The second layer for a children's paper flower craft is glued with a 1 cm indent inside the circle. And so we continue to the central point, changing shades.
3D carnations
In order to make such paper flower crafts, diagrams and descriptions need to be studied carefully. To begin with, we prepare wide strips of paper of the same size, you can use corrugated paper. When the cut is ready, it needs to be folded several times. For such a carnation, sharp thin petals are needed. To do this, the paper collected in several layers must be thinly cut, but not to the end of the strip, but leaving about 1 cm of paper free.

When all the strips have a terry edge, you can start twisting the layers. In the middle, you need to tightly twist a strip of light color, as in the photo. Then we glue the edge of the dark color to the light one and continue to wind up a strip of a different shade. The end is also well glued so that the flower holds firmly. The last step is to spread the petals.
Bouquet of hyacinths
Such children's crafts of paper flowers can be presented to mom on March 8. This will be a real surprise. To make such a bouquet, you need to buy several cocktail tubes, preferably green, like stems. Half of the flower is the petals, the other half is the leaves. To make the first part, you need to cut a strip of colored double-sided paper from oneside, not to the end, leaving 1 cm below for gluing.

The next step is to wind each petal onto a round stick (pencil). This will give them roundness and volume. The even part of the strip is smeared with PVA glue and wound tightly in a spiral from the middle of the stick up to the edge. It remains to make green leaves. The principle of doing the work is the same. The green square on one side is cut into sharp sheets. Lubricate the even part with glue and simply wind the paper around the tube from below, only pressing each turn tightly.
A little bit about quilling technique
Many lovers of beautiful paper flower crafts have tried to work with stripes using the quilling method or, in Russian, twisting. On sale there are whole sets of already cut strips of thick paper designed for such work. You can also buy a hook for convenience and templates with cut out circles of different diameters. Each element of quilling is done by twisting these strips. Then they are given any shape by indentation. Let's look at how you can make paper crafts in this way.
3D quilling flowers
The flower consists of two parts: a yellow center and colored carved leaves. To perform such crafts, you need strips from the set - thin and widest. We take a quilling hook and tightly twist a thin strip. You should get a tightly coiled tight circle.

The edge of the part is sealed with PVA. wide stripebefore twisting, you need to prepare by cutting the edge with a fringe to the middle. Glue the beginning of a wide strip to the middle of the flower and begin to wind it tightly. The last turn also needs to be glued. It remains only to bend the colored petals with a soft movement from the center to the edges. Volumetric flower is ready.
Sunflower
This is a very beautiful DIY paper craft. Color schemes can be seen in the photo. Here, a combination is used. The first part is yellow sunflower petals, which are cut out of thick double-sided paper. The second part is the black "seeds" inside, made according to the "cones" method described earlier.

Work begins with cutting a thick cardboard circle of large diameter. This will be the basis for our work. Next are the petals. A template is drawn according to which all identical elements are cut out. The first petals are glued along the contour of the circle with sharp tips away from the center. The next layer is more difficult, since here the petals should be voluminous. To achieve this effect, you need to cut the lower blunt part of the petal in the middle. The incision is small, about 1 cm. When the petal is glued, these cut edges overlap one another, while the petal itself bends a little and becomes voluminous.
Black center
It remains to decorate the sunflower with black "seeds" in the center. To make them fluffy, and the product itself looked beautiful, you need to prepare it from black square leaves with a sticky layerseveral cones. The last step will be gluing the middle. Work begins on the outer edge and converges to the center. Such sunflowers can be made on a large A3 sheet and complement the picture with stems and leaves. You can decorate a class with such a composition in the fall or make a picture for an exhibition. First place guaranteed.
The most difficult craft is a rose
The most difficult object to work with paper is a rose. This beautiful and delicate flower is loved by all women and girls. But making such a craft is a rather complicated process. The difficulty lies in self-drawing. First you need to cut out a circle from paper, for example, pink, as in the photo. Then, using a simple pencil, you need to draw a spiral in which all the turns will be the same width. You can practice in advance, because the first time it may not work. It's okay, you don't need to get upset, but try again. You can train on plain white paper.

Next, with small sharp scissors, you need to cut the resulting spiral along the contour. Then gently twist it, the edges can be smoothly bent to the sides. The end of the spiral is glued to the last turn. It remains with the help of PVA to fix the finished rose on a sheet of cardboard by adding petals.
Making paper crafts is creative, interesting and painstaking work. But the work will not be in vain. A beautiful picture will please the eye for a long time. And paper flowers will never wither, and will decorate the room for a long time, reminding of warmdays.
Recommended:
Original and beautiful do-it-yourself plasticine crafts: interesting ideas and recommendations
Almost all children love to sculpt various figures and use all kinds of materials for this creative process - from sand on the playground to culinary dough. This activity is not only very exciting, but also useful. In the process of creating beautiful crafts from plasticine, the child is engaged in an interesting business that directly affects his mental development, emotional state and instills a sense of beauty
Beautiful and original skirts for girls with knitting needles (with descriptions and diagrams). How to knit a skirt for a girl with knitting needles (with a description)
For a craftswoman who knows how to manage yarn, knitting a skirt for a girl with knitting needles (with or without a description) is not a problem. If the model is relatively simple, it can be completed in just a few days
Easy paper crafts: diagrams and photos. Learning to make paper crafts with children
Children love to make paper crafts. This lesson develops fine motor skills, spatial thinking, accuracy and other useful qualities. The diagrams and photos offered in the article will help you make interesting products correctly
Dress from crochet motifs: diagrams and descriptions, original ideas and options, photos
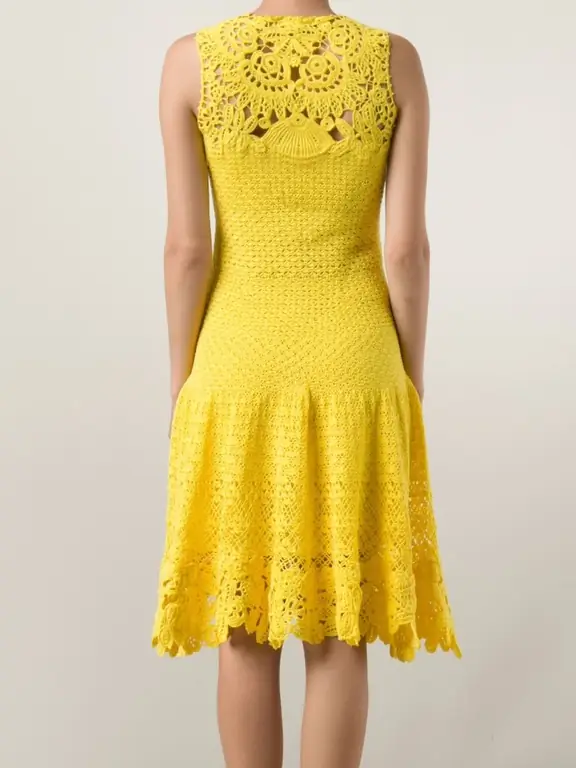
Truly, a hook is a real magic wand in the skillful hands of skilled craftswomen. In addition to the main types of clothing, knitting dresses is a separate article. Dresses are knitted for a long time and difficult, I must say frankly, especially large sizes. This is a very laborious process, even the simplest dress requires patience, perseverance, attentiveness, accuracy, the ability to take measurements and much more from the knitter
Original and simple plasticine crafts - interesting ideas and recommendations

Making simple plasticine crafts is an exciting activity not only for kids, but also for their parents. Plasticine is the best material for the manifestation of the imagination and capabilities of children, with its help you can make incredibly beautiful and original things
