Table of contents:
- Author Sierra Becker becker@designhomebox.com.
- Public 2024-02-26 03:45.
- Last modified 2025-01-22 22:09.
Knitting a border with knitting needles is a rather specific work that is necessary for decorating a wide variety of products: from dresses and skirts to shawls and scarves.
A border is a narrow canvas with a pattern that differs from the main part. There are two ways in which a border can be knitted with knitting needles (the schemes and descriptions of each of them have their own specifics). First: several long rows form a longitudinal canvas. Second: with the help of a large number of short rows, a transverse border is formed.

Shawl knitting border: how to place the pattern
Many models of shawls and scarves have a central (or main) part and a decorative (tying).
At the same time, craftswomen often use some simple pattern to complete the main part. The main decoration of such products is the harness, which is knitted in parallel with the central part or performed separately and then sewn on.
The shawl can be any geometric shape:
- Rectangle or long stripe.
- Square.
- Triangle.
Openwork border, knitted, is located as follows:
- Along oneedge of the product.
- Near two sides (forming one corner).
- Attached to all sides of the shawl (three or four corners).
Angles (usually 90 degrees) are formed by matching two stripes of the pattern, the edges of which are cut at an angle of 45 degrees.
Forming an angle: methods and options
Depending on the skill of the knitter and the features of the model chosen by her, she can use one of three methods for forming corners on a knitted fabric:
- Knit two parts, the edges of which will be symmetrically beveled at an angle of 45 degrees. This effect is achieved by reducing or adding one loop (at the beginning or end of the row) in every second row.
- Start knitting a long border, mark a loop in the center and reduce one stitch in every second R before and after the marked stitch. The fabric will contract 2 stitches in every second R, and as a result the desired angle will be formed.
- Start with a few sts, mark the center st and add 1 st every other st before and after the marked st. The canvas will expand by 2 sts every other st and this will also form a right angle.
Of course, all these tricks are not needed if you create a border with knitting needles, the schemes and description of which already provide for all additions and reductions. Many designers provide models with ready-made instructions. Below are the schemes, following which, you can quickly and easily knit an openwork strip.
Knitting triangle garter stitch
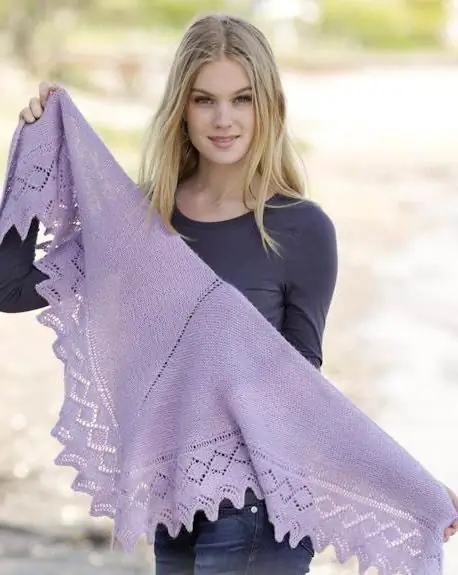
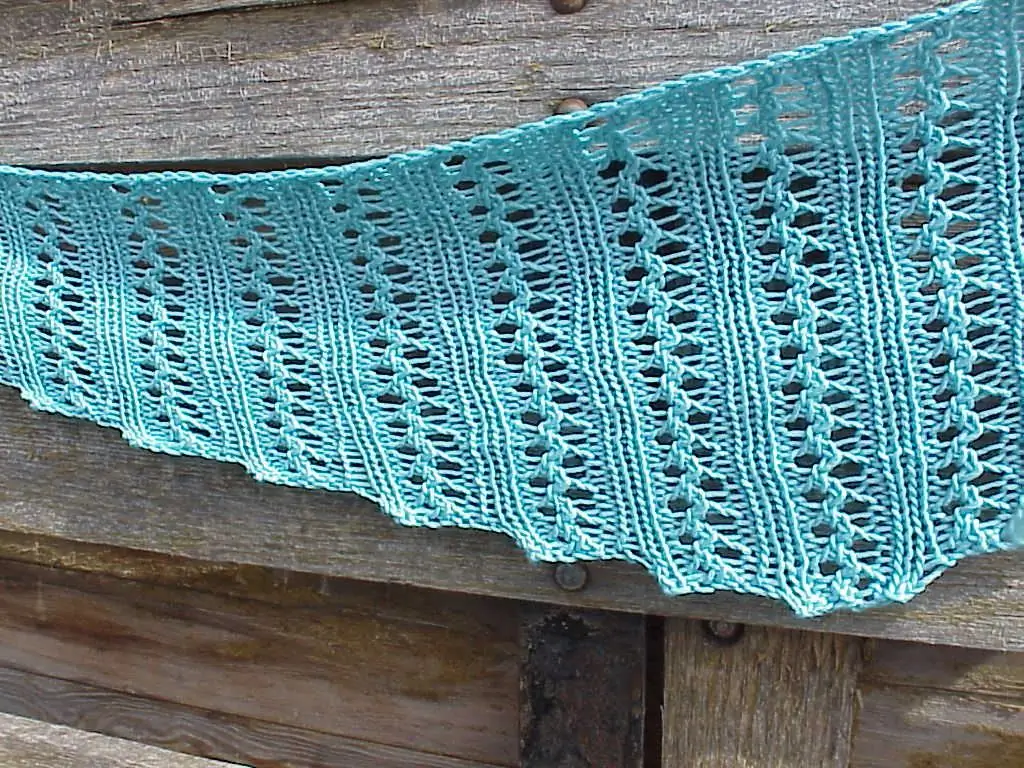
The model whose photo is located at the beginningarticles, has a fairly dense central part and a beautiful openwork border along two sides.
To form the main part, dial seven Ps on the knitting needles and mark the central one with a marker.
Then work as follows:
- Remove the edging P, yarn over (H).
- Knit two P knit.
- Make N, knit the marked P and perform another N.
- Knit two P.
- Make N and knit the last P.
- The second and all even rows are knitted with facial P.
- The third and all odd rows are knitted in such a way that the number of P is increased by four elements.
As a result of knitting H, openwork holes will be obtained. If the craftswoman wants to avoid such an effect, she should form new stitches from the broaches between adjacent stitches.
When the triangle is ready, the edge that will not be decorated with a border should be crocheted (several rows of single crochets).
Knitting edging: patterns and description of knitting a triangular shawl
The first pattern for knitting a border is indicated by A.1. It requires cast on 27 loops to create the first row. The figure shows that the canvas will shrink on the right side and expand on the left. As a result, the craftswoman will receive a part for the right side of the shawl.

Protruding teeth will also be placed on the right side of the border.
Next, the knitting of the border with knitting needles will continue according to scheme A.2. There is already a full-fledged openwork pattern, a rhombus, and teeth on the rightsides. Continuing to work on the border, repeat pattern A.2.
To form a corner, the craftswoman should refer to diagram A.3. Here is the transition from the border for one side of the shawl to the fabric of the border for the second side.

Further work must be done, focusing on scheme A.4. Rapports repeat the same number of times as the pattern according to scheme A.2.
Finish the knitting of the border according to the scheme A.5.

The openwork strip is ready, now it can be carefully sewn to the triangle knitted earlier.
What to do if the sizes of the paintings do not match
When knitting a border with knitting needles, the patterns and description of which are similar to those given in this article, there may be some difference in size. In the process of assembling the product, the craftswoman may find that the tight borders are longer than the side of the shawl to which the lace should be sewn. This shortcoming is easily eliminated by knitting the main part of the shawl.
In the event that the triangle, on the contrary, has too long edges, it should be slightly dissolved and the loops re-closed. In other words, some fitting is required.
In cases where the openwork border with knitting needles is performed in parallel with the main part, this problem does not arise.
Recommended:
Beautiful and original skirts for girls with knitting needles (with descriptions and diagrams). How to knit a skirt for a girl with knitting needles (with a description)
For a craftswoman who knows how to manage yarn, knitting a skirt for a girl with knitting needles (with or without a description) is not a problem. If the model is relatively simple, it can be completed in just a few days
Shawl Engeln: scheme and description. Openwork shawls with knitting needles with patterns
The wardrobe of a modern woman is quite diverse, but often only the use of additional accessories makes her look truly individual. Fashion is characterized not only by new trends, but also by the fact that long-forgotten items of clothing often find new life. One of these accessories is a shawl
Japanese bactus needles. Openwork bactus knitting needles. How to tie a bactus? Knitting needles and our instructions will help you
Every day such an unusual accessory as an openwork bactus becomes more and more popular. A knitted or crocheted knitted product looks not only unusual, but also very beautiful
Openwork stripes with knitting needles: diagrams with descriptions. Openwork knitting patterns
Openwork knitting from fine yarn is suitable for light summer outfits: blouses, tops, hats, scarves, T-shirts. From cotton threads, airy lace napkins, paths for furniture, and collars are obtained of amazing beauty. And from thick yarn you can knit a pullover with openwork stripes, a sweater or a cardigan. It is only important to choose the right pattern for the product
Knitting a square with knitting needles: options, patterns, patterns and description

Knitting time flies by, especially when the details are small and the company is pleasant. It is all the more surprising to find that in a short time enough modules have accumulated to create the intended product. A blanket of friendship from squares, knitted by the whole family, will not only warm you on cool evenings, but also remind you of a pleasant time spent among people close to your heart
