Table of contents:
- Author Sierra Becker becker@designhomebox.com.
- Public 2024-02-26 03:47.
- Last modified 2025-01-22 22:09.
It has long been known that in any interior, small and, at first glance, insignificant details are important. It is they who give grace, beauty and originality to the room. Therefore, in the article presented below, we will study the features of crocheting the "Sunflower" napkin. Schemes and a description of the whole process will allow readers to create an interesting and colorful thing. Which will certainly decorate the interior of any room.
Preparing yarn
Experienced needlewomen say that various small crafts are most conveniently made from the remnants of knitting threads. But despite this, the first skein that comes across should not be used for a number of reasons. First of all, the color should match the idea. Since we are planning to knit a sunflower napkin, you need to choose yellow yarn and black or brown. The thickness of the skein should also be taken into account. Napkins are best made from fine yarn. Perfect fitfor these purposes "Iris". Especially if you want to make an openwork fabric. But in extreme cases, you can use thin acrylic yarn. But it is better to refuse fleecy and "shaggy" skeins.

Tool selection
Even novice needlewomen can crochet a napkin "Sunflower" according to the presented schemes and descriptions. True, only if a good tool is prepared. But what is hidden under this term? In fact, everything is simple. Professional masters are convinced that the ideal hook is the one that is comfortable to hold in your hand. Therefore, we immediately refuse from a long or too short one. In addition, it is believed that it is easiest to work with a metal tool. Although readers who are in the habit of knitting in large loops, it is wiser to consider a wooden one. The size of the selected tool must match the thickness of the thread. If you want to knit a canvas from simple columns, you can take a smaller hook.
The initial stage of knitting
Next, we will offer different patterns and descriptions of the crochet "Sunflower" napkin. However, if you study various master classes prepared by professional needlewomen, it becomes clear that the starting steps are identical in all cases. Knitting a simple or openwork napkin begins with making an amigurumi ring. Readers who are familiar with the technique that describes the features of knitting toys do not need any explanation. And they can move on to the next item. If such a term is heardfor the first time, then we suggest studying the instructions, which will not only reveal the secret of the mysterious name, but also teach you how to start crocheting napkins correctly.

Amigurumi ring
Amigurumi is a crochet technology for various toys. It was invented in Japan. But after a short amount of time, it spread all over the world. The needlewomen fell in love with her so much that even the patterns and descriptions of crochet napkins (including the "Sunflower" napkin) prefer to build, starting with the amigurumi ring, which is done as follows:
- Preparing yarn and hook.
- Wrap the tool twice with knitting thread.
- Remove the resulting loop.
- Slightly stretch, trying not to unravel.
- And tie with six single crochets.
- Close the row into a ring, connecting the first and last loops.
- After performing all the described actions, pull the initial tip of the skein.
- As a result, the center of the resulting circle closes.
- Now we need to knit three rows, focusing on a specific pattern or adding loops on our own and expanding the circle to the desired size.
- Then turn the circle over with the initial tip of the thread towards you.
- And then knit in the opposite direction.
If the master is just starting to learn the basics of crocheting, you can continue to work according to the standard pattern and description of the "Sunflower" napkin. Crochet in this case, tying the product is clockwise, as it impliessimple technology. And accordingly, there is no need to turn the formed circle towards you.
Plain napkin

First of all, we invite readers to study the technology of making an elementary product. However, despite its simplicity, it looks very original and beautiful. Work begins with knitting an amigurumi ring. We use black or brown yarn for this. It is better to present further actions in the form of a list:
- In the second row, double the number of loops.
- In the third, we increase through one column.
- Turn over the circle and then knit counterclockwise. Or we continue to work in the standard order.
- In the fourth row we make an increase through 2 loops.
- In the fifth we knit columns with one crochet. We make an increase through three loops.
- In the sixth - single crochets, we do not increase and decrease.
- In the seventh - columns with one crochet. Increase through three loops.
- In the eighth - single crochets. Increase through two loops.
- In the ninth - columns with one crochet, we do not increase.
- The tenth row is knitted in a circle, making an increase with an interval of two loops.
- Eleventh - with an interval of three loops.
Thus, it is possible to crochet the center of the Sunflower napkin. Description of further actions involves knitting petals.
Preparation of sunflower petals

Experienced needlewomen prefer to startknitting these details directly from the core of the flower. However, novice craftsmen can first prepare the petals, and then sew them on with a needle and thread. To do this, you need to take a yellow knitting thread and knit twenty details. In this case, we will not load the reader with a step-by-step description. The crochet sunflower doily pattern will best explain the necessary steps.
Having successfully completed the work, we collect all the details together. First we sew the top row of petals, and then in between the bottom row. In conclusion, we remove all the threads so that they do not spoil the beauty of the craft. After that, we use the finished napkin for its intended purpose or present it to someone close.
Round napkin

If the above description and crochet pattern for the "Sunflower" napkin seem difficult for a novice master, we suggest making a different version of the craft. It is a circle that can be enlarged to the desired size. However, for its implementation, green yarn should be prepared. It will serve as a background for our flower. It is also worth noting that this model does not need to start with an amigurumi ring. Otherwise, the technology is quite simple, and further the reader will be able to verify this for himself:
- First of all, prepare a black or brown knitting thread and knit a chain of six stitches.
- Close it into a ring, connecting the first and last loop.
- Tie a chain with twelve single crochets.
- We knit the next two rows, moving alongcircle and from time to time adding loops. In this case, there are no strict recommendations regarding increases. Therefore, the reader can navigate independently.
- Cut the working thread.
- We continue to crochet the Sunflower napkin with yellow and green yarn.
- We knit four columns of yellow yarn and one - green. Repeat the step to the end of the row.
- In the next two rows on the yellow petals, we increase the number of loops to eight, we also knit one green one. Repeat the step to the end of the row.
- Increase the number of loops in the yellow petals to ten, knit two loops in green. Repeat the step to the end.
- Narrow the petal, knit eight yellow loops and six green ones.
- In the next two rows - eight yellow and ten green.
- Cut the threads, fasten and hide. This completes the creative process.
Napkin with beads

The next version of the product under study looks very interesting. For its implementation, beads or beads should be prepared in the amount of one hundred and eighty pieces. Then we take a black or brown thread and, guided by the scheme, we knit the middle. Change the yarn to yellow and add two more rows. We take a needle and thread, sew on loops of beads. Then we use the hook again and tie each petal of the craft. Such a crocheted napkin "Sunflower" will not only protect a wooden or other surface, but will also become an excellent interior decoration.
Openwork napkin
Ifthe previous version of the craft seems to the reader to be insufficiently bright and expressive, then we suggest studying another one. Experienced needlewomen say that it is better for him to use a thin thread and a hook of the appropriate size. Otherwise, the work is also carried out in a circle, highlighting the black or brown center and yellow petals.

So we figured out how to crochet a napkin "Sunflower". Schemes and descriptions will help novice craftsmen to bring an interesting idea to life. After all, it is not difficult to do this. You just need to want.
Recommended:
Knitted shoes (crocheted) with a description and diagram. From slippers to boots

Boots, ballet flats, sandals and slippers are all knitted shoes (crocheted). You can work with the description and diagram of each of them, modifying it to suit your taste and needs. Then you get something unique. And if you pick up elegant yarn, you get really beautiful knitted shoes
Need a bib (crocheted)? Scheme and description of its elements

In bad weather, you want to shelter children from the cold as reliably as possible. But how to do this if mom is not around? For example, in kindergarten or school. Where children dress on their own and educators and teachers do not always follow how the scarf is tied. A shirtfront (crocheted) will come to the rescue. Its scheme is most often simple and yarn is required much less than for a scarf
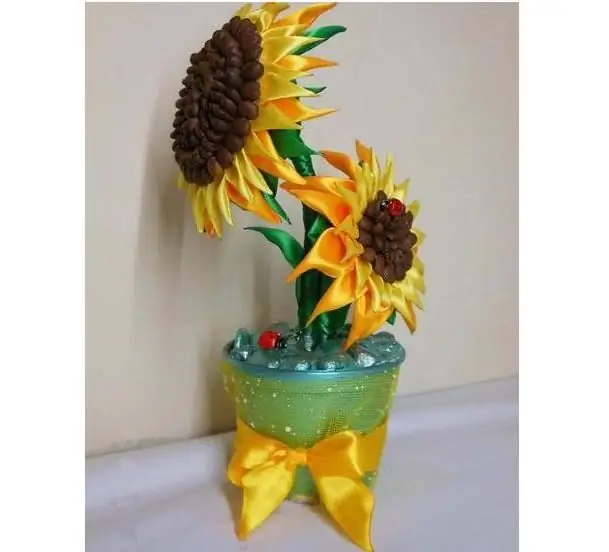
Topiary "Sunflower": necessary materials, step by step description, photo

The article will present a master class on making topiary "Sunflower". You will learn what materials you need to use, how to strengthen crafts in a flower pot, what craftsmen use to assemble the middle of a flower so that it has the shape of a hemisphere, and how it can be filled
Crocheted tracks: diagrams and description

Special comfort, warmth and charm to the interior of any home give products made by hand. Thin tablecloths, bright napkins and openwork paths enliven and decorate the dining area, making it attractive for households and guests. If you want to learn how to crochet beautiful interior items, this article is for you. In it, we will present different crochet patterns, simple, understandable descriptions and give the necessary recommendations
Crocheted slippers: diagram, description. Slippers crocheted from squares: pattern

Home slippers always attract attention. They can be made from a variety of materials. Products that are made by hand always look original. In this article we will talk about how to crochet slippers. A diagram of some products will also be presented. You will definitely pick up something for your family members
