
Inhaltsverzeichnis:
- Rosenzweig mit drei Knospen
- Zubereitungen für kleine Rosenblätter
- Mittelgroße und große Blütenblätter erstellen
- Kantenbearbeitung von Werkstücken
- Knospe leer
- Anziehen der Knospe mit Blütenblättern
- Weiter eine Blume bilden
- Erzeugung einer halb geöffneten Knospe
- Erstellen einer offenen Knospe
- Kelchblätter herstellen
- Blätter erstellen
- Zweigmontage
- Vorbereitung zum Zusammenbau der Rose
- Stammverdichtung
- Knospen sammeln anFiliale
- Autor Sierra Becker [email protected].
- Public 2024-02-26 04:44.
- Zuletzt bearbeitet 2025-01-22 22:11.
Es gibt mehrere Möglichkeiten, mit eigenen Händen eine Blume aus einem Satinband zu machen. Betrachten Sie mehrere Techniken, die sowohl für Anfänger als auch für Handwerkerinnen geeignet sind, die bereits mit diesem Material vertraut sind. Lassen Sie uns versuchen, eine schöne Innenrose zu schaffen, die schwer von natürlichen zu unterscheiden ist. Wie Sie Schritt für Schritt eine Blume aus einem Satinband machen, erfahren Sie in unserer Meisterklasse.
Rosenzweig mit drei Knospen
Auf dem Zweig machen wir drei Varianten der Blume - offen, halboffen und geschlossen. Alle drei Rosen werden nach dem gleichen Prinzip gesammelt, nur mit einer unterschiedlichen Anzahl an Blütenblättern. Bevor wir Blumen aus Satinbändern herstellen, bereiten wir die folgenden Werkzeuge und Materialien vor:
- Dichtes, hochwertiges Satinband, 5 cm breit. Die Farbe der Knospen können Sie selbst wählen, für Blätter und Stängel ist es wünschenswert, einen naturnahen Grünton zu wählen.
- Eine Kerze, um die Ränder des Bandes zu verbrennen.
- Ahle oder dünne Nadel.
- Papierhandtuch.
- Toilettenpapier.
- Klebepistole.
- Folienblatt.
- Schere.
- Blumenband passend zum grünen Satinband.
- Dünner und dicker Blumendraht oder gewöhnlicher Draht, der mit Blumenklebeband bedeckt ist.

Zubereitungen für kleine Rosenblätter
Alle Materialien sind ziemlich erschwinglich und die meisten sind leicht in Bastelläden zu finden. Jetzt fangen wir an, Rosen zu machen. Bevor wir Blumen aus Satinbändern herstellen, bereiten wir Rohlinge für die Blütenblätter vor. Wir brauchen sie in drei Größen: klein, mittel und groß. Wir fangen bei den Kleinsten an. Schneiden Sie dazu das Band in 4 cm lange Segmente, für eine Knospe benötigen Sie 7 Stück. Das Blütenblatt selbst wird 4 cm breit sein, die Zuschnitte müssen quadratisch gemacht werden, aber da das Klebeband noch eine Kante hat, schneiden wir etwa 7 mm ab und lassen einen kleinen Rand. Dann schneiden wir die zusätzlichen Ecken ab und bilden ein Blütenblatt. Wir runden das Werkstück an drei Seiten ab. Satinbandblumen für Anfänger zu machen ist so einfach.
Mittelgroße und große Blütenblätter erstellen
Jetzt beginnen Sie mit der Herstellung mittelgroßer Blütenblätter. Sie benötigen 10 Stück für eine Blume, 3 davon - um auf die Knospe zu passen. Rosen haben Hemdblätter, die sich in der untersten Reihe befinden. Dies ist eine Möglichkeit, eine schöne Satinbandblume natürlicher zu machen. Sie können drei zusätzliche Rohlinge dafür kochen, dies verleiht der Rose eine natürliche Form. Wir schneiden das Band in Segmente mit einer Länge und einer Breite von 4,5siehe Wir lassen auch zusätzliche 2 mm. Wir bilden ein Blütenblatt. Dann beginnen wir mit der Erstellung von 10 großen Blütenblättern. Wir schneiden das Band in 5 cm breite Segmente und runden es an drei Enden ab. Wenn die Randleinwand oben auf dem Blütenblatt auftaucht, muss sie abgeschnitten werden, da sie während der Wärmebehandlung stark schrumpft und die Leinwand verformt. Dies ist optional auf der Unterseite.

Kantenbearbeitung von Werkstücken
Wir machen weiterhin mit unseren eigenen Händen eine Blume aus einem Satinband. Jetzt brauchen wir für die Arbeit eine Kerze oder ein Feuerzeug. Wenn alle Blütenblätter ausgeschnitten sind, müssen ihre Ränder versengt werden, da sonst das Band zu bröckeln beginnt. Mit Hilfe von Feuer können Sie auch die Form der Blütenblätter ändern und sie in verschiedene Richtungen biegen. Wir stellen die Kerze auf einen Teller, um die Arbeitsfläche vor Wachs zu schützen, und zünden sie an. Dies ist eine Möglichkeit, schnelle Blumen aus Satinbändern herzustellen. Wir beginnen mit der Bearbeitung der Kanten mit den kleinsten Blütenblättern: Wir ziehen sie schnell durch die Mitte der Flamme, damit sich kein Ruß bildet. Verbrennen Sie vorsichtig die Ränder aller Blütenblätter. Sie müssen nicht gebogen werden. Das Material ist ziemlich formbar und erfordert daher keine zusätzliche Verarbeitung. Die gleiche Verarbeitungsoption wird verwendet, bevor eine Kanzashi-Blume aus einem Satinband hergestellt wird. Wenn Sie den Blütenblättern eine geschwungene Form geben möchten, legen Sie sie einfach auf einen Spülschwamm und drücken Sie einen erhitzten Teelöffel darauf.
Mittelteile werden genauso bearbeitet. Aber drei Rohlinge für die letzte Reihe müssen um die Kanten gebogen werden, um die Kerze zu h alten. Unter dem Einfluss der Temperatur beginnt sich das Blütenblatt nach innen zu biegen. Es ist nicht notwendig, es stark zum Feuer zu bringen, da sonst Brandflecken entstehen. Es reicht aus, nur die Kanten ein wenig zu verstauen. Dann drehen wir das Werkstück um und schmelzen den Schwanz ein wenig, damit er sich in die andere Richtung biegt. Jetzt sind die Mittel- und Hemdblätter fertig. Die größten Werkstücke können leicht zum Rand verdreht werden, wodurch sie länger über der Flamme geh alten werden. Die scharfe Spitze muss auch gebogen werden, damit das Blütenblatt beim Zusammenbau sauberer liegt. Entferne danach die Kerze.

Knospe leer
Lassen Sie uns nun mit dem Zusammenbau der Knospe fortfahren. Bevor Sie aus einem Satinband eine einfache Blume machen, müssen Sie einen Rohling für den mittleren Teil machen. Gleichzeitig ist es ratsam, die Klebepistole an die Steckdose anzuschließen, damit sie Zeit zum Aufheizen hat. Aus der Folie rollen wir eine Kugel mit einem Durchmesser von ca. 2,5 cm, Sie können die Größe ändern - es hängt davon ab, welche Blumen aus einem Satinband hergestellt werden können. Für eine solche Kugel benötigen Sie ein Blatt aus starrer und dichter Folie mit einer Breite von 30 cm. Es ist ratsam, Blumenklebeband für die Verarbeitung der Stiele zu kaufen. Aufgrund der Klebeseite ist es bequem damit zu arbeiten. Sie können Wellpappe verwenden, aber Sie müssen Klebstoff darauf auftragen. Das Blumenband wird passend zur Farbe der Blätter ausgewählt. Es ist besser, sich nicht auf die Namen der Farben zu konzentrieren - sie können von Hersteller zu Hersteller unterschiedlich sein.

Anziehen der Knospe mit Blütenblättern
Wenn die Klebepistole heiß ist, beginnen Sie mit dem Zusammenbau der Blume:
- Nehmen Sie eine Kugel Alufolie und zwei mittelgroße Blütenblätter, die in die Knospe passen.
- Nehmen Sie ein Blütenblatt, bestreichen Sie den Randkleben und einen Kegel formen.
- Wir legen es auf den Ball und tragen die richtige Menge Kleber auf.
- Drücken Sie auf die Ränder des Kegels, ohne die Spitze zu berühren, damit sich die Spitze der Kugel schließt. Den Kleber braucht man nicht zu bedauern, da das Klebeband nicht gut auf der Folie haftet.
- Nun bedecken wir mit dem ersten Blütenblatt sozusagen die Mitte, bestreichen den Rand mit Klebstoff und drücken es gegen das Werkstück.
- Klebe die restlichen Teile zusammen.
Du solltest am Ende eine kegelförmige Rosenknospe haben.
Weiter eine Blume bilden
Jetzt nehmen wir die ersten 7 Blütenblätter und fangen an, sie nacheinander auf das Werkstück zu kleben. Versuchen Sie, die Knospe nicht vollständig zu schließen und die Blütenblätter auf derselben Höhe zu fixieren.
Der Prozess besteht aus den folgenden Schritten:
- Drücken Sie das Blütenblatt an die gewünschte Stelle und klappen Sie es mit den Fingern fest.
- Kleber auftragen und erneut drücken.
- Klebe es fest auf den Rohling und verschmiere die Ränder auf allen Seiten, um eine feste Knospe zu bekommen.
- Das zweite Blütenblatt wird etwas seitlich versetzt aufgeklebt. Kleber wird unten und auf der linken Seite aufgetragen, das erleichtert die weitere Arbeit. Die Oberkante muss frei bleiben.
- Der nächste ist ebenfalls überlappt, aber unten und beidseitig verklebt.
- Bei der sechsten lassen wir eine Kante frei und eine Seite der siebten wird darunter gebracht und überlappend verklebt.
- Versuche, alle 7 Blütenblätter gleichmäßig über die Knospe zu verteilen. Falls gewünscht, kann der Rand mit Klebeband verschlossen werden, dies ist jedoch nicht erforderlich.
Eine Rose ist fertig - wirmachte eine Blume im Knospenstadium. Für die anderen beiden benötigen Sie die gleichen Leerzeichen. In der Endphase werden Kelchblätter hergestellt.

Erzeugung einer halb geöffneten Knospe
Jetzt lernen wir am Beispiel einer Rose, wie man Blumen aus halboffenen Satinbändern macht. Nehmen Sie die mittleren Blütenblätter und folgen Sie diesen Schritten:
- Setze einfach die Reihe der Blütenblätter fort, so dass das nächste auf das vorherige folgt. Sie können es 2 mm höher anheben als die anderen.
- Kleber unten und in der Mitte am rechten Rand des ersten Blütenblattes auftragen, so auftragen, dass er von der Knospe weggebogen ist.
- Lass den linken Teil offen. Kleber von unten auftragen und die Kanten zur Mitte andrücken.
- Das nächste Blütenblatt etwas zur Seite schieben, biegen und in der Mitte Kleber auftragen.
So fügen wir die ersten fünf Blütenblätter ein. Der Abstand zwischen ihnen sollte etwas größer sein als in der ersten Reihe. Es ist unerwünscht, die Mitte vollständig geschlossen zu machen - es sieht nicht sehr schön aus. Wir füllen das fünfte Blütenblatt unter das vierte und kleben es von allen Seiten. Jetzt müssen Sie fünf weitere Blütenblätter auf dem Rohling sammeln. Sie werden auf gleicher Höhe angebracht, aber anders geklebt: Wir kleben die Mitte, den Boden und die Mitte einer der Kanten. Das andere Ende muss offen bleiben. Es ist wichtig, dass sich das Blütenblatt auf gleicher Höhe wie die anderen befindet.
Je größer die Knospe wird, desto breiter werden die Blütenblätter. Sie müssen versuchen, diesen Prozess zu kontrollieren, um eine schöne und gleichmäßige Rose zu erh alten. Kleben Sie vier Blütenblätterüberlappen, und der letzte wird unter dem vorherigen gefüllt. Jetzt nehmen wir fünf große Blütenblätter mit einer gebogenen Kante. Wir kleben die erste dort, wo wir die vorherige Reihe beendet haben, etwas tiefer als der mittlere Teil. Wir verteilen alle fünf Blütenblätter so, dass alle passen. Wir befestigen die ersten vier Überlappungen und die letzte wird für die vorherige gefüllt. Wir haben die zweite Knospe - halb offen.
Erstellen einer offenen Knospe
Für eine offene Rose müssen Sie alle Schritte noch einmal wiederholen und dann die verbleibenden fünf großen Blütenblätter nehmen und beginnen, sie nur von unten zu kleben, indem Sie sich spiralförmig bewegen. Wenn Sie eine Blume aus Satinbändern machen, sieht sie auf dem Foto wie eine echte aus. Die letzten drei Hemdblätter werden in zufälliger Reihenfolge geklebt. Die Rose wird natürlicher und vollständiger aussehen. Wenn ein Blütenblatt aus der Knospe herausfällt, kann es geklebt werden, aber die Blütenblätter sollten leicht zur Seite abweichen, wodurch ein zerzauster Effekt entsteht.
Kelchblätter herstellen
Im nächsten Schritt beginnen wir mit der Herstellung von Kelchblättern. Jede Knospe hat 5 davon. Schneiden Sie dazu das grüne Band in 5 cm lange Quadrate, die jeweils 3 Mal gef altet werden - aus einem Stück erh alten Sie 3 Kelchblätter. Nehmen Sie eine Schere und runden Sie die Enden ab. Öffnen Sie das Band und schneiden Sie es in drei Teile. Nehmen Sie nun eine Kerze und schmelzen Sie die Rohlinge ein wenig, damit sie sich nach außen drehen. Insgesamt werden 15 Stück benötigt. Wir kleben die Kelchblätter so auf die Knospe, dass sie zu ihr passen, also mit der konvexen Seite nach außen, und umgekehrt bei der offenen Knospe.
Blätter erstellen
Jetzt machen wir uns an die ArbeitFlugblätter. Jede Rose hat ein dreiblättriges Blatt und im unteren Teil des Zweigs ein fünfblättriges Blatt. Das heißt, wir brauchen 14 Blätter. Für sie nehmen wir auch ein Quadrat aus einem 5x5 cm großen Band Rosenblätter in verschiedenen Größen. An einem fünfblättrigen Ast befinden sich ein großes Blatt, zwei mittlere und zwei kleine. Auf drei Blättern - ein großes und zwei mittlere. Ein Quadrat von 5 x 5 cm ergibt 1 großes Blatt.

Zuerst die Kanten auf beiden Seiten abrunden. Das Blatt hat eine runde Basis, daher haben wir auch den unteren Teil abgeschnitten, um es seinem natürlichen Aussehen näher zu bringen. Die mittleren haben die gleiche Form, sind aber kleiner. Um die Arbeit zu erleichtern, empfiehlt es sich, sich selbst ein Muster anzufertigen, indem man es zum Beispiel von einem echten Rosenblatt abnimmt. Sie können die Blätter mit einem Löffel oder einem anderen Gegenstand mit abgerundeter Spitze adern. Wir erhitzen es auf einer Kerze und zeichnen Streifen auf einer weichen Oberfläche mit einer scharfen Seite. Jetzt müssen Sie Nelken machen: Wir nehmen eine Schere und bringen kleine Kerben am Rand des Blattes an. Wir nehmen eine Kerze und versengen die Ränder. Das Blatt ist fertig.
Zweigmontage
Um die Blätter zu formen, benötigen Sie einen Draht mit einem Durchmesser von 0,7 mm, der mit Blumenband bedeckt ist, oder fertige Stiele. Der Draht kann jede Farbe haben, aber das Band muss auf die Farbe des Laubs abgestimmt sein. Für das mittlere Blatt eines fünfblättrigen Zweigs benötigen Sie einen 15 cm langen Draht und für die äußersten 10 cm, für einen dreiblättrigen Zweig 10 cm bzw. 5 cm. Wir bereiten alle Blätter vor, kleben sie an den Draht und fangen an, die Äste zu sammeln. Nehmen Sie für ein großes Blatt ein großes, zweimittlere und zwei kleine Blätter, schneiden Sie ein 17 cm langes Stück vom Blumenband ab und schneiden Sie es in zwei Hälften. Wir ordnen die Rohlinge gegenüberliegend an, biegen den Draht und beginnen, den Ast mit Hilfe eines Klebebands zu sammeln, indem wir ihn gut festziehen. Wir geben dem Ast die gewünschte Form. Wir sammeln alle Zweige auf die gleiche Weise.
Vorbereitung zum Zusammenbau der Rose
Jetzt wissen wir, wie man Blumen aus Satinbändern macht, es bleibt, sie zu einer einzigen Komposition zusammenzusetzen. Beginnen wir mit der Erstellung einer Innenrose. Zum Befestigen benötigen Sie den dicksten Floristikdraht mit einer Länge von 40 cm, für Knospen teilen wir ihn in zwei Hälften und für die Hauptrose nehmen wir die gesamte Größe. Wir nehmen eine Blume und stechen sie mit einer Ahle oder einer Stricknadel von hinten durch, damit der Draht bequem eingeführt werden kann. Wir beginnen, die Kelchblätter mit einer Klebepistole anzubringen und verteilen sie gleichmäßig über die Knospe, ohne das Loch zu schließen. Gießen Sie Kleber hinein und führen Sie den Draht ein.
Stammverdichtung
Zentralrosen haben keinen dünnen Stängel, daher muss er verdichtet werden. Sie können dies mit einem normalen Küchentuch tun. Wir schneiden es in 4 Teile - für einen Stiel benötigen Sie 3 Streifen. Wir f alten sie 2 mal ohne zu kleben. Dann beschichten wir den Stiel mit Klebstoff und beginnen, das Papier von der Basis aus aufzuwickeln, wobei wir regelmäßig Klebstoff hinzufügen. Wir fixieren die Spitze, nehmen den nächsten Streifen, tragen Klebstoff auf die Kante auf, wickeln ihn auf und verdicken so den Stiel über die gesamte Länge. Um die Knospen zu verdicken, nehmen Sie ein zweilagiges Toilettenpapier und wickeln Sie es auf die gleiche Weise und versuchen Sie, einen glatten Übergang zu schaffen.

Knospen sammeln anFiliale
Lege die geöffnete Rose beiseite und beginne Knospen zu sammeln. Wenn sie fertig sind, nehmen wir das Floristikband und fangen an, den Stiel damit zu umwickeln, indem wir uns von der Blume nach unten bewegen. Ungefähr in der Mitte fügen wir Blätter hinzu, befestigen sie auch und bewegen uns bis zum Ende weiter nach unten. Jetzt sammeln wir den Busch. Eine geöffnete Rose ist immer etwas niedriger als eine halb geöffnete Knospe. Vor allem wird es eine geschlossene Knospe geben - das ist das Merkmal von Rosen. Deshalb befestigen wir sie zuerst und dann eine halboffene Blume.
Das Blumenklebeband selbst ist durchscheinend, also müssen Sie es in mehreren Schichten fest wickeln und ein wenig dehnen. Um die Knospe zu befestigen, bewegen Sie sich zuerst nach unten zum Befestigungspunkt und dann zurück und wieder nach unten, dann liegt sie flach. Wir biegen den Draht etwas zur Seite und wickeln die Knospen so, dass die Blätter herausschauen. Auf Höhe der zweiten Knospe wickeln wir einen dreiblättrigen Ast. Wir wickeln das Klebeband nach unten und befestigen einen fünfblättrigen Zweig etwa 8 cm von den gewickelten Blättern entfernt. Es sollte in die entgegengesetzte Richtung des dreiblättrigen Zweigs gerichtet sein.
Wir wickeln das Blumenband auf die gleiche Weise auf und ab, um einen gleichmäßigen Stiel zu erh alten. Wir schließen den Schwanz und erheben uns. Zusätzlich können Sie eine Klebepistole verwenden. Es bleibt nur übrig, die Blätter zu biegen, ihnen eine Form zu geben und die Knospen der zentralen Rose leicht zu biegen, damit sie nicht zu fest anliegen. Rosa ist bereit. Sie können einen Strauß erstellen, indem Sie einen Zweig nur aus Knospen, offenen und halboffenen Rosen herstellen und die Farbe der Blütenblätter nach Ihrem Geschmack auswählen, einen Strauß oder einen anderen machenBlumenschmuck.
Empfohlen:
Temari-Kugeln, wie man sie macht? Wie man einen Temari-Ball stickt
Die Kunst von "Temari" ist das Sticken von leuchtenden Mustern auf Bälle. Muster können einfach oder abstrakt sein, mit Formen, die sich in verschiedenen Winkeln schneiden (Dreiecke, Rauten, Ovale, Quadrate, Ellipsen usw.). Dies ist eine sehr lustige und entspannende Handarbeit, die Sie zu Hause, vor dem Fernseher oder auf einer Reise machen können
Kleine Meisterwerke: DIY Satinbandblumen
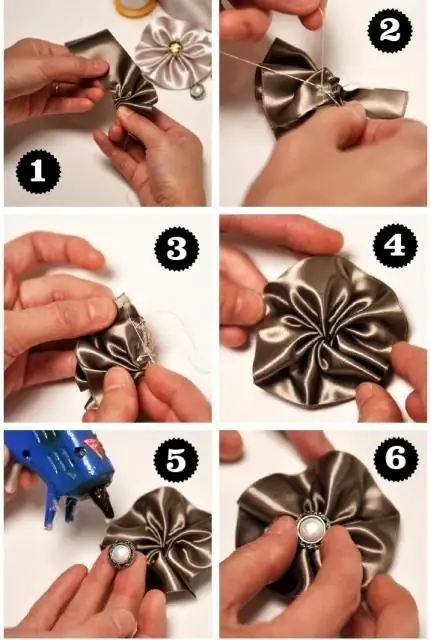
Anstatt fertige Dinge zu kaufen, die mit Standarddekorationen verziert sind, versuchen Sie, Ihre eigenen Blumen aus Satinbändern zu machen. Sie werden sehen, dass sie fantastisch aussehen! Gleichzeitig ist ihre Herstellung sehr einfach und macht Spaß
Fimo: wie man es zu Hause macht. Wie man Fimo-Schmuck herstellt
Wenn Sie kein Geld mehr für teuren industriellen Fimo ausgeben möchten, der in Bastelgeschäften verkauft wird, können Sie Ihren eigenen herstellen. Dafür werden einfache Zutaten verwendet, die für jeden verfügbar sind
Wie man ein Bild mit Bändern stickt. Wie man mit eigenen Händen Bilder aus Bändern macht
Der Artikel bietet eine Beschreibung der Methode zum Sticken von Bildern mit verschiedenen Bändern - Satin, Seide. Diese Art der Handarbeit ist recht einfach und die Produkte kommen von erstaunlicher Schönheit. Das Material beschreibt die Grundstiche und die benötigten Materialien
Wie man einen Diamanten aus Papier macht und wie man ihn im Innenraum anwendet
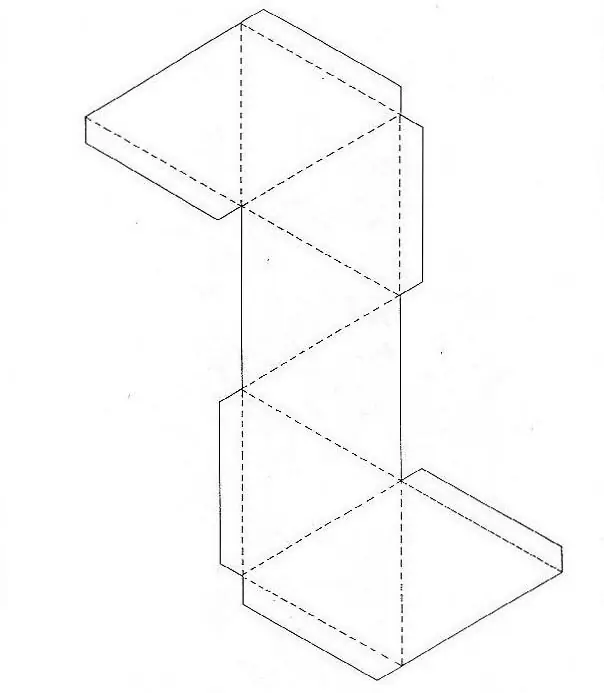
Die beste Heimdekoration ist eine DIY-Dekoration. Schließlich steckt man seine Seele und Kraft hinein, und das Ergebnis ist immer so unterschiedlich. Daher lohnt es sich zu lernen, wie man einen Diamanten aus Papier macht. Eine Verwendung für so ein süßes kleines Ding zu finden ist ganz einfach
