Table of contents:
- Author Sierra Becker becker@designhomebox.com.
- Public 2024-02-26 03:47.
- Last modified 2025-01-22 22:09.
Let's touch on such a popular direction of creativity as painting on glass. Today, she has many fans, and many who want to learn this art.
What to work with
Acrylic paints for glass painting - what are they? There are two main varieties: covering and stained glass. The first, according to the name, cover the glass with an opaque layer, like ordinary gouache. Working with them is easy even for a beginner, special skills are not required here. They are usually water based. Because of what, such a pattern is very easy to scratch or even completely wash off. Therefore, the finished work must be varnished (also acrylic and water-based). After that, the drawing will gain "longevity".
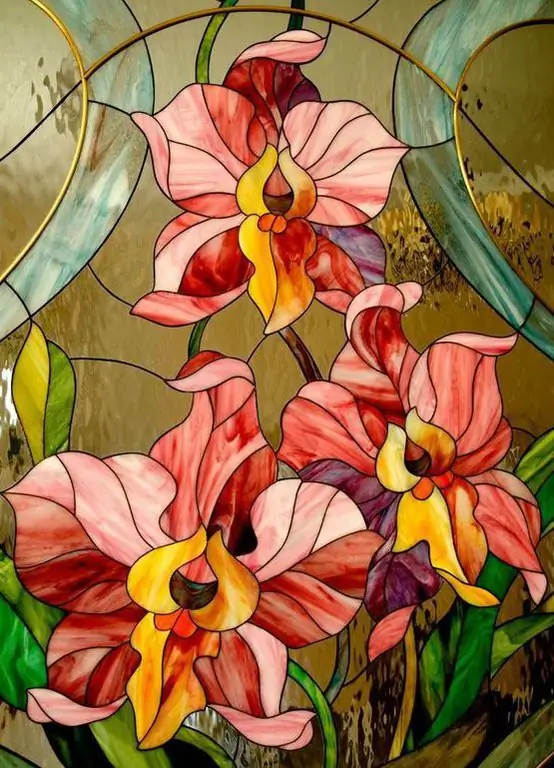
Other acrylic paints, which are used for stained glass painting of the bottle, due to their transparency, are able to create an amazing play of light shades. It is much more difficult to work with them, it is desirable to have at least minimal experience in painting contours.

What are stained glass paints
You should know that these paints are also sold in several varieties:
- regular (it takes about a day to dry);
- the so-called baked - these stained glass paints are heated in the oven to the desired temperature. This is required to securely capture the image. All technological subtleties of work are given in the attached instructions;
- "sticky". It is understood that they are released for children's creativity, but adults also work with them with pleasure. The process is very exciting - the image is drawn on any smooth surface (for example, on a regular stationery file), dries up and turns into a beautiful film with your drawing, which can be carefully removed and pasted anywhere.
Where exactly? On window panes, mirrors, refrigerators, ceramic tiles, etc. These patterns seem to be very fragile and should be handled with care. But in practice, the surface with a glued pattern can even be washed with glass cleaner.
Another plus of these paints is that a boring picture can be easily removed and re-pasted somewhere. In addition, such creativity can perfectly entertain both children and adults.

What do we need for painting?
- Acrylic paints themselves, the same varnish for fixing (in jars - requires application with a brush, or in the form of an aerosol).
- Brushes of different thicknesses.
- Artistic outlines for dramatic painting or stencils for painting.
- Cotton swabs andtoothpicks for correcting the pattern.
- A palette that will be replaced by a plastic disposable plate.
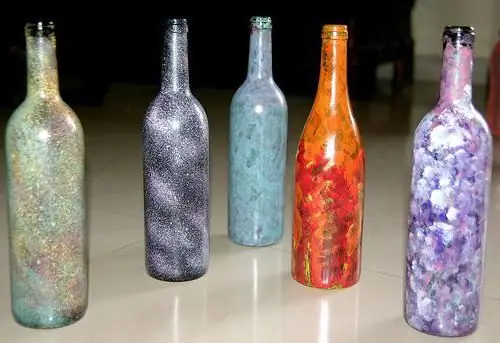
The painted surface can be different: mirrors, any dishes, decorative panels, windows with New Year's drawings and even glass furniture. In this short article, we will consider painting a bottle with acrylic paints. Yes, the most ordinary glass bottle!
Material preparation
Glass without all that is superfluous requires only degreasing with alcohol or even the usual liquid, which is used to remove varnish from nails. If the bottle you like is with a label, then, of course, you first need to get rid of it.
Dip it in hot water for fifteen or twenty minutes, remove traces of glue with a stiff brush, scouring powder or sandpaper. Then dry - and the bottle is ready. Remember that painting a bottle with acrylic paints can turn an ordinary object into a unique vase or an original gift item for any occasion.
Then we select an image. For beginners, drawing should not be too confusing. Floral motifs, leaves, twigs are popular. On sale you can find a variety of stencils for painting. Some of them are quite difficult, while others are quite suitable for a beginner artist.

Transfer image
Painting a bottle with acrylics requires some artistic skills. If you don’t have enough of them yet, transferring the drawing directly to the glass is a rather risky task. Good advice for beginners - try puttingdrawing under glass and simply circle around! And for convenience, you can even "glue" it with water.
If you want to achieve a stained glass effect, be sure to apply the outline first. It will dry for an hour or two, then you can start decorating it.
Perhaps the biggest difficulty here is to apply the contour evenly. Painting a bottle with acrylic paints requires extremely careful work. Hand pressure must be constantly controlled, which is not easy for a beginner. Weak pressure will not give the desired effect - the paint simply will not flow out, if you press too hard, it will flow "over the edge".
Irregularities you and I will have to correct with stocked toothpicks and cotton swabs. Well, if you do not aim to achieve the stained glass effect, then everything is much simpler - you draw "to your liking", up to improvisation in the course of work.
Extra Tips
Remember - acrylic paints dry quickly, so don't squeeze too much out of the tube at once. The paint dried during the work is refreshed by sprinkling with water.
It is desirable to apply each of the colors not in one layer, but in several. They should all dry well. The colors of such glass are unusually bright and expressive.
Buy a lot of different colors is not worth it. Enough primary colors - red, blue, yellow, green and, of course, black and white. The number of shades that can be obtained from their base by mixing is practically unlimited.

And more
"Texture" pattern will give the usual foam sponge. It is better to cover a large area (for example, a glass door) with paint from an aerosol can (the background is even and neat). But its cost is higher.
To prevent the brushes from becoming "disposable", rinse them thoroughly immediately after finishing work. With any kind of paint, use varnish for reliability.
And most importantly - wait for inspiration, do not start work "on duty"!
Painting the bottle with contours
The bottle chosen for creativity must be elegantly shaped - otherwise there will be no effect. It is desirable - from transparent white glass. And without any engravings with the designation of the manufacturer.
So, we need to buy in the art store special contours for working with glass and ceramics. Make sure they are sold with the nozzle (sometimes sold separately). The nozzles have holes (about half a millimeter). Of course, you can do without it, but using a nozzle will give the work a sophisticated and "professional" look.
It would also be nice to have loose holographic sparkles (for example, golden ones). They are also used to create a manicure, and the purchase can be made in the department of decorative cosmetics. It is advisable to choose the smallest.
In addition to the brushes, thinner, detergent mentioned above, prepare some more poster feathers and cotton wool.
So, let's look at the painting technique.

Apply contours
Bottle (washed, cleanedfrom labels and degreased with alcohol) will be decorated with decorative curls. You depict them in any form you like, which your imagination will suggest.
Use a white outline to draw the first swirl on the bottle (the nozzle is not used yet, it will come in handy later). The hole in the contour will not allow you to get thin curls, but so far this is not required. Bold curls will "collect" more sparkles.
Without waiting for the contour to dry (and it dries for about half an hour), gently sprinkle it with sparkles. They should adhere well to a fresh contour. Part of the sparkles will inevitably be scattered around the contour, but you don’t need to remove them now - you can smear the borders of the curl. They are removed only after all the curls, made sequentially in the same technique, have dried.
Practical advice
When you buy contours, you may be advised to use ones that already contain glitter. But they are already mixed with the main paint there, so they will not shimmer and shine so brightly.
Thus, it is better to choose a contour without sparkles, and apply them in the process from above.
Little by little, the pattern will cover the entire bottle. This will not happen too quickly - in several stages. After all, in order to turn the bottle over and start painting its reverse side, you should wait for the final drying of the already treated surface.

Apply paint
When the drawing is completely transferred to the glass, and everything is dry, under running water, you should wash off unnecessary sparkles andthoroughly blot the product with a rag. And only after that we start working with paints.
Having drawn paint on the brush, fill in some of the curls on the bottle. Choose the color of paint according to your own taste - one or more. It is better not to paint over all the curls, because a monotonously painted bottle will not look spectacular.
Apply the paint as gently as possible, evenly spreading over the surface. Explicit smears should not be visible. This process is also phased, with breaks for complete drying.
Finishing touches
At the final stage, the nozzle on the contour will come in handy. With its help, the final touches are applied, or rather the dots. They have to frame each curl around the edge. Grace and extraordinary sophistication of the final result is given precisely by the spot painting of the bottles, the stencil of which is selected taking into account the unity of the overall composition. You will immediately see how the product sparkles with bright colors and becomes "voluminous".
Currently, acrylic painting is extremely popular, and it is the dots that are a fashionable and winning option.
In conclusion, I would like to say that this beautiful type of decorative art is gaining more and more fans from year to year. The most real masterpieces of applied art are created. And most importantly - their creators are provided with the joy of creativity and good mood!
Recommended:
How to make stained glass windows with your own hands at home?

Stained-glass windows look beautiful, rich and unusual. That's just for some reason, many are accustomed to associate them with some kind of religious buildings or luxurious palaces. In fact, today a stained-glass window can be in an ordinary apartment. There are several technologies for their manufacture. They differ only in price, quality and operating conditions of the finished product, but not in its decorative characteristics
Stained glass on glass with your own hands. How to draw a stained glass window

Stained glass is one of the types of artistic painting, in our time it is gaining more and more popularity. Stained glass on glass is absolutely safe, and it can be done with children, it is made using acrylic paints. To perform this work, you do not need to have any special skills or abilities
Choosing stained glass paints

Stained glass paints are a great alternative to real stained glass. Not everyone is still familiar with this innovation, but it is firmly entering the life of creative people. What you need to know about these paints to make the right choice?
What can be made from a glass bottle? Interesting ideas for home and garden

Usually a large amount of garbage accumulates in the country house or in the pantry. For example, glass bottles from juice, soda, alcoholic beverages. If you show a little imagination, you can give them a second life. This article is for those who are wondering what can be made from a glass bottle
DIY glass bottle vase (photo)

Do you like to create souvenirs from unnecessary things? Read the article, follow the recommendations, and you will have a very beautiful glass bottle vase. It’s easy to make such a decor with your own hands
