Inhaltsverzeichnis:
- Autor Sierra Becker [email protected].
- Public 2024-02-26 04:44.
- Zuletzt bearbeitet 2025-01-22 22:11.
Mit eigenen Händen eine Platte aus Fäden und Nägeln zu erstellen, ist eine einfache und unterh altsame Möglichkeit, ein ungewöhnliches Geschenk oder Einrichtungselement aus improvisierten Materialien herzustellen. Diese Technik ist nicht kompliziert, aber es werden echte Meisterwerke erzielt, weshalb Designer und andere Vertreter kreativer Berufe sie häufig verwenden.
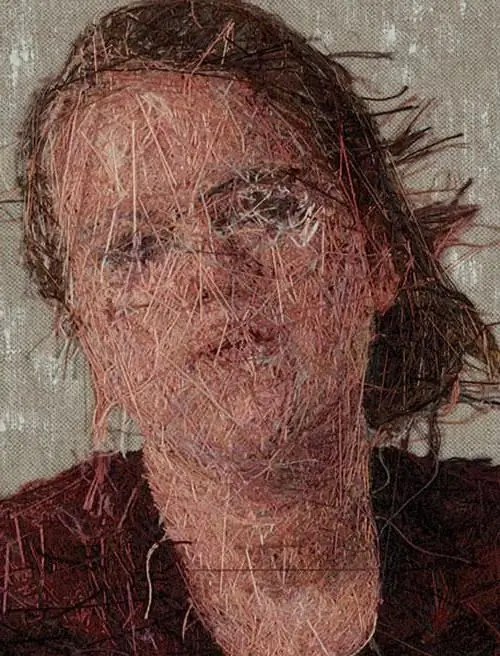
Zum Beispiel verwendet der japanische Künstler Kumi Yamashita einen einzigen durchgehenden Faden, der um tausend Nägel gewickelt ist, um atemberaubende lebensechte Porträts von Frauen und Männern zu erstellen. In einer Werkserie mit dem Titel "Constellation" (eine Anspielung auf die griechische Tradition, mythische Figuren am Himmel zu finden) verwendet sie drei einfache Materialien, die jedermann zur Verfügung stehen, und macht daraus echte Kunstwerke.

Threadpanel: notwendige Materialien
Wenn Sie noch nicht versucht haben, ein Panel aus Fäden und Nägeln zu erstellen, nehmen Sie sich etwas Zeit, um kreativ zu sein, und laden Sie die Kinder ein, sich an dem Prozess zu beteiligen, um gemeinsam ein ungewöhnliches Bild zu erstellen. Diese Art der Handarbeit hilft bei der EntwicklungKoordination und Kreativität.
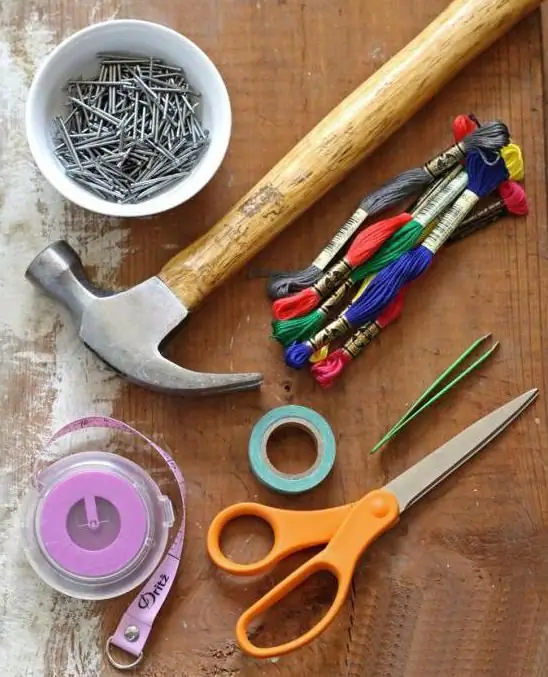
Für die Arbeit benötigen Sie folgende Materialien:
- Holzbrett;
- Schema für eine Reihe von Fäden und Nägeln;
- Pauspapier;
- Bleistift;
- Schere;
- Zange;
- hammer;
- Fäden in den gewünschten Farben.
Dekoration eines Holzrohlings
Zuerst bereiten wir das Brett vor. Es sollte glatt und gleichmäßig sein. Alle Unebenheiten müssen mit Schleifpapier entfernt und die Kanten abgerundet werden. Abhängig von den Details des Projekts kann Holz mit Acryl bem alt oder lackiert werden. Aber manchmal sieht die natürliche Struktur des Baumes viel attraktiver aus als die getönte Oberfläche. Wenn die Platte in einer Wohnung gestrichen wird, müssen Sie den Raum lüften und beim Arbeiten mit Lacken ein Atemschutzgerät verwenden. Nachdem der Baum vollständig getrocknet ist, beginnen wir mit der Erschaffung unseres Meisterwerks.

So erstellen Sie Ihre eigene Vorlage
Bevor Sie eine Platte aus Nägeln und Fäden herstellen, müssen Sie eine Schablone vorbereiten: Jede von Hand gezeichnete oder auf ein Blatt Papier gedruckte Kontur ist dafür geeignet. Es kann ein Tier, Symbol oder eine andere Zeichnung sein. Das Erstellen einer Inschrift in einer ungewöhnlichen Schriftart ist ganz einfach: Sie müssen nur den Text in einen beliebigen Fotoeditor eingeben und auf einem Drucker drucken. Hauptsache die Leitung ist frei.
Übertragen Sie die Zeichnung mit Pauspapier auf die Tafel. Wir werden Nägel entlang seiner Kontur hämmern. Manche Handwerker machen es noch einfacher: Schneiden Sie eine Aufschrift oder Zeichnung aus und kleben Sie diese mit Klebeband festauf dem Schreibtisch. Das Blatt muss unbedingt gesichert werden, da sich das Papier sonst während des Betriebs bewegt. Wenn dann der letzte Nagel genagelt ist, wird er einfach abgerissen.
Mach Muster mit deinen eigenen Händen
Eines der beliebtesten Motive für eine Reihe von Fäden und Nägeln ist ein Herz. Einen Zuschnitt dafür zu machen ist ganz einfach: Einfach das Blatt in der Mitte f alten und die Hälfte ausschneiden und dann gerade richten. Sie erh alten eine glatte Vorlage, die sich leicht auf einen Baum übertragen oder daran befestigen lässt.

Erfahrene Handwerker hören nicht bei einfachen Zeichnungen auf und schaffen verschiedene Kompositionen, von Tieren bis zu einer Weltkarte. Sie können verschiedene Techniken kombinieren, zum Beispiel Blumen aus Wellpappe machen und eine vasenförmige Platte aus Fäden und Nägeln dafür herstellen. Eine andere Idee: ein Traumfänger mit Muscheln, die am Brett befestigt sind. Der obere Teil ist wie gewohnt fertig und echte Muscheln werden mit einer Klebepistole am Boden befestigt. Durch die Kombination verschiedener Farben und Fadenstärken können Sie erstaunliche Effekte erzielen und Ihrer Arbeit Originalität verleihen.

Technologie zur Herstellung von Platten aus Fäden und Nägeln
Wir wählen Nelken mit einem langen Stiel und einem großen Hut, damit es bequem ist, sie zu h alten und zu punkten. Um mit Nägeln zu arbeiten, ist es besser, eine Zange zu verwenden, dann wird die Gefahr verringert, sich mit einem Hammer auf den Finger zu schlagen. Nach dem Übertragen der Zeichnung beginnen wir, Nägel in gleichem Abstand voneinander zu hämmern, nicht bis zum Ende, sondern etwa zu einem Drittel der Länge. Hauptsache sie bleiben fest an Ort und Stelle.
Hüte manchmalmit Acrylfarbe bem alt, um der Arbeit mehr Farbe zu verleihen. Wenn die Nägel leicht verbogen sind, können sie mit einer Zange begradigt oder durch andere ersetzt werden. Alle sollten auf gleicher Höhe sein, daher ist es besser, einen kleinen Hammer zu verwenden, um eine Platte zu erstellen, mit der sich die Aufprallkraft leichter berechnen lässt. Wenn die Kontur fertig ist, löschen Sie die Vorlage.

Die für die Arbeit verwendeten Fäden sind stark und die Farben und die Dicke werden für das Projekt ausgewählt. Erfahrene Handwerker arbeiten meistens mit Baumwolle oder Nylon. Wir setzen das Design der Platte fort, befestigen den Faden mit einem Knoten an einem der Nägel und wickeln die Hüte ein, indem wir daran ziehen. Wir erstellen eine Zeichnung. Damit sich der Faden nicht löst, können Sie sich mit dem Finger nachhelfen.
Dann machen wir die zweite Schicht und wiederholen, bis die Platte aus Fäden und Nägeln fertig ist. Manchmal können Sie sich bei dieser Technik auf nur eine Schicht beschränken und den Faden unter die Kappen ziehen. Die Richtung ist chaotisch, parallel oder nach einem vorgegebenen Muster. Wenn das Ende des Fadens an der letzten Nelke befestigt ist, ist die Arbeit fertig und kann verwendet werden, um das Innere zu dekorieren.
Empfohlen:
Meisterklasse: Rosette aus Satinband. Ideen für Handarbeiten und Kreativität

Jeder Mensch hat sein eigenes Hobby. Und egal, was ein Mensch tut, es ist wichtig, dass es ihm Freude bereitet. Neben dem einfachen Vergnügen kann es jedoch oft auch nützlich sein
Wie erstelle ich ein Quilling-Panel? DIY-Panel: Materialien, Werkzeuge, Meisterklasse

Quilling ist eine wundervolle und unglaublich aufregende Kunst. Menschen, die Quilling-Paneele an der Wand sehen, können nicht verstehen, wie es möglich ist, aus dünnen Papierstreifen ein so schönes Muster zu machen. In der Tat erfordert diese Technik bestimmte Fähigkeiten und Fertigkeiten, da Sie aus demselben Streifen völlig unterschiedliche Figuren und Elemente des Bildes drehen können
Wie man aus Fäden ein Bild mit eigenen Händen macht. Ideen für Kreativität

Der neue Trend in der Welt der Handarbeit ist die Nitkografie. Seit jeher sticken Nadelfrauen und Hostessen verschiedene Muster, Ornamente und Zeichnungen auf Stoffe. Jetzt sind die Techniken zur Herstellung von Gemälden aus Fäden weiter gegangen
Ein Bild aus Nägeln und Fäden: eine Meisterklasse. Schemata, Anweisungen

Heute kann dich fast nichts überraschen. Sogar eine solche Arbeit wie ein Bild von Nägeln und Fäden. Wer hätte gedacht, dass man aus solch einfachen und scheinbar unvereinbaren Materialien echte Meisterwerke schaffen kann, die jedes Interieur schmücken werden. Wir laden Sie ein, mehr über die Technik des Malens zu erfahren, darüber, welche weiteren Werkzeuge Sie benötigen und über mögliche Gest altungsmöglichkeiten
Kunsthandwerk aus Abfall: Ideen, Meisterklasse

In dem Artikel werden wir den Lesern Fotos von verschiedenen Dingen präsentieren, die aus recycelten Materialien hergestellt wurden. Wir werden auch eine detaillierte Meisterklasse für Kunsthandwerk aus Abfallmaterial mit Schritt-für-Schritt-Anleitungen für deren Umsetzung anbieten, wir sagen Ihnen, was Sie dafür zusätzlich benötigen, wir beschreiben den Arbeitsablauf
