Table of contents:
- Author Sierra Becker becker@designhomebox.com.
- Public 2024-02-26 03:46.
- Last modified 2025-01-22 22:09.
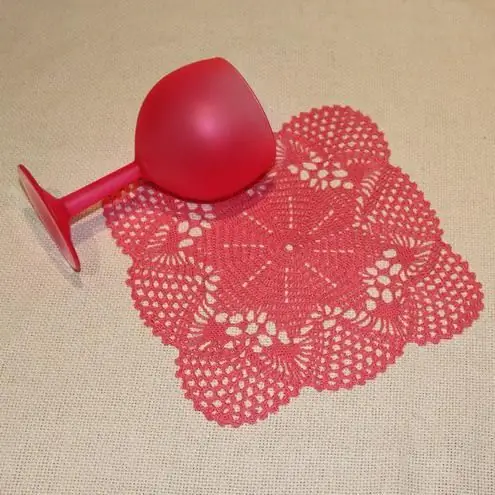
It is believed that making napkins allows you to hone any knitting techniques, and also helps you learn to understand various patterns. You can start your first acquaintance with a crochet with the implementation of such openwork products, which will become a unique interior decoration.

Making round and rectangular napkins will allow the master to acquire the necessary skills in using the hook. By learning to knit, you can create other unique and beautiful things - bedspreads, tablecloths, pillows, etc. In this article, we would like to share with you a step-by-step master class on making an openwork hot coaster.
Crochet napkins: a step-by-step master class for beginners

We invite you to make a bright and elegant craft that will not only decorate the kitchen, but also serve as an excellent hot stand. To work, you will need two colors of yarn (white and green), a four-millimeter hook,scissors and a needle with a large eye for embroidery. And, of course, do not forget about the great mood! So, we crochet napkins as follows. To begin with, we take the thread of the main color and make a “magic ring”. We carry out two air loops. Next, we knit double crochets into a ring. There should be 11 of them. After that, we connect the ring, tighten it and perform one single crochet in the first loop of the row. The magic ring allows you to make the central hole minimal, which gives a special accuracy to the product. We start the second row with three air loops. In the same row we knit a single crochet. Next, in each loop of the first row we knit two with a crochet. Thus, you should get 24 of them. Close the row with a single crochet, knitting it into the first loop of the row. Crochet napkins further. We begin the third row by performing three VPs for lifting. After that, we continue to work according to the scheme: two columns with a crochet, then one with a crochet and again two with a crochet (each element in a new row). As a result, you will get 36 loops. You need to complete the row with a single crochet element. The fourth row, start with three air loops. Run double crochets - 2 pcs., one loop with a crochet and again double crochets - 2 pcs. As a result, their number will increase to 48. Close the row with a single crochet, knitting it into the initial loop of the row.
Crochet openwork napkins: schemes of the final stage

The fifth row will start with three air loops. We will knit one single crochet in the same row. After thatLet's do two air loops. Next, we will knit two columns with a crochet in the same loop of the previous row. Let's skip two rows. Again we will make two loops with a crochet. Thus, we will complete the entire fifth row. That's all, you can finish our knitting by pulling the working thread through the loop and cutting it. Our napkin is almost ready.
Crochet: decorating the finished product
In order for our craft to become more attractive and elegant, take a green thread. We will pass the hook in any row, preferably closer to the outer edge, and draw out the air loop. Next, skip the hook into the loop of the next row and make another one. Crochet (napkins) by analogy until we return to the first loop. To finish knitting, stretch the thread and cut it. That's all, our charming craft "napkin-stand" is ready. Now you know that creating such a thing with your own hands is not difficult at all, and this business will not take much free time.

After mastering the technique of knitting round products, we advise you to try making rectangular crochet doilies. Schemes of such crafts are also not very complicated. Once you learn how to make round napkins, you can apply your skills to making rectangular, square, or hexagonal napkins. To do this, tie several round fragments and combine them into a single design. So you get a beautiful product of the shape and size you need. Good luck with your creative search!
Recommended:
Hot crochet stand: diagram, description, patterns

For the manufacture of hot crochet coasters, any pattern is used. It is advisable to choose suitable threads, a knitting pattern, and then get to work. Hot pads can be round or square. you can choose an openwork pattern
How to make a do-it-yourself napkin tree: a master class. Tree of happiness, flower tree from napkins

Every woman dreams of a cozy warm nest, which is why we all decorate our home, creating harmony in it. In achieving this goal, you cannot do without a tree of happiness. You can make it with your own hands from improvised materials
Let's talk about how to crochet napkins: a master class for beginners

Anyone can learn how to crochet napkins. In fact, it is not difficult and does not take much time. In this article we will tell you how to create such an openwork miracle with your own hands, which can become a magnificent element of decor
Crochet square napkins: diagrams and descriptions. Crochet a square doily for beginners

Even today, crochet square napkins, the patterns of which have come down to us from grandmothers, are in great demand. Learning to knit them is not so difficult. The main thing is to master several techniques and read the diagrams correctly
Hot batik: technique. Cold and hot batik

If you are a lover of exclusive things, then cold and hot batik is yours. In this article, you will learn the general principles of painting fabric in the batik style. Get acquainted with the history of technology, find an interesting master class
