Table of contents:
- What is cold porcelain?
- For what purposes it is used
- Ingredients for making cold porcelain
- Cold porcelain do-it-yourself at home
- Second option for cooking cold porcelain with boiling
- Required tools and accessories
- Description of the work of creating a flower for beginners
- Giving the necessary shades to flowers
- Care for porcelain compositions
- Author Sierra Becker becker@designhomebox.com.
- Public 2024-02-26 03:45.
- Last modified 2025-01-22 22:09.
Do-it-yourself cold porcelain at home is easy to prepare, there are several methods. The two main ones used by experienced craftswomen will be considered in this article. Creating beautiful porcelain products is the most interesting thing available to any person. And we will help you in your work!
What is cold porcelain?
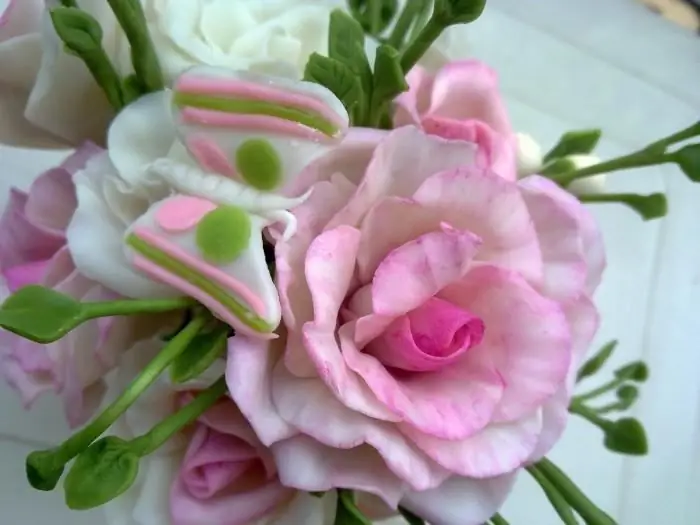
With its name, it speaks of the resemblance to real porcelain products. But unlike conventional material, "cold" naturally dries in the air. They make from it stunning natural flowers - lilacs, roses, orchids.
"Cold Porcelain" is rapidly gaining popularity among craftswomen. Its delicate texture, velvety, and ease of use become attractive. The finished mass is sold in needlework and art stores, but resourceful needlewomen did not stop there and came up with recipes for home cooking.
As a rule, flowers are molded from cold porcelain, and the result is incredible - delicate, fragile, translucent - absolutelyindistinguishable from the real ones!
For what purposes it is used
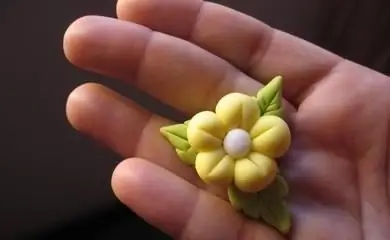
As many masters believe, and quite rightly, cold porcelain mass is an ideal option for sculpting excellent products! Flowers created from it can be used to decorate any object: interior bouquets, frames, boxes, women's jewelry.

Assembling ready-made flower buds into a composition, needlewomen make amazing bouquets for wedding ceremonies. Such inflorescences do not fade, and for many years continue to remind of the celebration.
Artificial compositions fit optimally into modern interiors, occupying an important role in the arsenals of designers. As already mentioned, the "porcelain" flowers, which were made by a talented master, are insanely similar to real ones and only a tactile touch can convince you of the opposite!
Decorating gift packages with small flowers and leaves, you will bring joy to family and friends for whom these surprises are intended.
Ingredients for making cold porcelain
In the modern handicraft world, all components are available to anyone who wants to learn how to sculpt. In general, there is a ready-made material, but many prefer to make it themselves.
Ingredients for cold porcelain roses, master classes for which are presented on the Internet, do not differ much.
It will be necessary to get one glass of corn starch (for the first time, you can take potato starch, the only difference isshade of the finished mass and varying degrees of plasticity). The mass of it will turn out snow-white and velvety.

You will also need to get PVA glue - always with D 1 plasticizer, a little water, fat cream, citric acid and glycerin (opinions differ here - someone adds this ingredient, someone does not).
Methods of preparing the mass are also different - you can boil the mixture, or you can do just kneading. Let's look at all the options, and everyone can choose the right one for themselves.
Cold porcelain do-it-yourself at home
For him you need to take:
- Fragrance-free Vaseline or Vaseline oil - 1 tablespoon.
- Corn starch (if not, use potato starch for a sample) - 2 tablespoons.
- 2, 5 tablespoons baking soda.
- Desired shades of watercolor.
- 35 ml PVA glue bottle.
In a dry clean plate, mix starch and petroleum jelly, grinding thoroughly. Next, add soda, mix again.
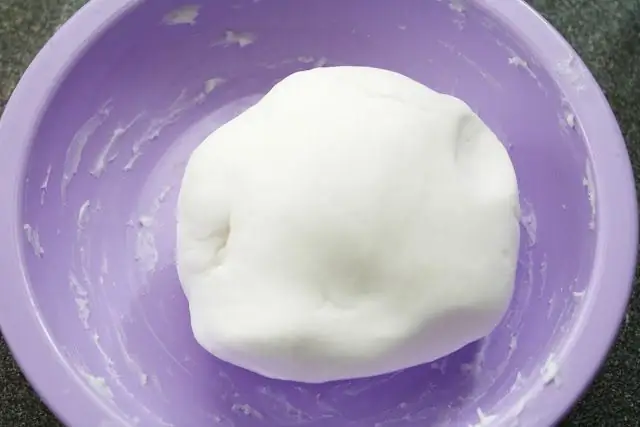
Then, add a little glue here, watching the density and ductility of the mass - ideally, it should turn out plastic and soft. Now we will apply the cream on our hands and diligently knead the resulting lump until a homogeneous texture is obtained.
Before you make a rose from cold porcelain, you need to paint it. Apply watercolor, lip gloss, pastels and even cocoa powder!

First, you need to decide how much mass will go to one oranother part of the flower, and then divide everything into pieces and add separately to each dye. Storage should be carried out in packaged form, in bags or jars. After some time after manufacturing, porcelain may appear to crumble, this is very easy to fix. You need to add a drop of cream and knead the whole lump.
This manufacturing option is perfect for children's needlework, because it does not require laborious manipulations and a long time.
Second option for cooking cold porcelain with boiling
This method is much more difficult, but as a result, the mass is almost the same as the purchased one. So let's get started:
- The main ingredient here will be glue - it must contain plasticizer D 1. Sold in building materials stores.
- Next, starch is needed and it is better if it is rice or corn. The whiteness and velvety of your porcelain is guaranteed!
- Nivea cream in a blue tin box is the best option.
- Johnsons baby oil is another essential ingredient. It is possible to replace it with vaseline, but the first one has coconut oil, and this is a great softener.
- Citric acid powder.
We measure out 100 ml of glue and the same amount of starch - by volume (it is more convenient to do this in a measuring cup). Next, add 4 more teaspoons of starch without a slide.

It is necessary to cook in a container with a very massive and thick bottom, otherwise the porcelain will burn:
- Pour glue here,half a teaspoon of cream, a quarter of a spoon of citric acid powder and a full spoon of oil.
- Turn on a low level of fire and, stirring constantly, cook until the first bubbles and the cream dissolves.
- Pour half a glass of starch and knead, then pour in the rest.
- Constantly interfering, we collect everything in the center of the container, forming a lump. It is easy to check for readiness - you need to press the whole resulting lump with a spoon and lift it sharply. Ready-made porcelain will simply fall off the spoon, while undercooked porcelain will stick.
- Lightly powder the porcelain board with starch and put the mass here. Let cool.
It is advisable to wash the dishes and hands at this time with regular dishwashing detergent. Before working with porcelain, grease dry hands with cream or petroleum jelly and start kneading the lump. The result is a plastic, soft and velvety substance. The porcelain remaining after work is stored in a plastic bag for about a month.

Required tools and accessories
To create a rose from cold porcelain according to the master class, you will need to acquire the following tools:
- Set of rolls with big and small balls.
- Rolling pin or cylindrical object.
- Tweezers with rounded tips.
- Scissors.
- Pliers.
- Wire.
- PVA glue.
- Acrylic paints or decorative cosmetics to color the petals.
- Acrylic varnish for fixing the finished parts of the composition.
Be sure to have wet wipes ready to wipe your hands during the rose-making process.
Cold Porcelain for Beginners is easy to make, but keep your fingers clean all the time. Each mote will be clearly visible against a snow-white background and will make the craft sloppy.
Description of the work of creating a flower for beginners
There are many different ways to make flowers and buds. All craftswomen have their own well-established methods, using tools that are convenient for them.
Let's create a rose from cold porcelain, a master class with a detailed description is given below. In this case, you will need special tools. Prepare for work:
- Small amount of cold porcelain dyed white and green - prepare as above or purchase ready made.
- Floral wire of various thicknesses - thicker to make a cold porcelain rose stem, and thinner - for leaf cuttings.
- Tube of fat cream.
- Several veined "leaf" shapes.
- Tape tape.
- PVA glue bottle - for assembling cold porcelain roses.
- Paper napkins or foil.
- Knife with curly edge.
- Brush.
Create a rose from cold porcelain according to the master class below:
- Attach a crumpled napkin smeared with glue to a thicker wire - a stem. This is the preparation of the core of the flower.
- Then, pinching off small pieces from a piece of porcelain, roll them into a ball andflatten with a special bulb - a ball on a stick. Do not make excessively thick parts, they will crack when dried. Do not forget about the constant lubrication of hands and tools with cream so that the mass does not stick. Don't be afraid to make the edges of the petals too thin, they can even be torn a little - this will give a natural vibrant look to the flower.
- We coat the edge of the first petal with glue and fix it on a napkin - the core, wrapping it around.
- Also form the following petals, gluing them one by one, as if partially overlapping each other, and moving in a circle. The size of the flower depends on your preference - some like roses in full bloom, some like buds.
- At the end of all the work on creating the petals, proceed to the sepals and stems with leaves. The receptacle is molded from green porcelain. First, glue the lower leaves, and then make the base of the flower from a piece of green mass.
- For the leaves, take small pieces of porcelain, knead the “pancake” and cut it out. Pressed against the silicone mold, pushing through the veins of the leaf. A thin wire is inserted along the thickest one and pasted over with a piece of porcelain, stretching along the length. Having made 3 of the same leaves, they are fastened together into one, fixed on the stem and left to dry for about 24 hours.
That's how we made one beautiful rose!
But it is not necessary to buy special tools and forms for work. Great flowers are created with just one finger.

Quite petiteA rosette is easy to make with a beaded pin. First, make several balls that have the size of peas. Then they are rolled out with a bead of a pin. It will also serve as the basis for the flower - all the petals are glued on top.
Giving the necessary shades to flowers
Food paints, acrylics or special pigments and pastels are perfect for coloring products in bright colors.
To obtain the desired color of porcelain, dyes are added to it immediately after manufacturing and kneading, and then everything is kneaded again. This is necessary in order to obtain a uniform color.
Cold porcelain rose tinting can be carried out already on the finished product. This is done by applying food coloring with cotton swabs directly to dried porcelain. Colors are more saturated and dense. To fix the paint, the product must be held over boiling water for 1-2 minutes.
They also use oil paint, creating with its help gradient transitions and influxes of colors. This gives the 'porcelain' buds a natural, lively look.
Care for porcelain compositions

In order to preserve the original beauty of the product for a long time, it is important to properly care for it:
- This is the most important - cold porcelain is very afraid of water! Naturally, a few drops will not destroy the product, but with prolonged exposure to moisture, the flower will collapse.
- Cold porcelain products have high strength. Even falling from a certain distance, the flower will not break. But each material has a "mechanicalfatigue". If you work on the craft for a long time, you can break it.
- To clean such flowers is possible only in a dry way - with napkins, a hard brush. The best option would be a special panicle, which is electrified and attracts dusty deposits.
- Changes in temperature have little effect on porcelain flowers. But it has been noticed that under the influence of sub-zero temperatures the material becomes more brittle.
- If the flower breaks, don't be upset - just use glue and connect the parts of the product, trying to make the seam as invisible as possible.
Recommended:
Cold porcelain with your own hands. Creation of beauty

The latest fashion trends in decorating our interior with handmade things made us remember traditional Russian crafts. How to make a beautiful thing yourself? The basics of making porcelain at home
Cold porcelain flower. Sculpting flowers from cold porcelain with your own hands

There is nothing special about the fact that today many people are fond of making products from cold porcelain. Flowers made by needlewomen surprise with their grace and similarity with living plants. The desire to make the same beauty makes you master this interesting technique, which then becomes an exciting hobby
What is cold porcelain and how to make it?

Cold porcelain is a mass that resembles plasticine or polymer clay. Ideal for any kind of work. It dries quickly and then becomes very hard. It is absolutely harmless, so it can be entrusted to children without fear
Biscuit porcelain: characteristics, features, application. Types of porcelain

Let's analyze in detail what biscuit porcelain is and why it is biscuit. Let's take a look at its history and applications. In conclusion, we will present you three more types of material - soft, hard and bone
Cold porcelain without cooking. Manufacturing methods

Cold porcelain without cooking is a great alternative to modern modeling materials. It is easy to make at home with minimal time and material costs. Flowers, figurines, dolls created from it cause genuine admiration
